Last Updated on June 14, 2020 by Larious
Back in October 2018, Microsoft changed its external storage device policies. With the October 2018 update, Windows 10 no longer optimizes your external storage devices like USB Drive, SD Cards, External hard drives, etc for better performance. Instead, it just optimizes them for quick removal. This thing doesn’t bother Windows 10 users, but it has a huge impact on the USB Storage performance.
For those who don’t know, external storage devices that are connected via the USB or thunderbolt have their own policy settings. Microsoft actually allows users to set the policy settings for the behavior of the external storage devices, but lots of users don’t know how to change those policy settings.
So, in this article, we are going to explore everything about the Quick Removal and Better Performance Policies for USB Storage devices.
Table of Contents
Better Performance vs Quick Removal – Which is Better?
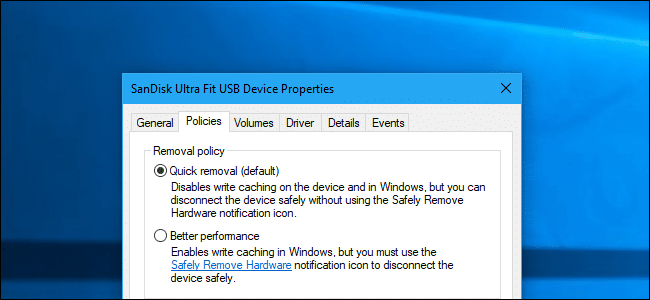

As we all know, Microsoft’s Windows operating system has different policies for external storage devices that are connected to the computer via USB cable. Each of the connected devices has its own policy settings.
Quick Removal Policy
By default, the Windows 10 operating system uses the ‘Quick Removal’ policy. This policy disables the write cache on the device. Since it disables the write cache, users can disconnect the USB device safely without using the ‘Safely remove hardware’ option.
Better Performance Policy
Another option is the ‘Better Performance’ policy. Unlike Quick Removal, Better Performance focuses on improving the performance of the USB device. To enhance the performance, it enables the write caching in Windows.
Since it enables the write cache in Windows, you would need to use the safely remove hardware option, or else the cache data would be corrupted.
Which is Better – Quick Removal vs Better Performance?
To be honest, you won’t see any significant increase in speed while using the ‘Better Performance’ until & unless you are using modern USB devices. The speed depends on the USB type you are using and how the software you are using handles the writing process.
If you are amongst those who eject the USB devices from the computer directly, then the ‘Quick Removal’ policy might be the best fit for you.
How To Optimize USB Storage (Enable Better Performance)
If you want to use the ‘Better Performance’ policy, then you need to enable the Better performance option individually for external storage devices. However, you won’t have to do this every time because Windows remembers these settings. So, let’s check out how to enable Better Performance in Windows.
Step 1. First of all, open Windows Run dialog box by pressing Windows Key + R.
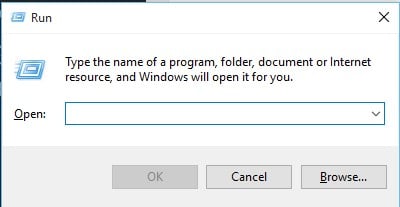

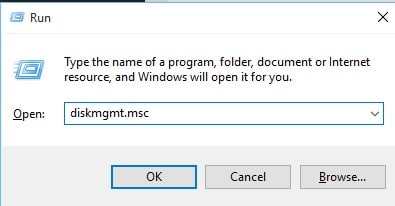
Step 2. On the Run dialog box, type in ‘diskmgmt.msc’ and hit enter.

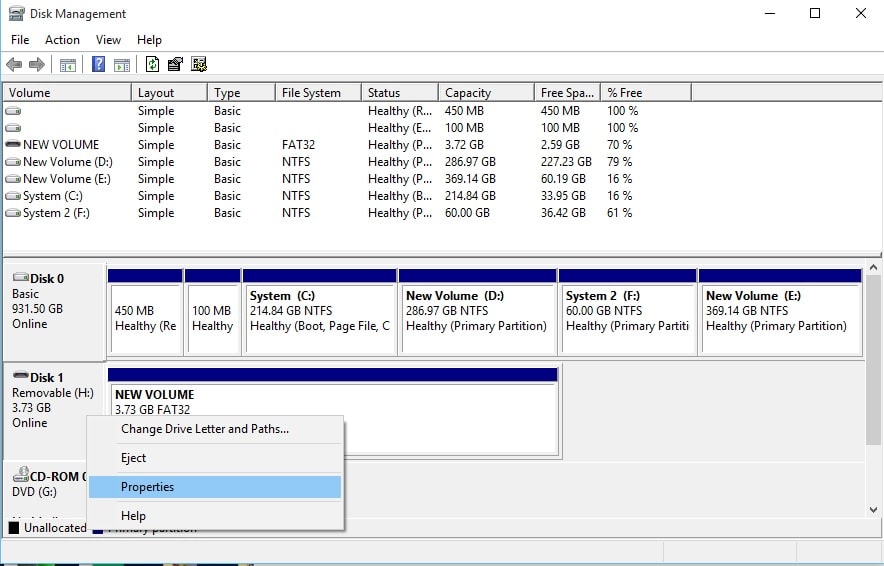
Step 3. On the disk management panel, right-click on the external drive and select ‘Properties’

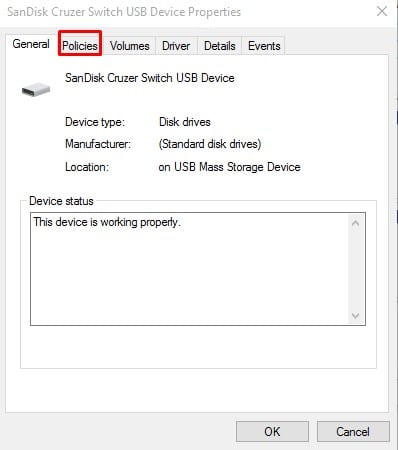
Step 4. Click on the ‘Policies’ tab.

Step 5. Next under the policies, enable ‘Better Performance’ and then enable the ‘Enable write caching on the device’. Now click on ‘Ok’ to apply the changes.
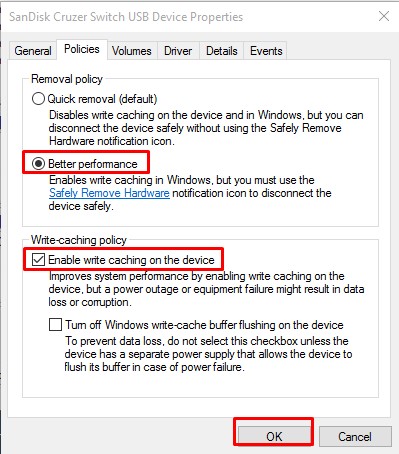

That’s it! You are done! This is how you can enable better performance in Windows 10 external drive.
So, this is all about how to optimize USB Storage for better performance on Windows 10 computers. I hope this article helped you! Share it with your friends also.

