Last Updated on July 21, 2024 by Larious
With Apple Intelligence soon joining, the iOS 18 is supposed to be very big. It will have some upgrades in features not seen on any phone.
If you can’t wait to try the new features, you can download & install the iOS 18 Public Beta on your iPhone. After installing the update, you will be able to enjoy features like home screen customization, a new control center, Game Mode, etc.
Table of Contents
Audio Transcriptions in iOS 18
Among all the features that iOS 18 brings, audio transcriptions are the most useful one. This feature converts your audio recordings into text that you can copy and use on other apps.
While the Audio Transcription feature can be achieved using third-party apps, most require a paid subscription to unlock all features.
Apple’s iOS 18 offers the Audio Transcription feature on its Notes and Voice Memo app.
How to use Live Audio Transcription in Notes on iPhone
To use the Live Audio Transcription in the Notes app of iPhone, you need to download & install the iOS 18 Public Beta. After installing iOS 18, follow these simple steps.
Change the Language & Region
Currently, the Audio Transcript in the Notes is available in English (Australia), English (Canada), English (Ireland), English (New Zealand), English (South Africa), English (UK), and English (U.S.).
Also, it’s only available on iPhone 12 and later. If you have a compatible iPhone but use an incompatible language, you will have to change the language & region first.
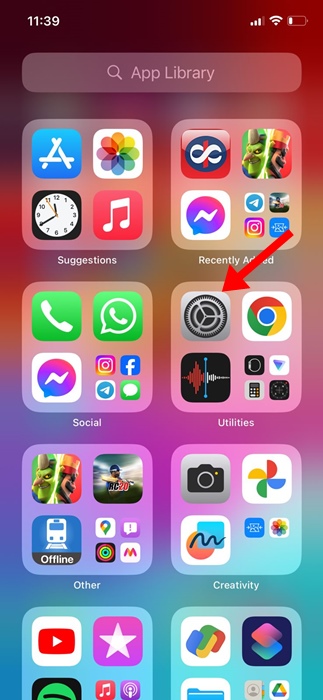
1. Launch the Settings app on your iPhone.


2. When the Settings app opens, tap on General.


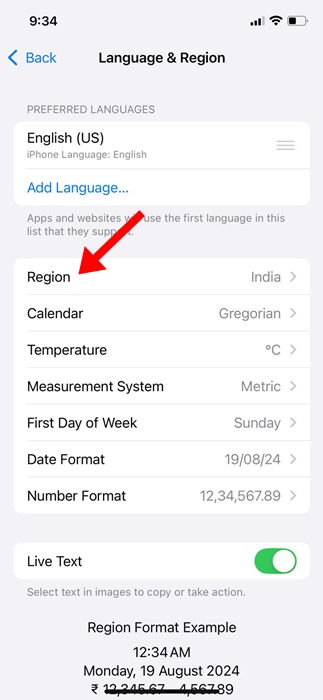
3. On the General screen, tap on Language & Region.


4. On the Language & Region screen, tap on Add Language.


5. Find and tap English (US).


6. Next, tap on the Region.


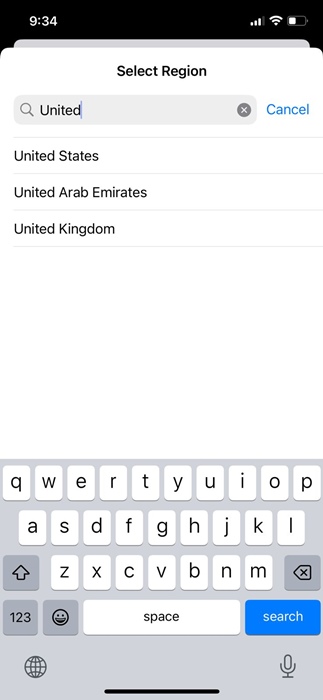
7. On the Select Region screen, select the United States.


Using the Live Audio Transcript in the Apple Notes App
After changing the language and region, your iPhone will be ready to transcribe your audio in the Notes app.
1. To get started, open the Apple Notes app on your iPhone.


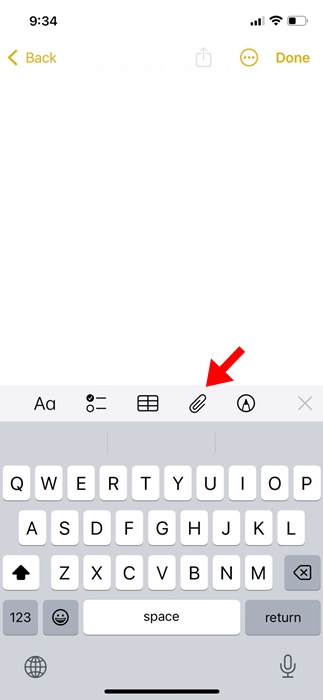
2. Next, tap on the Attachment icon at the bottom of the screen.


3. On the menu that appears, select Record Audio.


4. Now record the Audio. Once done, tap the Done button at the bottom right corner.


5. Once recorded, go back to the main screen. Below the audio recording, you will find a preview of the transcript.


6. Tap on the Transcript to view it. If you want to copy the text, tap on the three dots at the top right corner and select Copy Transcript.


Once you get the transcript, you can use it on any other app. This is the easiest way to convert audio into text on an iPhone.
This article explains how to use Live Audio Transcript in the Apple Notes app on iPhone. If you need more help with this topic, let us know in the comments below. Also, if you find this guide helpful, don’t forget to share it with your friends.

