Last Updated on October 20, 2020 by Larious
Well, it’s no doubt that Gmail is right now the most used email service. Google itself backs the email service, and it fulfills your everyday email needs. There are lots of users who don’t add a Gmail signature while sending emails. Well, sending emails without a signature is totally fine if you are sending emails to friends or family members.
However, if you are using Gmail for business purposes, then an email signature is recommended. An email signature comprises a few lines of text placed at the bottom of every outgoing email. The signature contains your name, website, company name, contact details, and address.
Steps to Add Email Signature in Gmail
Gmail lets you add an email signature without installing any additional extension. So, in this article, we are going to share a detailed guide on how to add a signature in Gmail in 2020. Let’s check out.
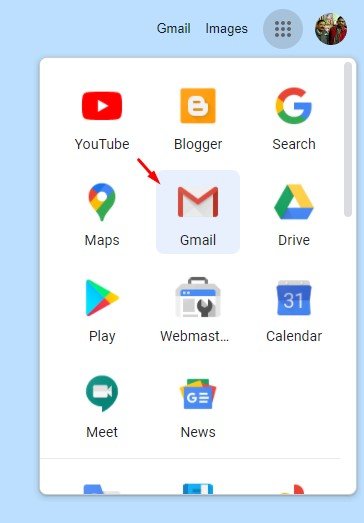
Step 1. First of all, login to your Gmail account.
Step 2. Once loaded, you need to click on the ‘Settings’ button.
Step 3. From the list of options that appears, click on the ‘See all settings’
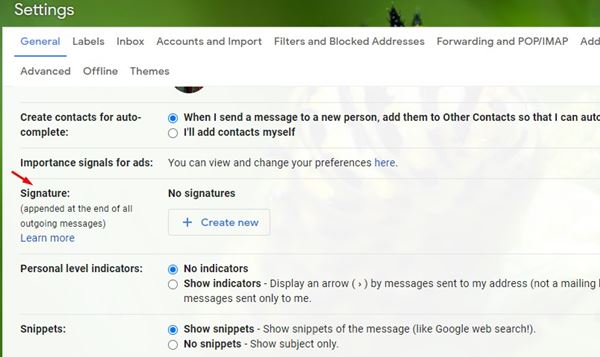
Step 4. Now scroll down and find the option ‘Signature’
Step 5. Now click on the ‘Create New’ button to add a new signature.
Step 6. Enter the new signature name and click on ‘Create’
Step 7. Now you need to compose the new signature. You need to include important elements to your signature like your full name, job title, company name, contact information, etc.
Step 8. Now set the signature defaults. In both of the fields, select the newly created signature.
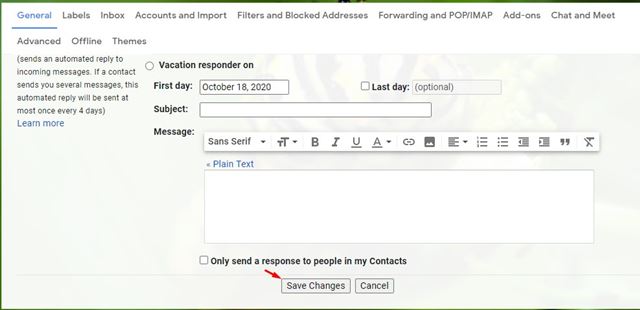
Step 9. Once done, scroll down and click on the ‘Save Changes’ button.
Step 9. If you want to remove the signature, just select “No Signature” on ‘For new emails use’, and ‘On reply/forward use’ field.
That’s it! You are done. This is how you can insert a signature in Gmail.
So, this article is all about how to add a signature in Gmail. If you have any doubts related to this, let us know in the comment box below. I hope this article helped you! Please share it with your friends also.


