Last Updated on September 7, 2023 by Larious
A network adapter, also known as a Network Interface card or network interface controller, is a computer component that allows your PC to connect to a network. Without a network adapter, you can’t connect to WiFi or Wired networks.
Whenever your PC connects to a new network, Windows 11 automatically creates a network profile. It’s pretty easy on Windows 11 to reset, rename, or configure the network adapters. You can also manually enable or disable network adapters.
Sometimes, you may want to disable a network adapter for several reasons. For example, if your device has multiple network adapters, you may want to disable the one you don’t use so that they don’t interfere with each other, or else, you can disable the network adapter to resolve pending issues with it.
Table of Contents
How to Enable or Disable Network Adapter in Windows 11
So, if you are interested in disabling or enabling network adapters in Windows 11, you are reading the right guide. In this article, we will share a step-by-step guide on how to enable or disable a network adapter on Windows 11. Let’s check out.
1) Disable/Enable Network Adapter via Settings
This method will use the Windows 11 Settings app to disable or enable a network adapter. Here’s what you need to do.
1. Click on the Windows 11 Start button and select Settings.
2. On the Settings page, click on the Network & Internet option as shown below.

3. On the right pane, scroll down and tap the Advanced network settings option, as shown in the screenshot below.

4. Under the Network adapters, select the adapter you want to disable and click the Disable button.

5. To enable the Network adapter, click on the Enable button.

That’s it! You are done. This is how you can disable or enable the Network adapter on Windows 11.
2) Disable/Enable Network Adapter via Control Panel
This method will use the Control Panel to disable or enable the Network Adapter. Here are some of the simple steps you need to follow.
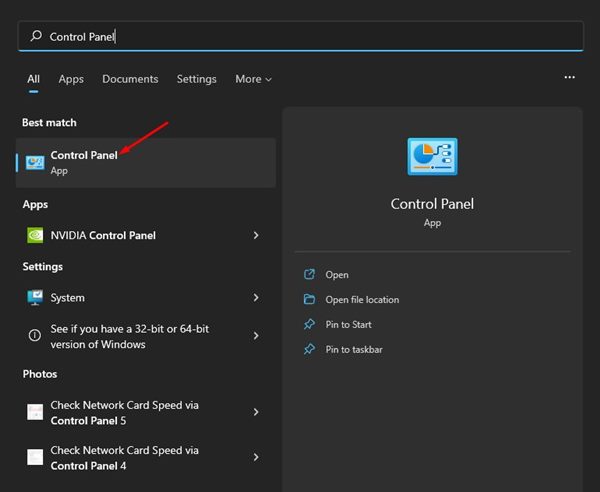
1. First, click the Windows Search and type in Control Panel. Next, select the Control Panel app from the list.
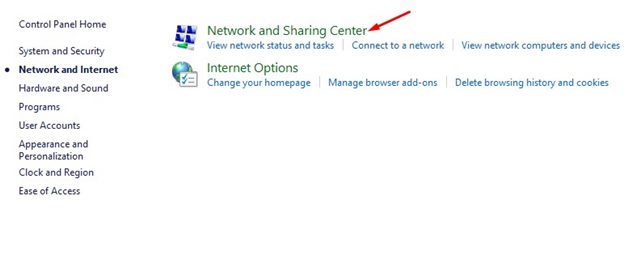
2. On the Control Panel, click on the Network and Internet option.

3. Click the Network and Sharing Center option on the next page.
4. On the left pane, click the Change adapter settings link.

5. Now, you will be able to see all network adapters. You need to right-click on the adapter you want to turn off and select the Disable option.
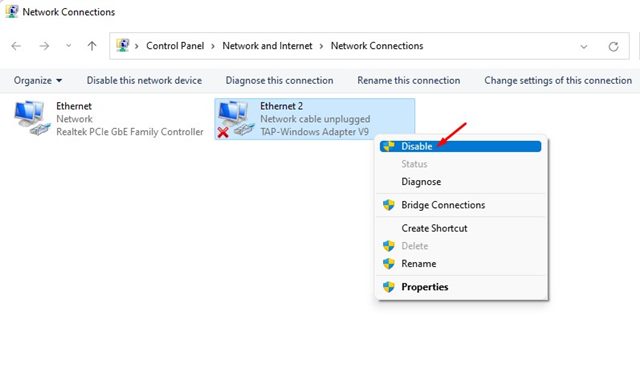
6. To enable the network adapter, right-click on the adapter name and select Enable.

That’s it! You are done. This is how you can disable or enable a network adapter in Windows 11 operating system.
3) Disable/Enable Network Adapter via Device Manager
Like the control panel, you can utilize the Device Manager of your Windows 11 PC to disable or enable the Network adapter. Here’s how to use Device Manager to disable or enable network adapters on Windows 11.
1. Open the Windows 11 search and type in Device Manager. Next, click on the Device Manager from the list of options.

2. On the Device Manager, expand the Network adapters.
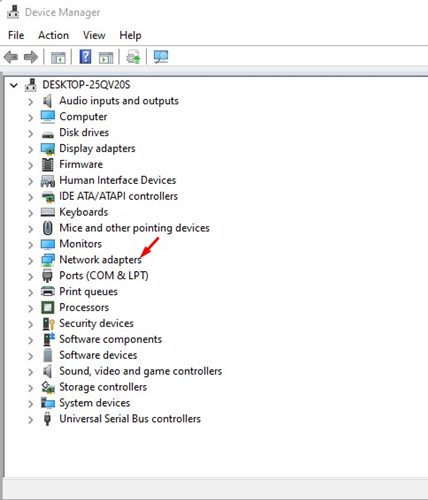
3. Now right-click on the adapter you want to turn off and select Disable Device.

4. To enable the Network adapter, right-click on the network device and select Enable Device.

This is how you can enable or disable the network adapter in Windows 11 via Device Manager.
4) Enable/Disable Network Adapters via Command Prompt
You can also use the Command Prompt utility to enable or disable the network adapters on Windows 11. Here’s how to enable or disable the network adapters on Windows 11 via CMD.
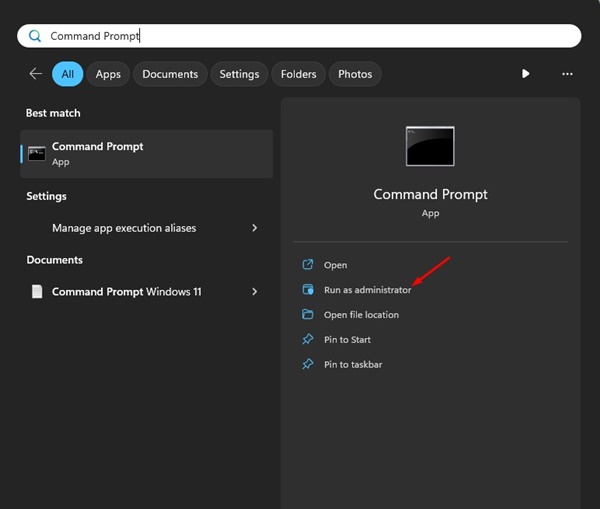
1. Type Command Prompt on the Windows 11 Search. Right-click on the Command Prompt and select Run as administrator.
2. When the Command Prompt opens, execute this command:
Netsh interface show interface

3. The above command will list all network adapters. Note the interface name, which is the network adapter you want to disable.
4. Now execute the given command by replacing the Interface name with the name you noted above. (Without quotation marks)
Netsh interface set interface "Interface Name" disable
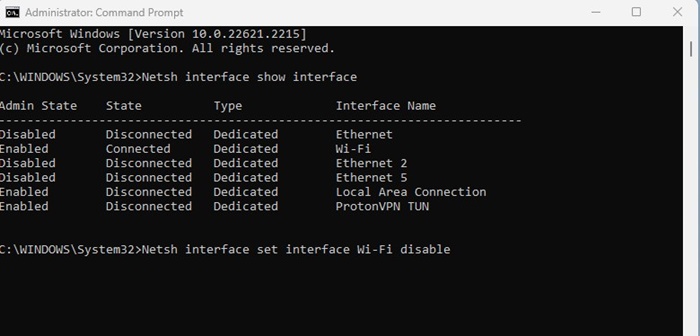
5. The above command will disable the network adapter.
6. To enable the network adapter, execute the given command by replacing the interface name with the adapter name you want to enable. (Without quotation marks)
Netsh interface set interface "Interface Name" enable

That’s it! This is how you can enable or disable network adapters on Windows 11 using the command prompt.
Disabling or enabling a network adapter in Windows 11 is pretty easy. I hope this article helped you! Please share it with your friends also. If you have any doubts, let us know in the comment box below.
