Last Updated on December 21, 2023 by Larious
Windows 11 is the best desktop operating system ever made, but it still needs much refinement. Bugs & glitches are still on the higher side on Windows 11; but Microsoft is constantly trying to resolve all existing issues.
If you have been using Windows 11 for a while, you may know that the operating system offers all sorts of tools you may need. You get tools to manage the disk space, manage the storage space, optimize the performance, etc.
A few months ago, Microsoft released a new tool for its Windows 11 called Microsoft PC Manager. Microsoft PC Manager is a software like CCleaner that allows you to boost your PC’s performance, check the device’s health, manage the storage space, and end resource hogging application.
You can find out more about the Microsoft PC Manager from this article. We are discussing PC Manager because we recently discovered a new toolbar on the program that provides one-click access to various useful tools.
Table of Contents
How to Enable & Use Toolbar in Microsoft PC Manager
So, if you already use the Microsoft PC Manager app to boost the performance of Windows 11, you would love to enable the new toolbar. Below, we have shared some simple steps to enable the toolbar in Microsoft PC Manager and how to use it. Let’s get started.
To enable the toolbar, you need to download & install the latest version of Microsoft PC Manager on your Windows 11 computer. You can update the existing Microsoft PC Manager app from the Microsoft Store. Once updated, follow the steps shared below.
1. Type in Microsoft PC Manager on Windows 11 Search. Next, open the PC Manager app from the list of best match results.
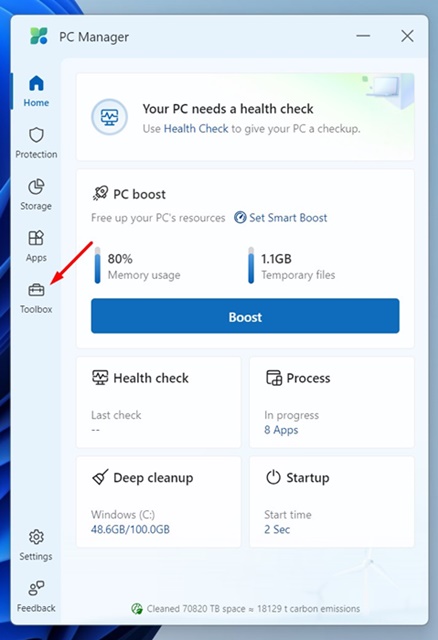
2. When the Microsoft PC Manager app opens, switch to the Toolbox tab at the left pane.
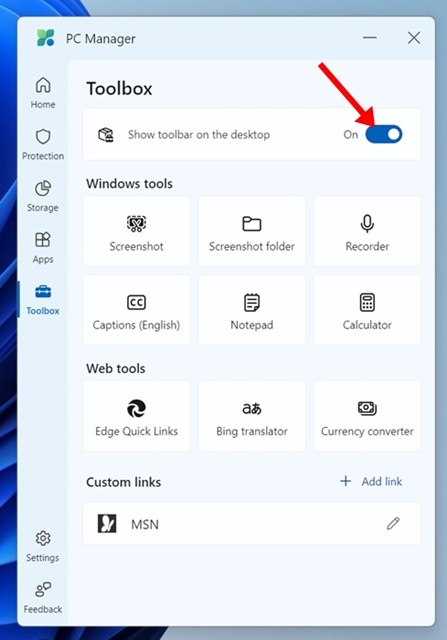
3. On the top, enable the toggle for Show toolbar on the desktop.
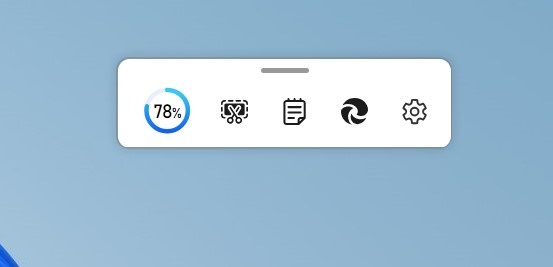
4. This will instantly add the PC Manager toolbox to your desktop screen. You can drag the toolbox to adjust its position.
That’s it! This is how you can enable Toolbox in Microsoft PC Manager app on a Windows 11 computer.
How to Customize Microsoft PC Manager Toolbox?
The toolbox can show you various tools. If you want to add more tools to the Microsoft PC Manager’s toolbox, follow these steps. Here’s how you can customize Microsoft PC Manager’s toolbox.
1. Click on the Settings gear icon on the Toolbox.
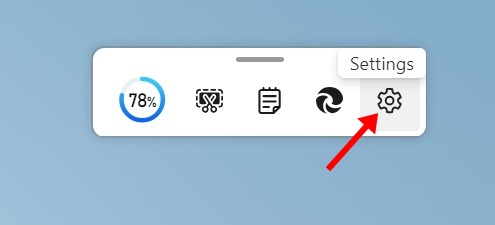
2. On the menu that appears, select Add Tools.
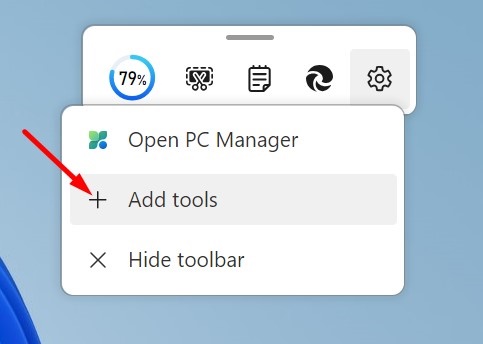
3. Now select the Windows tools that you want to add. You get various Windows tools like Screenshot, Screenshot Folder, Recorder, Captions, Notepad, Calculator, etc.
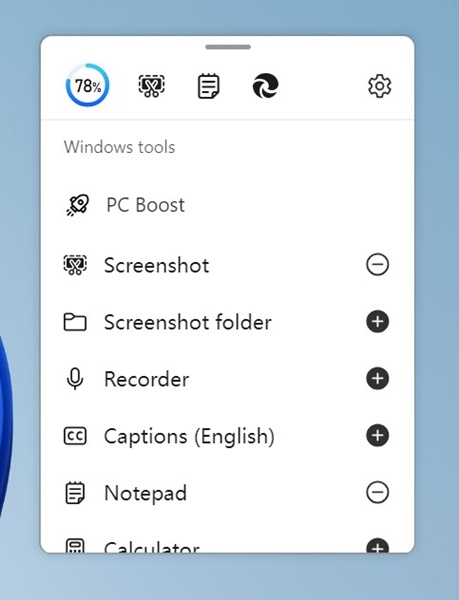
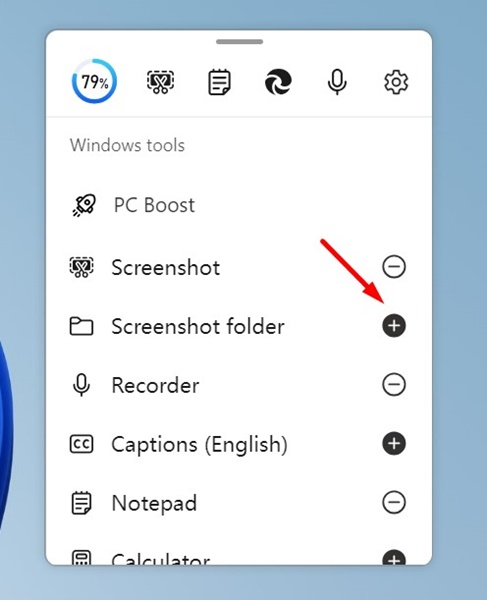
4. To add a specific tool, click on the plus (+) icon beside the tool.
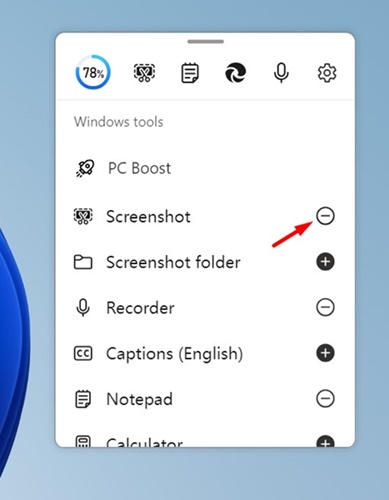
5. To remove a tool, click on the minus (-) beside the tool.
6. Also, there are some web tools and an option to add custom links.
That’s it! This is how you can add or hide tools on the Microsoft PC Manager toolbox.
Microsoft PC Manager is a great tool, and it’s Microsoft’s answer to all third-party PC Manager or cleaner apps. What do you think about the new toolbox of Microsoft PC Manager? Let us know in the comments below. Also, if you find this guide helpful, don’t forget to share it with your friends.

