Last Updated on July 23, 2023 by Larious
Usually, Windows updates help improve, update, or fix existing bugs on the operating system, but sometimes they can backfire. If we briefly look at Windows forums, we will find that users face problems after installing any new update.
One of those problems is known as ‘No Audio Output Device Is Installed’. This error keeps popping up while increasing the volume or turning on the computer. The worst thing is that the error completely disables the audio, and users can do nothing to bring back the sound.
Table of Contents
Ways to Fix No Audio Output Device Is Installed Error in Windows
The software giant Microsoft hasn’t commented anything regarding the error. But, Windows users have found a fix for the ‘No Audio Output Device is Installed‘ error. So, if the same error creates problems for you, follow the simple methods below to fix the No Audio Output Device Is Installed error on your Windows 10.
1. Restart your Windows Computer
The very first thing first, if you are continuously getting the “No Audio Output Device Is Installed” error message, you need to restart your Windows 10 computer.
Restarting Windows 10 PC will probably fix most system errors, including installing no audio output device. After the restart, if you still get the error message, you must follow the next methods.
2. Using Audio Troubleshooter
This is the second best thing Windows 10 users should do to fix audio-related problems. The Audio troubleshooter on Windows 10 can fix various audio issues, including No Audio Output Device is Installed errors. Here’s how you can use Audio TroubleShooter on Windows 10.
1. First of all, open Control Panel and click on Troubleshooting.
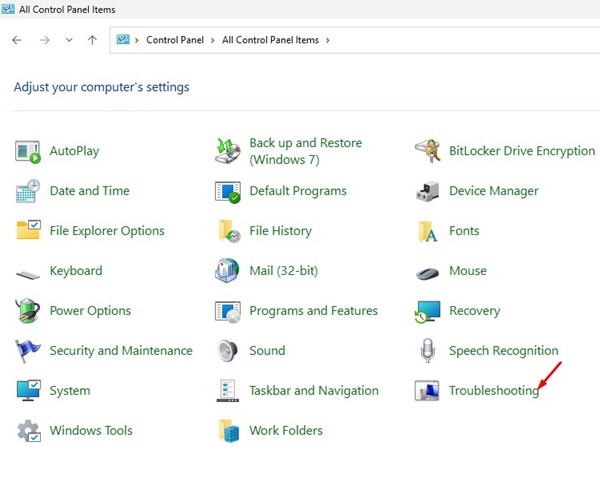
2. On the Troubleshooting, click on the Troubleshoot audio playback link in the Hardware and Sound section.

3. On the Playing Audio Prompt, click on the Next button.

4. Now wait until the Audio Troubleshooter scans for the audio devices. Once scanned, select your audio device and click on the Next button.

5. Now, follow the on-screen instructions to complete the Troubleshoot process.
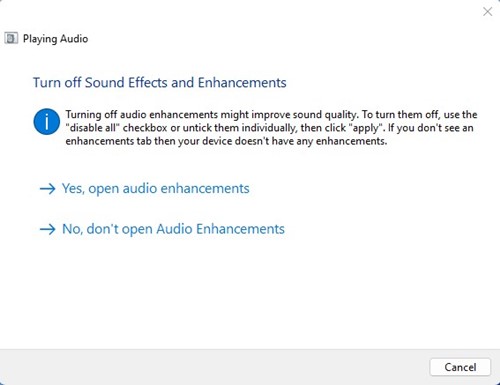
That’s it! This is how you can fix the error message by running Audio Troubleshooter.
3. Update the Audio Driver
1. First of all, open Device Manager on your Windows Computer. You can search for Device Manager on the Start Menu to open it directly.

2. Once in the Device Manager, select and expand the System Device.

3. System Devices will list all the devices or hardware installed. You need to search for an Audio driver that has SST in it. Right-click on it and choose Update Driver.
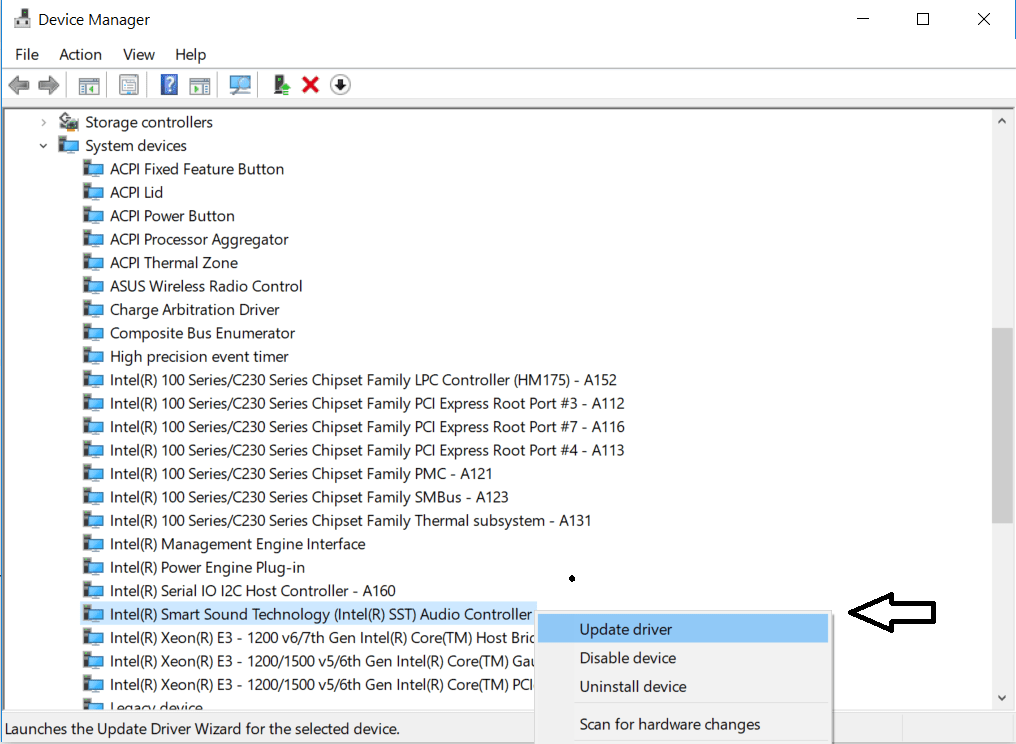
4. Now, you will see a pop-up asking you, ‘How do you want to search for drivers?’ Select the Second option to continue.

5. Next, you need to choose the option Let me pick from a list of available drivers on my computer
6. In the next Windows, select High Definition Audio Controller and click on ‘Next’

That’s it! Now restart your computer and check whether the error persists.
4. Uninstall the Intel SST Audio Controller
Well, there is one more method that you can follow to fix the No Audio Output Device Is Installed error from your Windows computer.
1. First of all, type Device Manager on the Windows Search box and open Device Manager
2. On the Device Manager, find and expand the Sound, video, and game controllers
3. Now, you need to search for the Realtek Device or any Audio component that has a yellow triangle with an exclamation mark.
4. Select the particular device. Right-click on it and select Properties. Under the Driver tab, select Uninstall Device

5. Now, you will see a confirmation pop-up. Check the Checkbox Delete the driver software for this device and click on Uninstall
Now restart your computer. This method should solve the No Audio Output Device Is Installed error.
5. Install the Generic Audio Device Driver
If you still get the No Audio Output device installed error, you must install the generic audio device driver. Here’s what you need to do.
1. Click on Windows Search and type in Device Manager. Open the Device Manager app from the list.
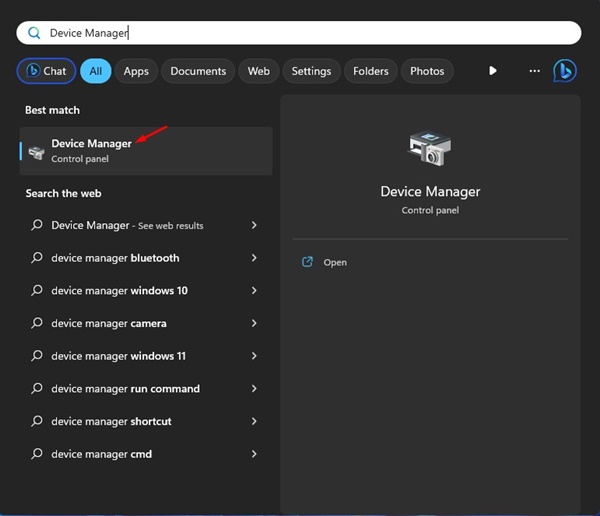
2. When the Device Manager opens, click on the Action and select Add Legacy Hardware.

3. On the Add Hardware screen, check the second option and click Next.

4. On the Add Hardware Prompt, select Sound, video, and game controllers and click Next.

5. Select (Generic USB Audio) on the left and USB Audio OEM Device on the right.

6. After making the selection, click Next. On the confirmation prompt, click the Next button again.

That’s it! This is how you can fix no audio output device installed error message on Windows.
6. Check if Audio Services are Running
The next best thing you can do to resolve the error is to check whether Audio services on your computer is running properly. Here’s how to check if the audio services are running.
1. Press Windows Key + R button on your keyboard. On the RUN dialog box, type services.msc and press Enter.

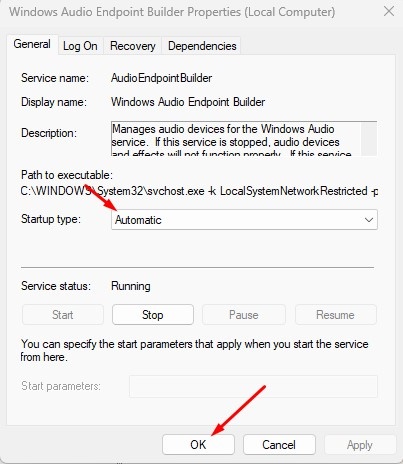
2. Now search for Windows Audio Endpoint Builder. Right-click on it and select Properties.

3. Under the Startup type, select Automatic and click the Ok button.
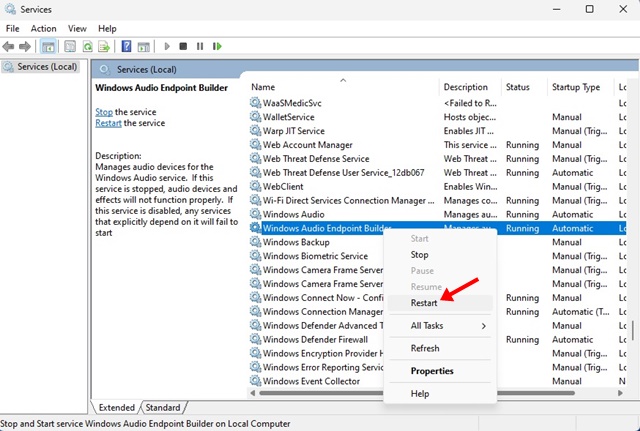
4. Now right-click on the Windows Audio Endpoint Builder service again and select Restart.
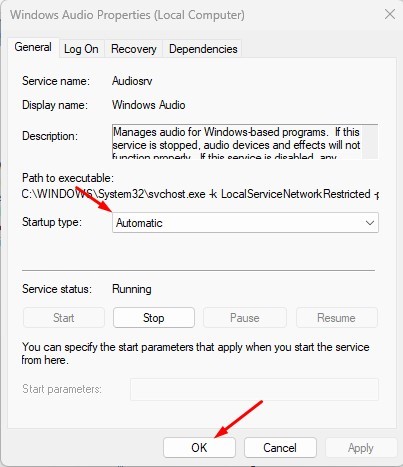
5. Find and right-click Windows Audio Service and select Properties.

6. Now select Automatic under the Startup type and click Ok.
7. Right-click on the Windows Audio Service and select Restart.

That’s it! Now close the Services app and restart your Windows computer. This should fix the audio device output error.
7. Run the DISM Command to fix Windows Image
Problems with the Windows Image also create problems with the connected devices. Many users have fixed the ‘No Audio Output device is installed’ error by repairing the Windows Image file with the DISM command. You can try doing it as well.
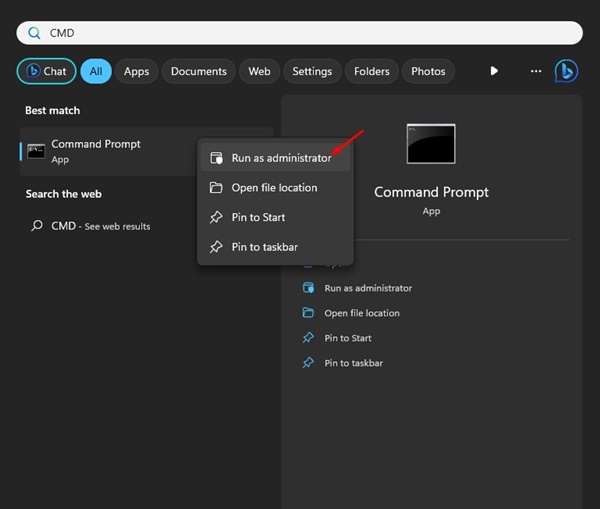
1. Click on Windows Search and type CMD. Right-click on the CMD and select Run as administrator.
2. When the Command Prompt opens, execute the following commands one by one.
DISM /Online /Cleanup-Image /ScanHealth
DISM /Online /Cleanup-Image /RestoreHealth

3. The second command may take time to complete. So, be patient and wait for the process to complete.
That’s it! After the process completes, restart your Windows computer to resolve the No Audio Output Device is Installed error.
So, these are the best methods to fix the No Audio Output Device Is Installed Windows 10 error. Every method shared in the article is grabbed from Microsoft Forums, and these fixes work on every case. So, what’s your opinion on this? Share your views in the comment box below.
