Last Updated on June 16, 2023 by Larious
If Blue Screen of Death on Windows wasn’t enough to haunt you, Windows got another variant called Purple Screen of Death or PSOD. Windows strongly relates to BSOD errors; without it, the OS looks incomplete.
Anyways, jokes apart! Let’s know about one of the fatal BSOD errors of Windows that’s now troubling many users. We will discuss the PNP_DETECTED_FATAL_ERROR, which appears out of nowhere and shuts down after showing a Blue Screen.
Table of Contents
What is PNP_DETECTED_FATAL_ERROR on Windows?
Before telling you the actual reason for the PNP_DETECTED_FATAL_ERROR on Windows, it’s important to know that this error often comes accompanied by many other stop codes such as 0x000000CA (0x01681690, 0xEA96A7BE, 0x938A81AD, 0xF8362881).
The PNP DETECTED FATAL ERROR on Windows mainly occurs when Windows fails to detect an appropriate drive for the attached Plug and Play devices.
For example, if you have just installed a plug-and-play hardware component on your PC, and when Windows fails to detect its driver, you will encounter the PNP DETECTED FATAL ERROR BSOD.
The PNP_DETECTED_FATAL_ERROR BSOD can also appear due to incompatible, outdated, or corrupted driver files. So, it mainly has to do with the drivers.
8 Ways to Fix PNP_DETECTED_FATAL_ERROR BSOD on Windows
Since this BSOD error mainly appears due to drivers, we will focus more on fixing problems related to the drivers. However, if repairing the drivers didn’t help, you can also try these few things.
- Reconnect the newly installed hardware.
- Disable the BIOS Memory Options.
- Update all Device Drivers.
- Run the Disk Check Utility.
- Check and rule out the hardware issues.
- Perform a System Restore.
- Update the Windows Operating System.
1. Remove the Newly Installed Hardware
Newly installed hardware is the prominent reason for PNP_DETECTED_FATAL_ERROR on Windows. You may have encountered the error after installing new hardware.
The hardware could be anything like a webcam, microphone, mouse, keyboard, etc. Whatever it is, you must temporarily remove it to check whether the error still appears.
If the error resolves and no longer appears, you have the culprit.
2. Update or Roll Back Device Drivers
If removing the hardware didn’t help, you can try updating or rolling back the device driver updates. Here’s how to update or roll back drivers on Windows.
1. Press the Windows Key + R button to open the RUN dialog box.
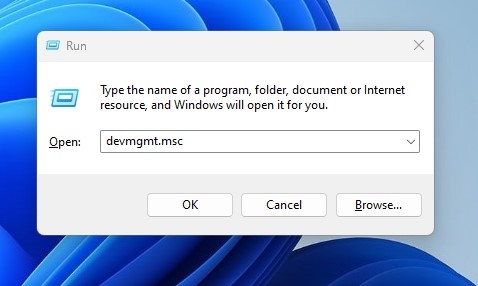
2. Type devmgmt.msc on the RUN dialog box and press Enter.
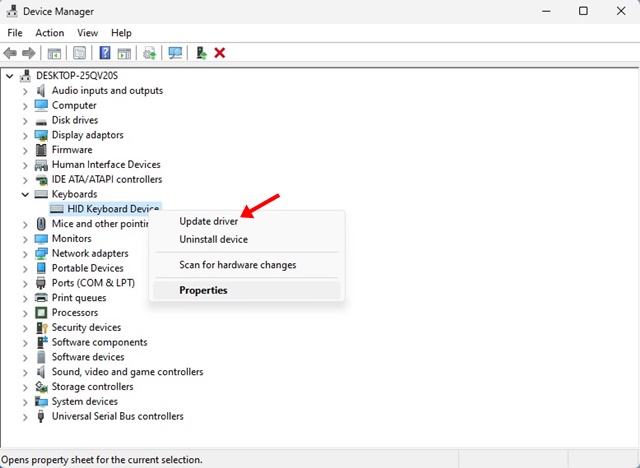
3. Now, right-click on the drivers (Keyboards, mice, headphones, etc) and select Update Driver.
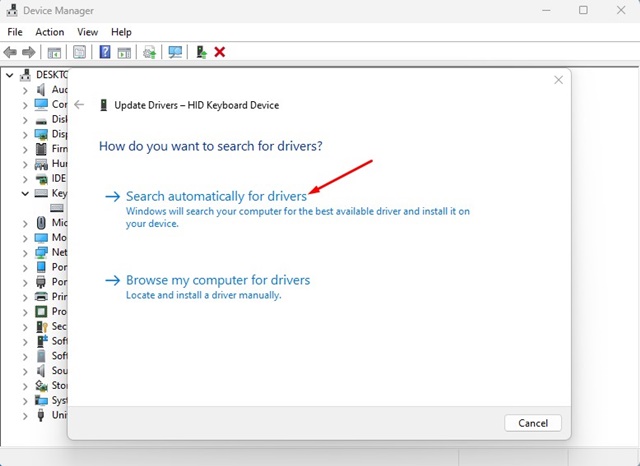
4. On the prompt, select Search automatically for drivers.
That’s it! You need to repeat the steps and update the drivers of every device you’ve recently installed.
How to Roll Back Drivers?
If updating the drivers fails to fix the PNP_DETECTED_FATAL_ERROR on Windows, you must roll back the device drivers. Here’s what you need to do.
1. Press the Windows Key + R button to open the RUN dialog box.
2. Type devmgmt.msc on the RUN dialog box and press Enter.

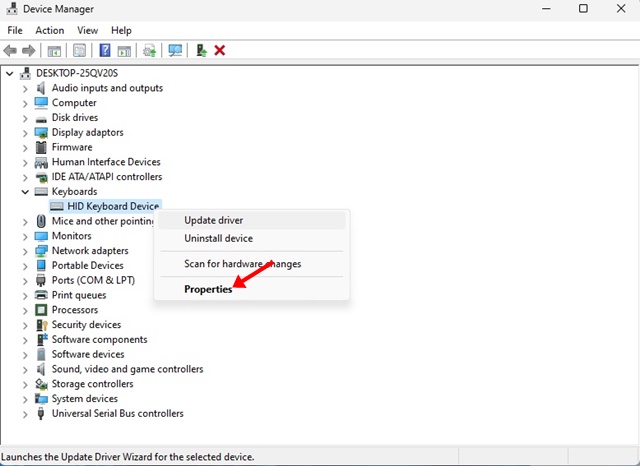
3. Now right-click on the drivers (Keyboards, mice, headphones, etc.) and select Properties.
4. On the Properties, switch to the Driver tab and click Roll Back Driver.

That’s it! Now the operating system will roll back the device drivers you have selected. Once the process completes, restart your PC.
3. Check the Disk for Errors
Many Windows users have claimed to fix the PnP Detected Fatal Error BSOD by running the Disk Check utility (ChkDSK). Hence, you can also try that to improve your chances of getting the problem fixed.
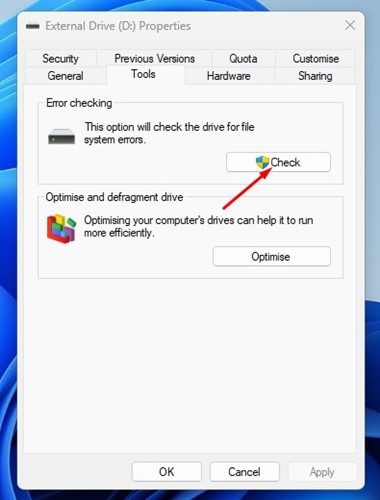
- Open the Windows File Explorer.
- Right-click on the System installation drive (C: Drive) and select Properties.
- On the drive properties, switch to the Tools tab.
- Next, click on the Check button underneath Error checking.
- On the Error checking prompt, click on the Scan Drive.
That’s it! Now Disk Check utility will run. Follow the on-screen instructions to complete the disk error-checking process.
4. Uninstall the Security Program
Sometimes security programs, especially the Norton Antivirus, can trigger the PNP Detected Fatal Error on the Windows operating system.
Several users have reported that removing the security and recently installed programs have helped them fix the 0x000000CA Error.
So, you need to open the Control Panel and uninstall all programs, including the security tools you have just installed on your device.
- Press the Windows Key + R button on your keyboard. This will launch the RUN dialog box.
- On the RUN dialog box, type appwiz.cpl and press Enter.
- This will open the Control Panel.
- Now uninstall the recently installed security programs.
- You also need to uninstall the programs you’ve installed recently.
- To uninstall, right-click on the program and select Uninstall.
That’s it! After the uninstallation, make sure to restart your Windows computer.
5. Update Your Windows Operating System
Some users have faced the PNP Detected Fatal Error BSOD because of the outdated system version. It’s best to keep the operating system updated if you are using Windows.
Keeping the operating system up-to-date has a few advantages; you will enjoy new features, get the security patches, and the bugs & glitches will be less.
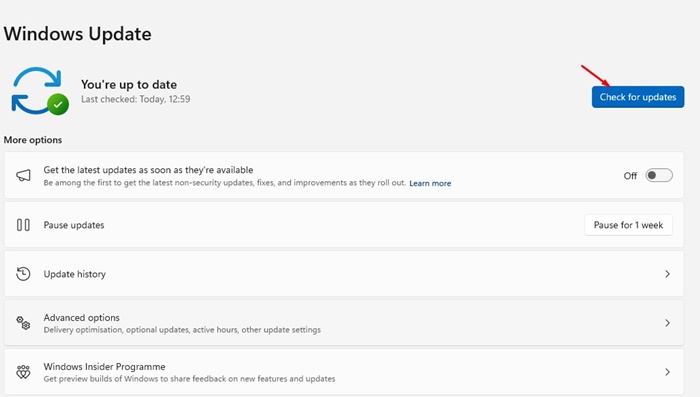
So, if you haven’t updated your operating system for a while, head to Settings > Windows Update and click on the Check for Updates button. Windows will automatically find and download all pending operating systems and security updates.
6. Perform a System Restore
If you are still getting the PNP Detected Fatal Error BSOD, it’s time to perform a system restore.
System Restore will roll back your computer to its previous state, ultimately fixing the BSOD error. Here’s how to perform a system restore.
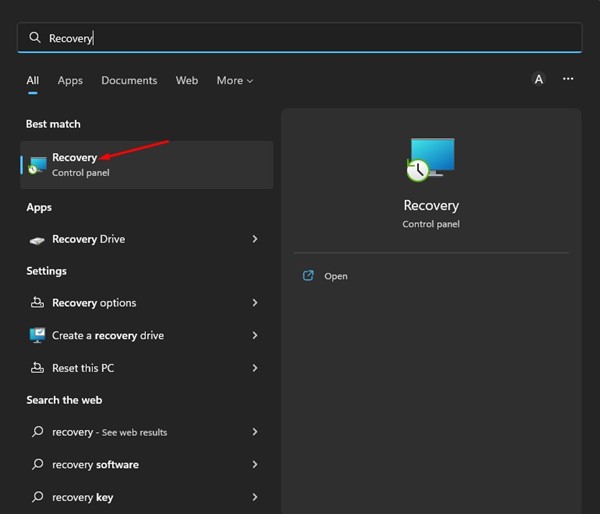
1. Open Windows search and type Recovery. From the list of results, click on the Recovery app.
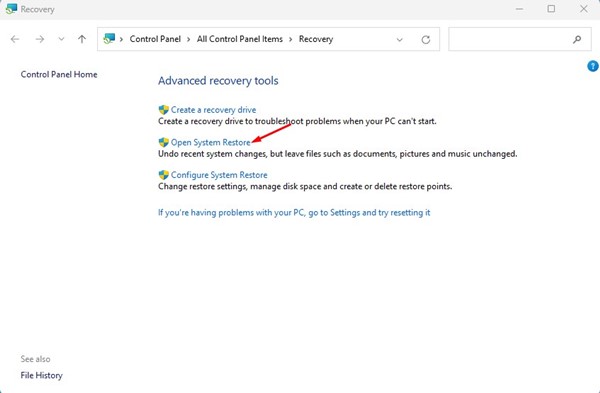
2. On the Recovery screen, select Open System Restore.
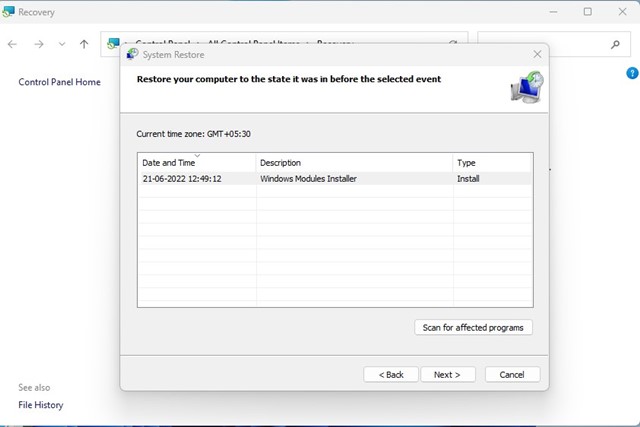
3. Now, pick the restore point you want to use and click on the Next button.
4. Click the Finish button on the Confirm your Restore point screen.
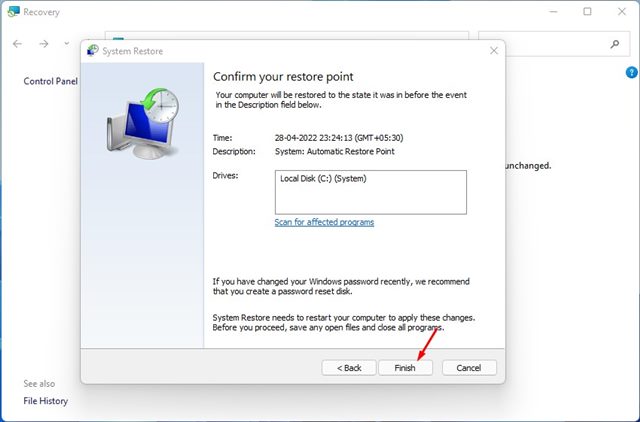
That’s it! Now Windows will automatically roll back your settings to your selected point.
7. Reset your PC
If nothing has worked for you until now, you don’t have any options left apart from resetting your computer.
System Reset will erase everything on your PC, including your user-made settings and personal files. So, create a backup of your important files before resetting your PC.
Reset Windows 11:

- Click on the Windows Start button and select Settings.
- Switch to the Windows Update on the left sidebar.
- On the right side, click on Advanced Options.
- On the Advanced options, click on Recovery.
- On the Recovery screen, click on the Reset PC button.
- You will now see a prompt providing you with two options. Select Keep my files.
- On the next prompt, select Cloud Download.
- Finally, click on the Reset button to reset your Windows 11 computer.
Reset Windows 10:
The steps to reset Windows 10 vary from Windows 11. We have shared a detailed guide on how to reset Windows 10 computer.
In that guide, we shared three ways to reset Windows 10 to default factory settings. Check out that article and follow the steps if you use Windows 10.
8. Check for Hardware Issues
Hardware issues like a faulty hard drive or RAM module can also be a reason for PNP_DETECTED_FATAL_ERROR.
If everything fails, there is a higher chance that your device has hidden hardware issues. It could be a faulty RAM module or a dying hard disk drive.
Sometimes, wrong BSOD settings can also trigger the error screen. So, if you have no clue, you can take your computer to a local service center and ask them to fix the issue.
Also Read: Download Microsoft Edge Offline Installer
PNP_DETECTED_FATAL_ERROR can be frustrating, but it can be fixed easily with the right approach. We have shared all working methods to resolve PNP_DETECTED_FATAL_ERROR BSOD. If this article helped you share it with your friends.
