Last Updated on November 14, 2020 by Larious
Previously, we have shared an article where we have discussed God Mode on Windows 10. If you haven’t yet read that article, then here’s a short explanation – Windows 10 has two control panels, the one you access via the Windows search, and the other one is kept hidden.
The hidden Control Panel is what we call ‘God Mode’. God Mode offers more than 260 different settings in one place. Recently, we found a free tool that extends the features of Windows 10’s GodMode.
Also Read: How to Hide & Lock Photos in Windows 10
Table of Contents
How to Get Extended GodMode in Windows 10
The tool is known as ‘Extended GodMode’, and it’s entirely free to download & use. The great thing about the Extended GodMode is that it not only enables the default GodMode of Windows 10, it also adds few other useful features. Below, we have shared a few best features of Extended GodMode.
Features of Extended GodMode
- Quick search by item name
- Searches can be saved
- Manage favorites
- Display recently used items
- Display of most used elements
- Integration of Control Panel and Admin Tools elements (can be disabled)
- Quick access to each setting item from the software system tray icon menu
Steps to Use Extended GodMode in Windows 10:
Well, Extended GodMode supports both 64-bit and 32-bit Windows 7/8/10 operating system. You need to download the files depending on your Windows type. Follow some of the simple steps given below.
Step 1. First of all, visit this link and download the Extended GodMode on your computer.
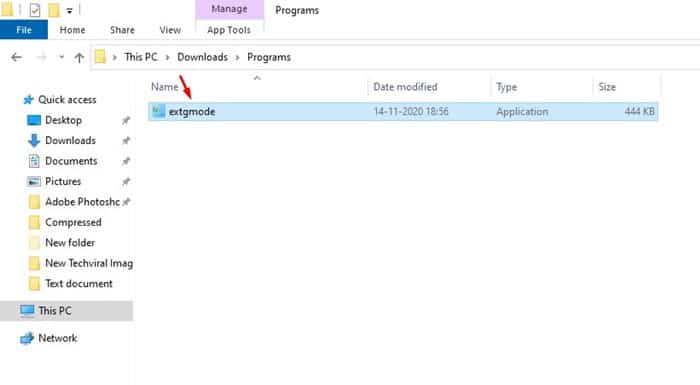
Step 2. Since it’s a portable tool, it doesn’t require installation. You just need to double click on the ‘extgmode’ to run the application.
Step 3. Now you will be able to see the main interface of Extended GodMode.
Step 4. Just scroll down and explore all available settings.
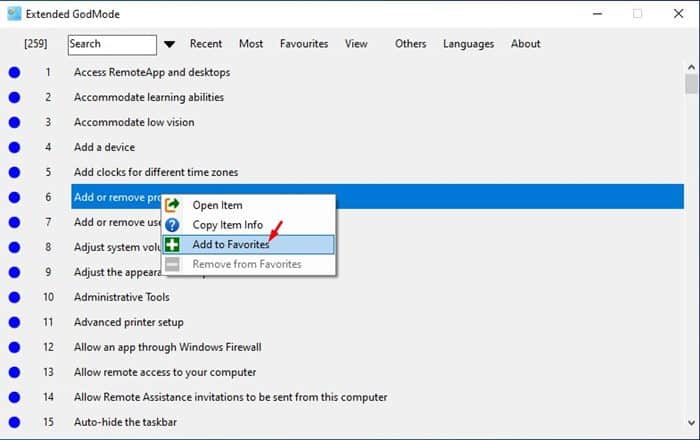
Step 5. The Extended GodMode also allows you to mark settings as a favorite. To do that, right-click on your most used feature and select ‘Add to Favorites’
Step 6. To enable or use any particular option, simply double click on it.
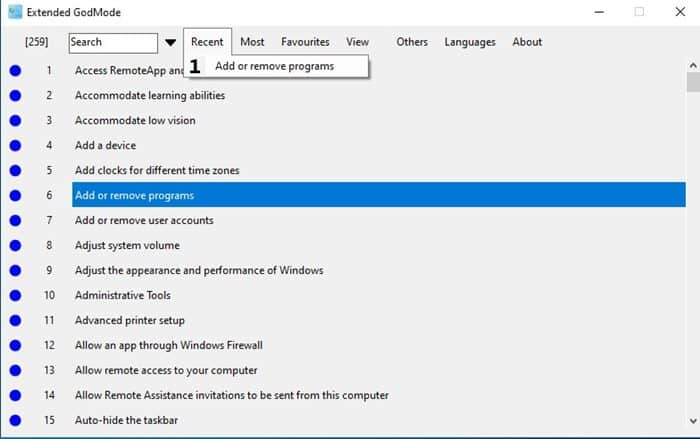
Step 7. The recent changes will appear on the ‘Recent’ tab.
This is how you can use the Extended GodMode in Windows 10.
So, this article is all about how to enable the Extended GodMode in Windows 10. I hope this article helped you! Please share it with your friends also. If you have any doubts related to this, let us know in the comment box below.


