Last Updated on July 16, 2023 by Larious
Windows 11 is a very new operating system, and it’s still being tested. As of today, it has many bugs and glitches that can prevent you from using your computer. However, the good thing is Microsoft is trying hard and releasing updates frequently to fix existing bugs & glitches in the platform.
While keeping Windows 11 up to date is always recommended, updates can sometimes break things. Problematic Windows updates sometimes prove more damaging than existing bugs & glitches. In worst-case scenarios, a problematic Windows update might force you to reinstall the operating system.
Table of Contents
Best Methods to Manually Uninstall Windows 11 Updates
Hence, if you have just installed a Windows 11 update and facing problems after that, it’s best to uninstall windows update manually. Below, we have shared a few best methods to uninstall windows 11 update in the latest. Let’s check out.
1. Uninstall Updates via Settings
We will use Windows 11’s Settings app to uninstall a problematic update in this method. Here are some of the simple steps you need to follow.
1. Click on the Windows 11 Start menu and select Settings.
2. Now, click on the Windows Update on the left pane.

3. On the Windows Update page, click on the Update History option.

4. Next, on the Update history, scroll down to the Related Settings section and click Uninstall updates.

5. Now Control Panel will open. Here you need to right-click on the most recent update and select Uninstall.

That’s it! This will uninstall the problematic update on your Windows 11 computer.
2. Uninstall Windows 11 Updates via Control Panel
Here we will use the Control Panel to uninstall Windows 11 updates. Here are some of the simple steps you need to follow.
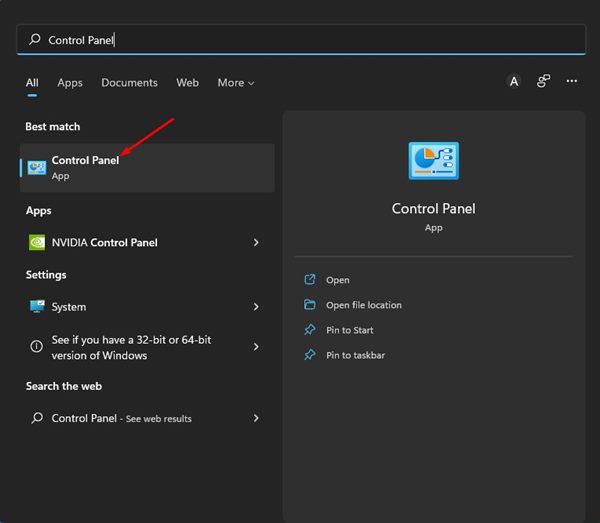
1. Click on the Windows 11 search and type in Control Panel. Next, open the Control Panel app from the list.
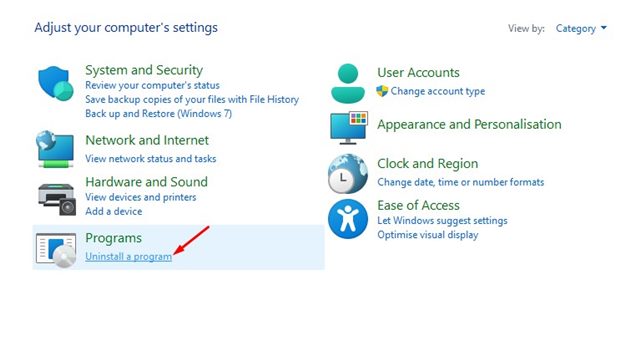
2. On the Control Panel, click the Uninstall a Program link underneath Programs.
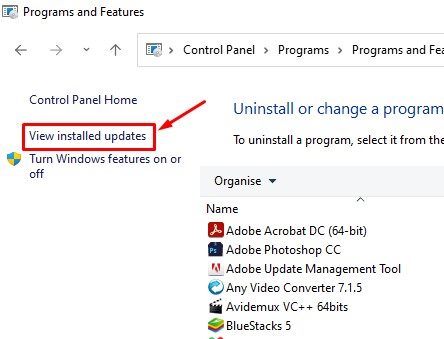
3. On the Programs and Features window, click on the View installed updates link.
4. Now, you will see all Windows 11 updates installed on your system. You need right click on the update that you want to uninstall and select the Uninstall option.
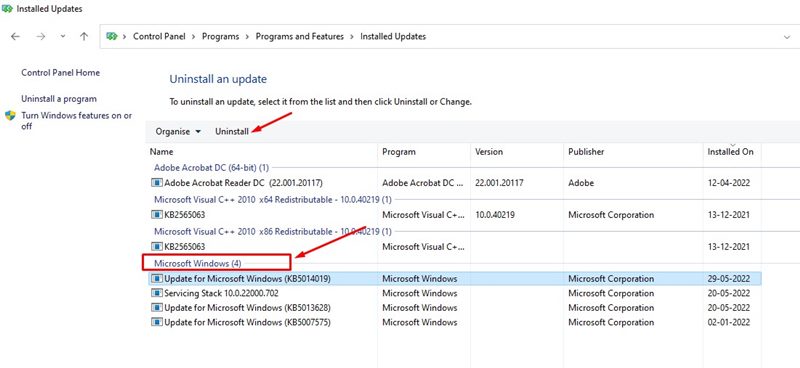
That’s it! This is how you can manually uninstall Windows 11 updates via Control Panel.
3. Uninstall Windows 11 Updates via PowerShell
You can even use the PowerShell utility on Windows 11 to uninstall a problematic update. Here’s how you can manually uninstall Windows 11 update via PowerShell.
1. First, open the Windows 11 Search and type in PowerShell. Right-click on the PowerShell utility and select Run as Administrator.

2. On the PowerShell utility, enter the command:
wmic qfe list brief /format:table

3. This command will list a table of all Windows 11 updates installed on your device. You need to note the HotfixID (the number after ‘KB’) of the update you want to install.

4. Now enter the command:
wusa /uninstall /kb:HotFixID
Replace the HotFixID with the update’s identification number. For example, if you want to uninstall an update KB5014019, the command would look like
wusa /uninstall /kb:5014019
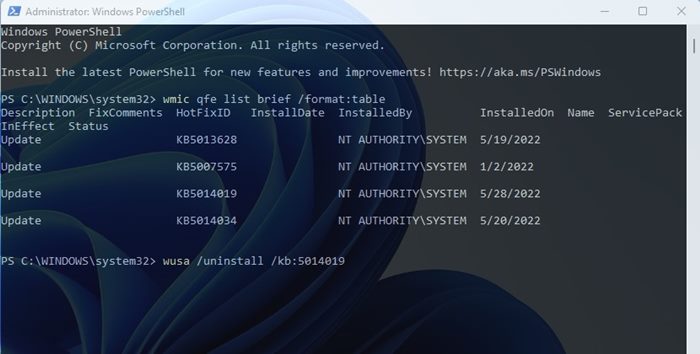
5. Once done, hit the Enter button to execute the command. On the confirmation prompt, click on the Yes button.

That’s it! This will uninstall the update from your Windows 11 device.
4. Uninstall Windows 11 Updates via Recovery Environment
If your PC doesn’t boot, you can use Windows RE to uninstall the problematic update. Here’s how you can access the Windows Recovery Environment.
1. Click on the Windows 11 Start menu and select Settings.

2. On the Settings app, click the Windows Update option on the left pane.

3. On the right pane, click on Advanced Options.

4. Next, on the Advanced Options page, scroll down and click on Recovery.
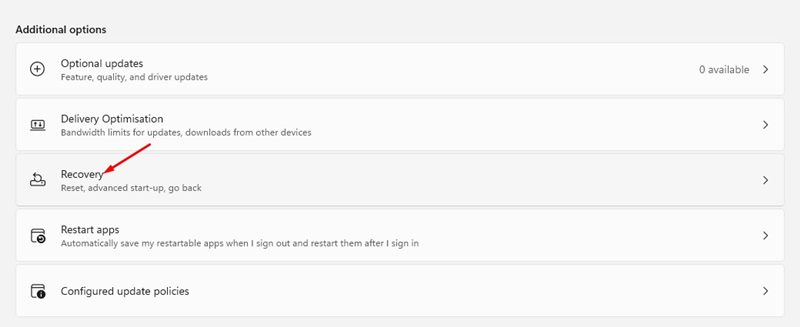
5. On the Recovery page, click the Restart Now button beside the Advanced Startup.
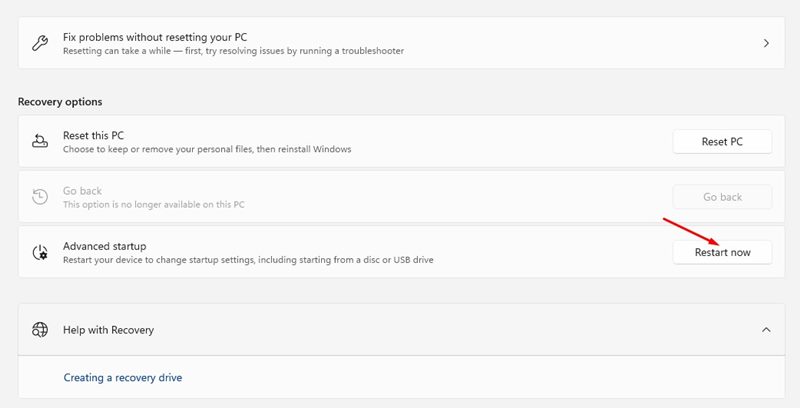
6. Now, your computer will restart and enter Recovery mode. On the Windows RE, navigate to Troubleshoot > Advanced Options. Next, click on the Uninstall updates.

7. you can uninstall the latest Windows 11 Quality or Feature update. Uninstall it, and your PC is likely to boot now.
5. Uninstall Windows Update by creating a batch file
You can create a batch script in Windows containing the updates you want to uninstall. After creating the batch file, you can easily uninstall the updates by running it on your computer.
Here’s how to create a Batch file on Windows containing the updates you want to uninstall.
1. Click on Windows Search and type in Notepad. Next, open the Notepad app from the list of matching results.
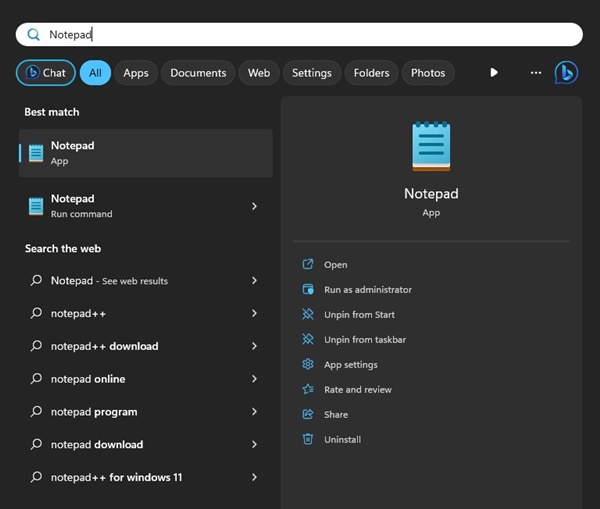
2. When the Notepad opens, enter the following texts.
@echo off

wusa /uninstall /kb:2565063 /quiet /norestart

wusa /uninstall /kb:5028851 /quiet /norestart

END
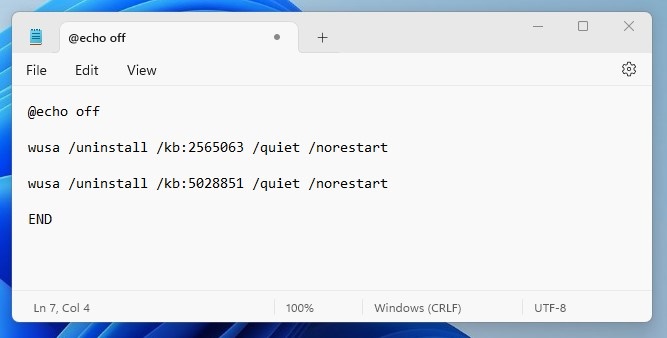
Important: You need to replace ‘2565063’ and ‘5028851’ with the identification number of the update you want to uninstall. And you can add more lines inbetween the @echo off and END.
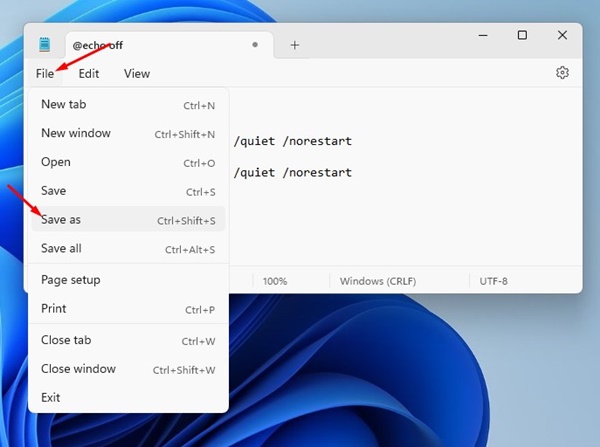
3. Click the File > Save As option to save the Notepad file.
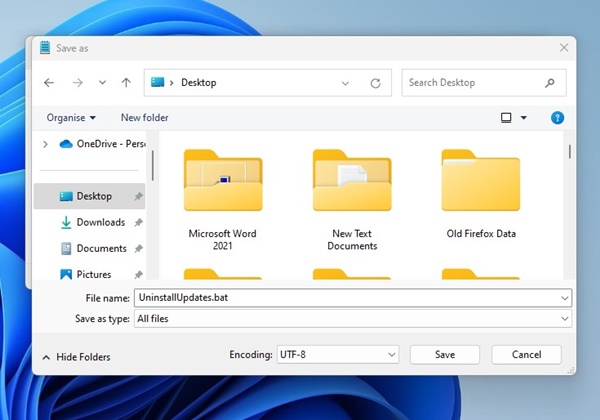
4. On the Save As Prompt, save the file with .bat as an extension.
5. To uninstall the updates, double-click on the Batch file you’ve created.
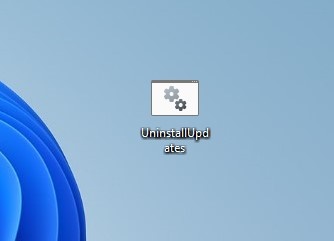
That’s it! This will immediately uninstall the Windows 11 updates.
So, these are just a few ways to uninstall Windows 11 updates manually. If you have set up an automatic system restore on Windows 11, you can even roll back your PC to a previous point to uninstall the updates. If you have any doubts regarding uninstalling Windows 11 updates, let us know in the comments.
