Last Updated on February 10, 2024 by Larious
Microsoft introduced many new changes to its Windows 11; some are not going well with the users. The new Windows 11 22H2 build has removed the classic ‘Device and Printers’ page.
You will still find the ‘Devices and Printers’ on the Control Panel, but opening it will take you to the Bluetooth settings page. So, is it now possible to access the classic ‘Devices and Printers’ window on Windows 11?
We have researched a few things and found that Microsoft hasn’t dropped the classic Devices and Printers; it just made it difficult to access the page. You can still access the old Devices and Printers in Windows 11, but you must go through some additional steps.
Table of Contents
How to Open ‘Devices and Printers’ in Windows 11
You can access the classic Devices and Printers in Windows 11 in various ways; below, we have shared all of them. Here’s how to open Devices and Printers on a Windows 11 computer.
1. Open the Old Devices and Printers from the RUN dialog box
The easiest and quickest way to open Devices and Printers on Windows 11 is through the RUN dialog box. Here’s what you need to do.
1. Press the Windows Key + R button on your keyboard. This will open the RUN dialog box.
2. When the RUN dialog box opens, paste the following code and press Enter.
shell:::{A8A91A66-3A7D-4424-8D24-04E180695C7A}

3. Executing the command through the RUN dialog box will instantly open the Devices and Printers page.

That’s it! This is the easiest way to open the classic Devices and Printers interface on your Windows 11 computer.
2. Open classic Devices and Printers from the Settings
The Devices and Printers page is hidden deep under the settings. So, you can utilize the Settings app as well to open the hidden Device and Printers page. Here’s what you need to do.
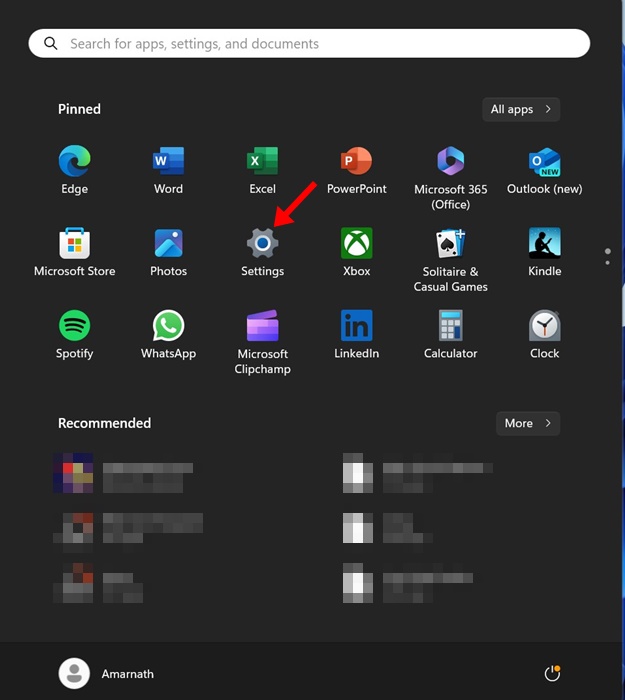
1. Click on the Windows 11 Start button and select Settings.
2. When the Settings app opens, switch to the Bluetooth & devices.
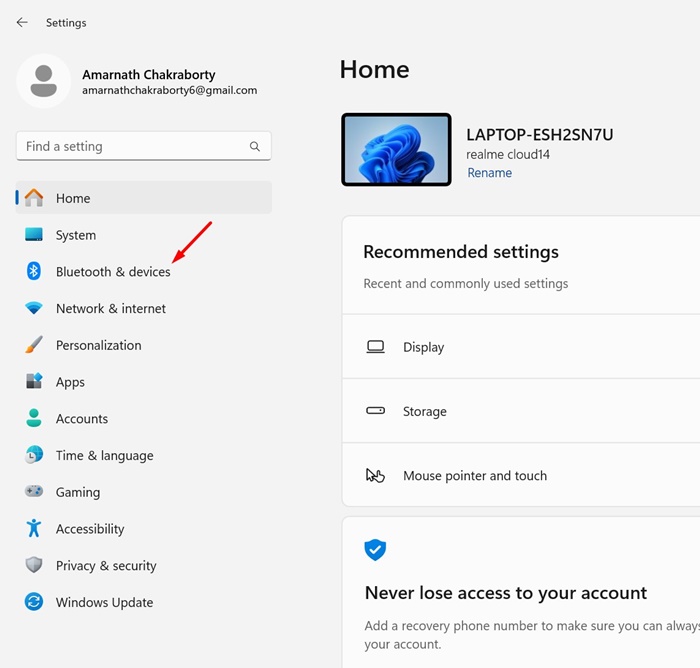
3. On the right side, click on Devices.

4. Now scroll down to the Related Settings section. Next, click on the More Devices and Printer settings.
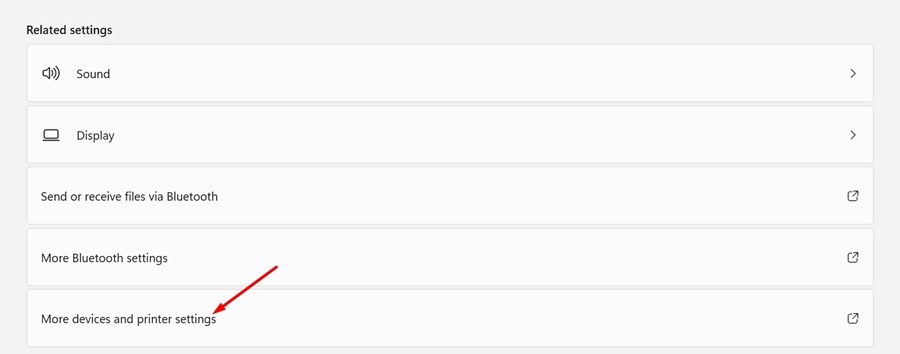
5. This will open the classic Devices and Printers screen.

That’s it! Now, you can access all your devices and printers from a single screen.
3. Create a Shortcut to open classic Devices and Printers
This nifty trick will let you access the old Devices and Printers screen right from your desktop screen. Follow the steps shared below.
1. Type in Control Panel on the Windows 11 Search. Next, open the Control Panel app from the list of best match results.

2. When the Control Panel opens, click on the View by drop-down and select Small or Large icons.
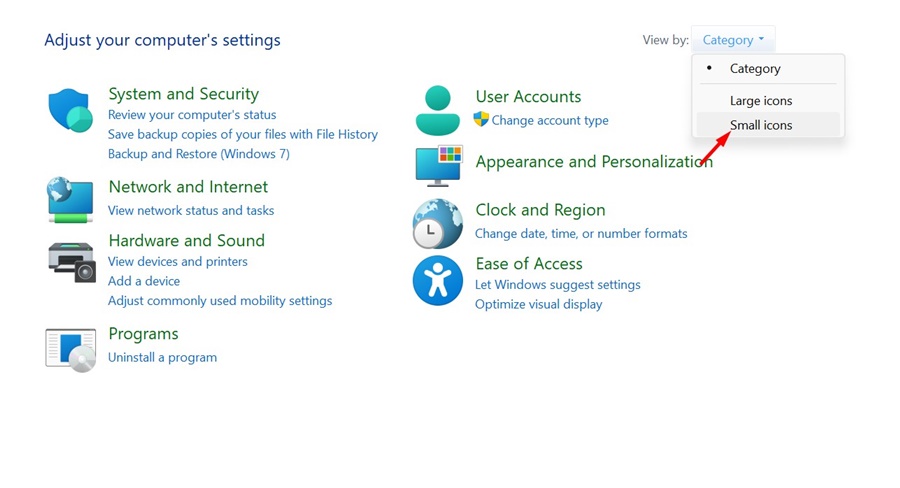
3. Next, right-click on the Devices and printers and select Create Shortcut.

4. On the desktop shortcut confirmation prompt, click Yes.
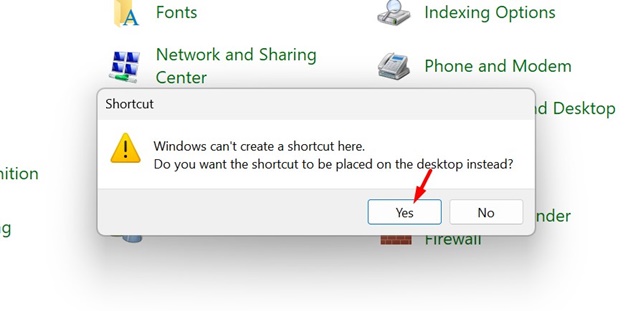
That’s it! The shortcut for accessing the classic Devices and Printers will be added to your desktop screen.
You can either manually modify the registry file or add entries by downloading the registry file to add a shortcut to access Devices and Printers on File Explorer.
You can download the registry file to add the Devices and Printer shortcut on either the top or bottom section of the navigation pane in the File Explorer.
1. To get started, download the Registry file depending on where you want the Devices & Printers to appear.
2. After downloading the registry file, close the File Explorer.
3. Then, double click on the Registry file you’ve downloaded. A UAC prompt will appear; click on Yes.

4. The Devices and Printers shortcut will be added to the Windows 11 File Explorer.
5. If you want to remove the shortcut from the file explorer, download and run this Registry file.
That’s it! This is how you can add or remove Devices and Printers in the Navigation pane of File Explorer.
So, if you feel comfortable using the old Devices and Printers page, you may find this method useful. Let us know if you need more help accessing the old Devices & Printers page on Windows 11.
