Last Updated on July 16, 2024 by Larious
Even though the new Windows 11 file explorer design is minimalistic, Microsoft removed many useful features. The old Windows 10 ribbon-style file explorer actually provided many features and quick access to many things.
If you’ve just switched to Windows 11, you may want to get back the Windows 10 ribbon style File Explorer. There are quite a few ways to get back the classic Windows 10 file explorer, but you must use third-party apps.
Table of Contents
Restore Windows 10 File Explorer in Windows 11 without any tool
If you don’t want to install any dedicated app to get access to Windows 10’s File Explorer, you need to rely on this nifty trick. Here’s how to quickly access the old file explorer from the Control Panel.
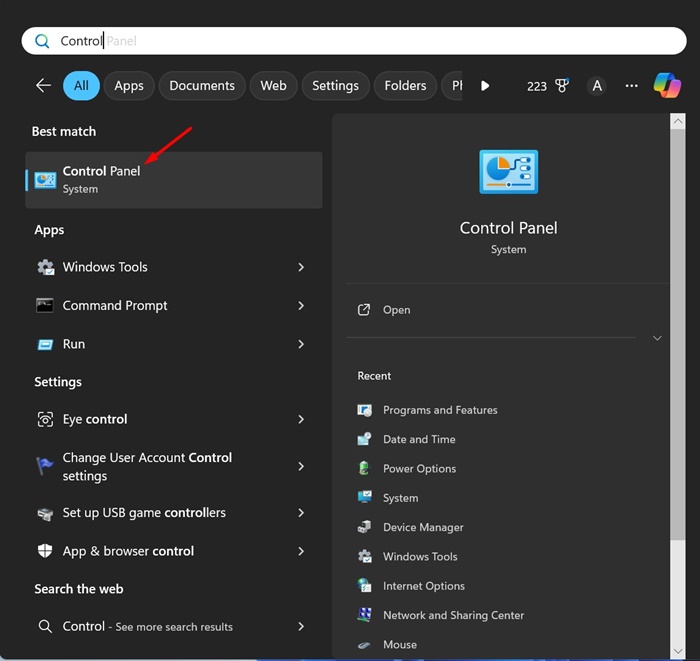
1. Click on Windows 11 Search and type Control Panel. Next, open the Control Panel app from the list of best match results.

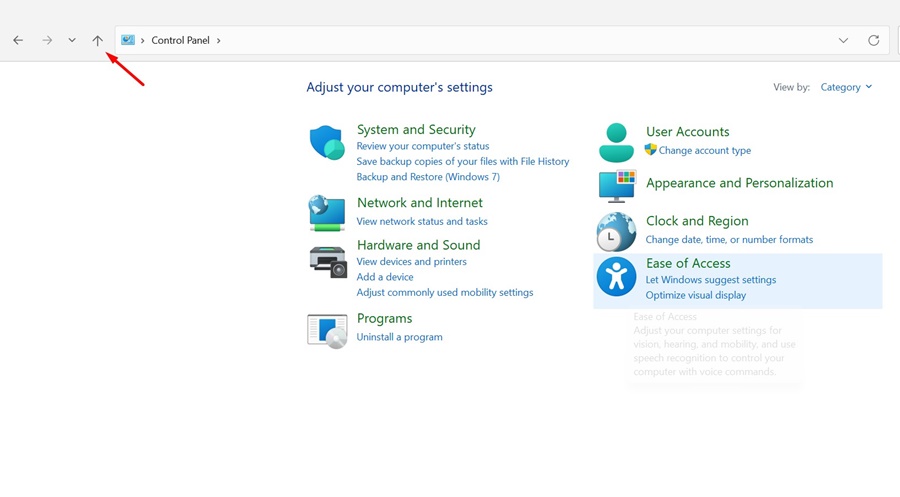
2. When the Control Panel opens, click the Up Arrow button multiple times.

3. You will arrive at the Windows 10 File Explorer.
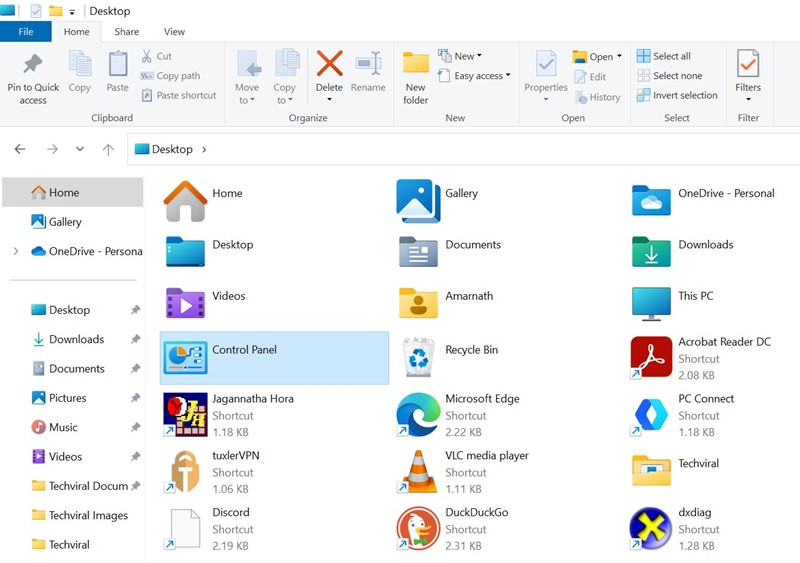

Although this nifty trick lets you access the Windows 10 File Explorer on Windows 11, this is not permanent. Windows 10 File Explorer will remain as long as you continue surfing inside this window.
Once you close this and open a new Window, it will revert to Windows 11 File Explorer without any ribbons.
Restore Windows 10 File Explorer with StartAllBack
StartAllBack is a customization tool that can restore the old Windows 10 File Explorer. It is a premium tool, but you can opt for a free trial to test it. Here’s how to use the tool to restore the old Windows 10 File Explorer on Windows 11.
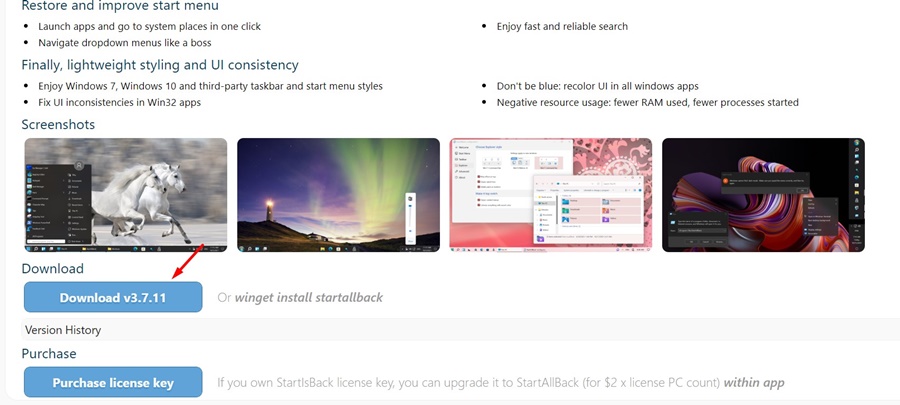
1. To get started, download the latest version of StartAllBack tool on your PC.

2. Once downloaded, run the setup file. On the Installation wizard, select Install for Me.
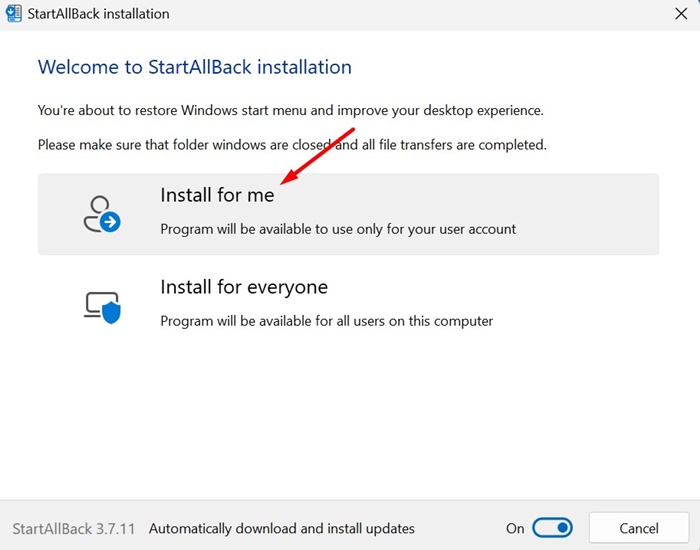

3. Once installed, switch to the Explorer tab on the left side.
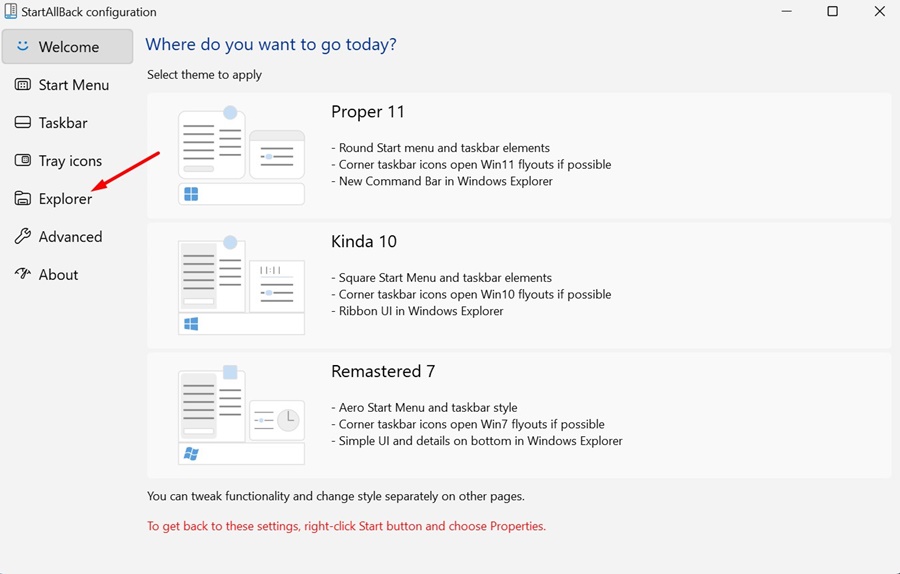

4. On the Choose Explorer Style, select Win10 Ribbon UI.
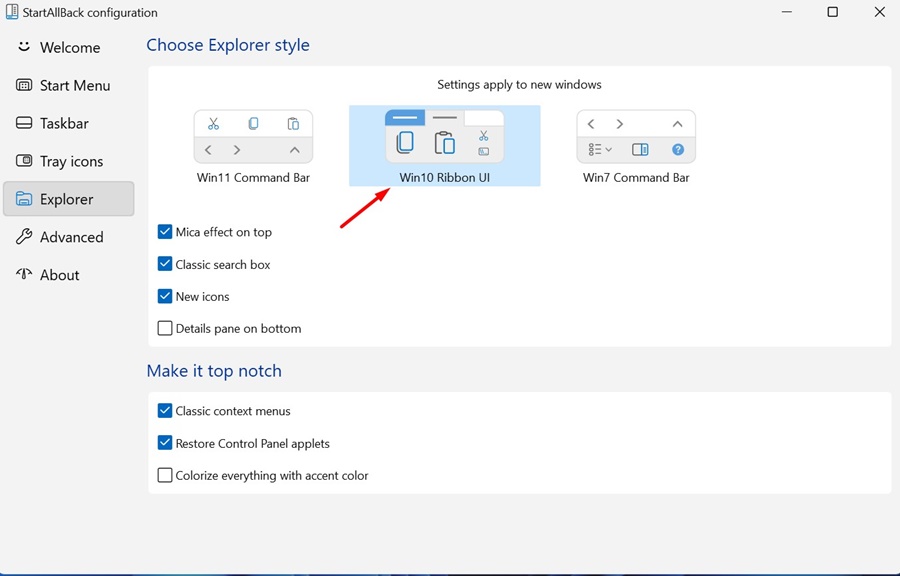

5. Once you’ve done this, open a new Window in the File Explorer. You will see the Windows 10 Ribbon UI.
Restore Windows 10 File Explorer using ExplorerPatcher
ExplorerPather is a free tool for restoring the Windows 10 File Explorer. It can also be used to customize various elements of Windows 11, such as the Taskbar, System Tray, and Start Menu. Here’s how to use it.
1. Download the latest ExplorerPatcher from this GitHub page.
2. Once downloaded, run the executable file. The program will be installed automatically.
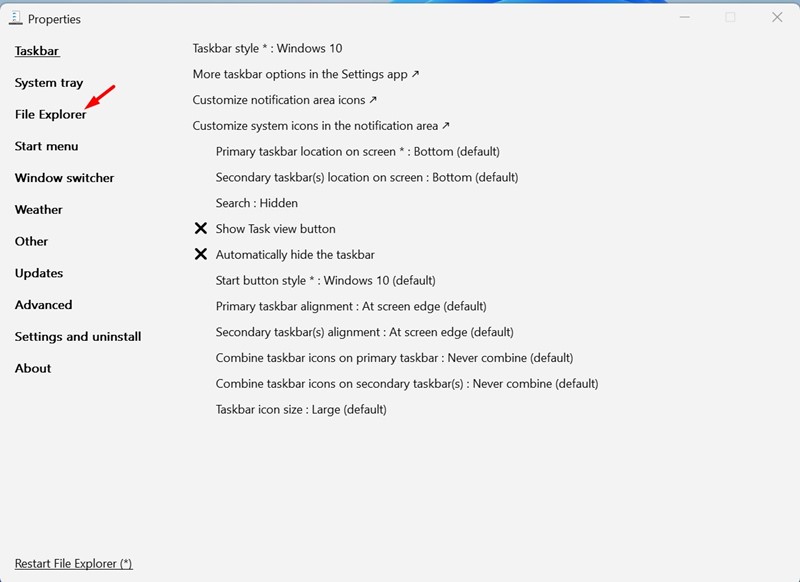
3. Open Windows 11 Search and type Properties. Next, open the Properties (ExplorerPatcher) from the list of best match results.
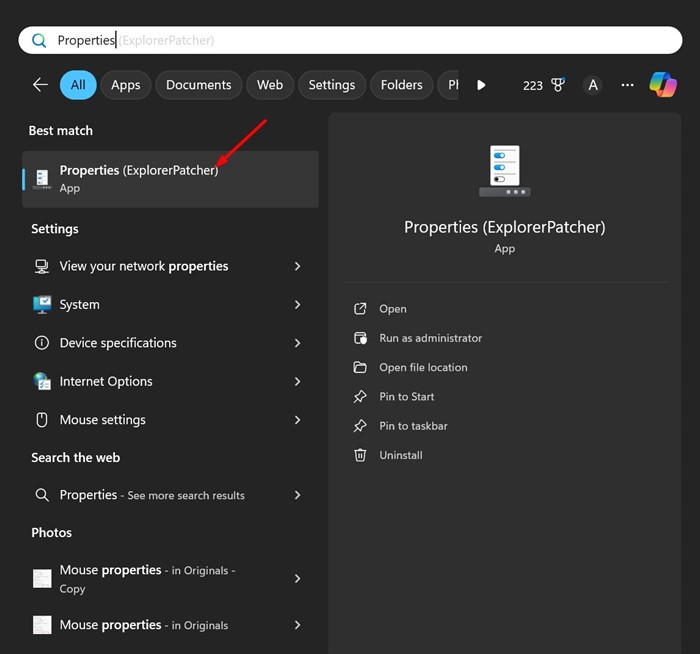

4. On the left side, click File Explorer.

5. Click on the drop-down for Control Interface and select Windows 10 Ribbon.
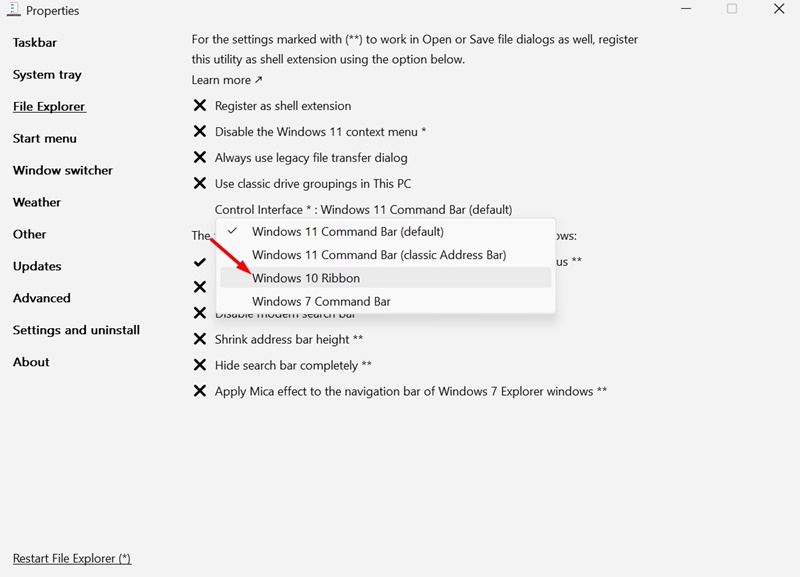

6. After making the changes, open the File Explorer on your PC. You will notice Windows 10 Ribbons instead of a command bar.
These are the three best ways to restore the old Windows 10 File Explorer on Windows 11. Let us know if you need more help on this topic in the comments. Also, if you find this guide helpful, don’t forget to share it with your friends.

