Last Updated on July 18, 2023 by Larious
If you have been using Windows 11 for some time, you might already know many bugs in the operating system. It’s pretty common for Windows 11 users to face problems such as Start Menu not working, internet connectivity issues, system freeze, BSOD errors, audio problems, drive incompatibility problems, and more.
Since Microsoft knows its new operating system is not entirely bug-free, it has introduced several new Troubleshooters on Windows 11. Windows 11 offers more options for troubleshooting problems than Windows 10. For example, there’s a troubleshooter for Windows updates, incoming connections, Program compatibility, etc.
Let’s say you are dealing with problems related to Search and Indexing on Windows 11; you need to run the Search and Indexing troubleshooter. Additionally, Windows 11 introduced a new troubleshooting feature that suggests fixes for problems that are not critical for the functioning of Windows 11. You need to configure this feature, and Microsoft will recommend and run troubleshooters automatically to fix issues on your computer.
Table of Contents
Ways to Run Troubleshooter in Windows 11 To Fix Various Problems
So, if you are dealing with any specific problem on Windows 11 and looking for ways to fix it, you have landed on the right webpage. This article will share a step-by-step guide on how to run troubleshooter in Windows 11 to resolve various problems.
Manage Troubleshoot Settings
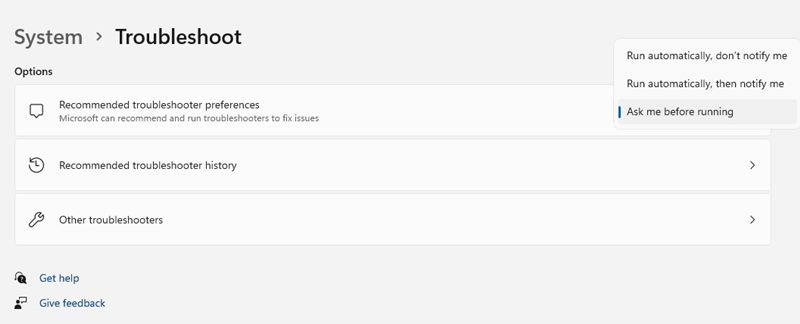
If you want Microsoft to recommend and run troubleshooters automatically to fix issues on your Windows 11 PC, you must configure the Troubleshooter preference. Here’s how you can do it.
1. First, click on Windows 11 Search and select Settings.
2. On the Settings app, click on the System tab as shown below.

3. On the right, click on the Troubleshoot option as shown below.

4. click on the drop-down menu behind Recommended troubleshooter preference setting.

5. From the drop-down, select the option that best suits your needs.
Run Troubleshoot on Windows 11 (Manual)
If you wish to fix specific problems on Windows 11, you need to manually pick and run a troubleshooter related to the problem. Here’s how to run various troubleshooters on Windows 11.
1. First, click the Windows 11 Start button and select Settings.

2. On the Settings app, switch to the System tab, as shown in the screenshot below.

3. On the right pane, scroll down and tap the Troubleshoot option, as shown below.

4. On the next screen, click on Other troubleshooters.

5. Depending on your problem, you need to click on the Run button behind the matching troubleshooter type to fix problems.
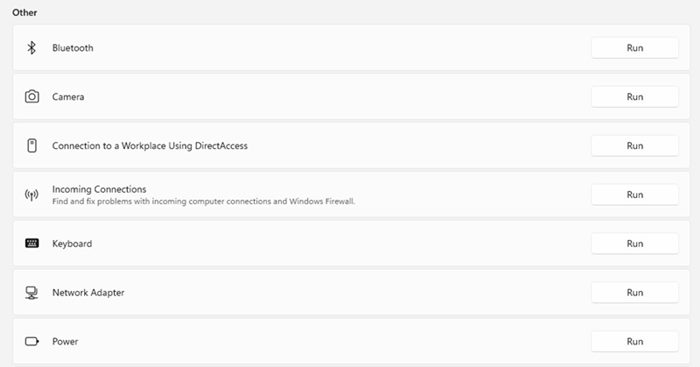
That’s it! You are done. Now you need to follow the on-screen instructions to fix the problem.
Run Windows Troubleshooter from Command Line
You can also use the command line utility of Windows 11 to run the Hardware and device troubleshooter. The Hardware and Devices troubleshooter is not accessible from the Settings app; hence, you must rely on the CMD to run it. Here’s how you can find and fix problems with devices and hardware in Windows 11.
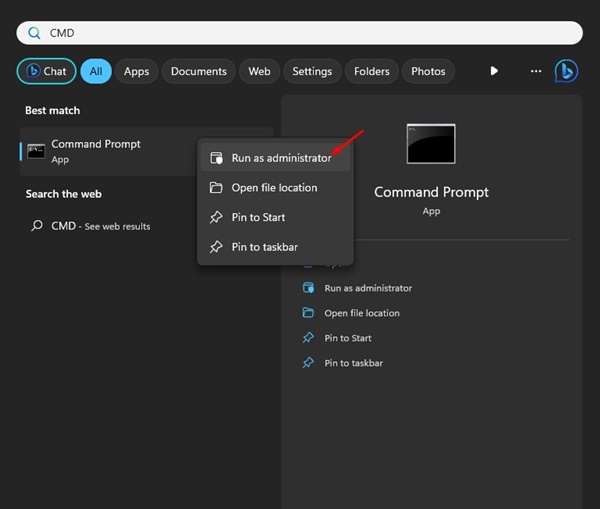
1. Click on Windows Search and type CMD. Right-click on the CMD and select Run as administrator.
2. When the Command Prompt opens, type the command and press Enter.
msdt.exe -id DeviceDiagnostic
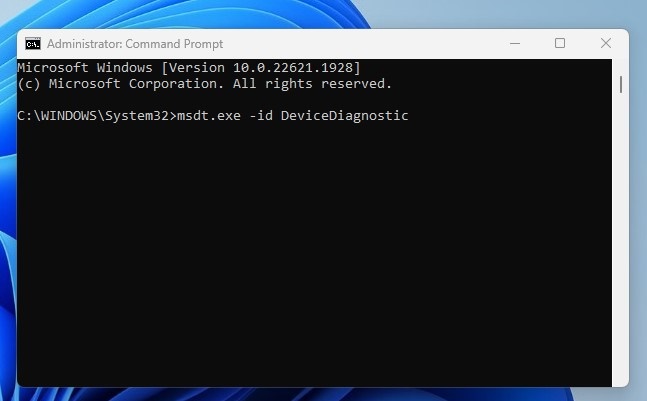
3. This will immediately launch your PC’s Hardware and Device Troubleshooter. Simply click on the Next button.
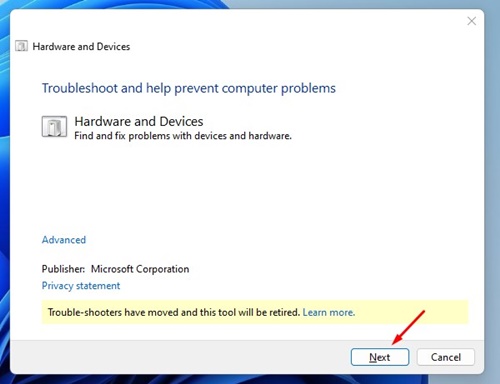
That’s it! Now you only need to follow the on-screen instructions to complete the troubleshooting process. This will possibly fix issues with your devices and hardware.
List of all Available Troubleshooters on Windows 11
Here we have shared a list of all Troubleshooters provided by Microsoft in the Windows 11 operating system. Check out the list.
- Internet Connection
- Playing Audio
- Printer
- Windows Update
- Bluetooth
- Camera
- Connection to a Workplace Using DirectAccess
- Incoming Connections
- Keyboard
- Network Adapter
- Power
- Program Compatibility Troubleshooter
- Recording Audio
- Search and Indexing
- Shared Folders
- Video Playback
- Windows Store Apps
This is the list of all available troubleshooters on Windows 11. You need to run the one that relates to your problem.
It’s pretty easy to run Troubleshooter in Windows 11 operating system. I hope this article helped you! Please share it with your friends also. If you have any doubts, let us know in the comment box below.

