Last Updated on October 3, 2019 by Larious
If you own a MacBook, iPhone, or iPad or any Apple device then there is the least probability that you know about the AirDrop application on your device. Even if you know about the app most of them do not use it. Basically, AirDrop is an application which is used for fast transfer of photos, videos, documents. It uses wi-fi and Bluetooth to make a peer-to-peer network between the devices. The devices have to be close in order to send and receive data among them.Now you know what AirDrop does. Check out the below section to know about the process of sending files from a Mac to an iPhone or iPad using AirDrop.
Table of Contents
Step 1: Turn On AirDrop on iPhone or iPad
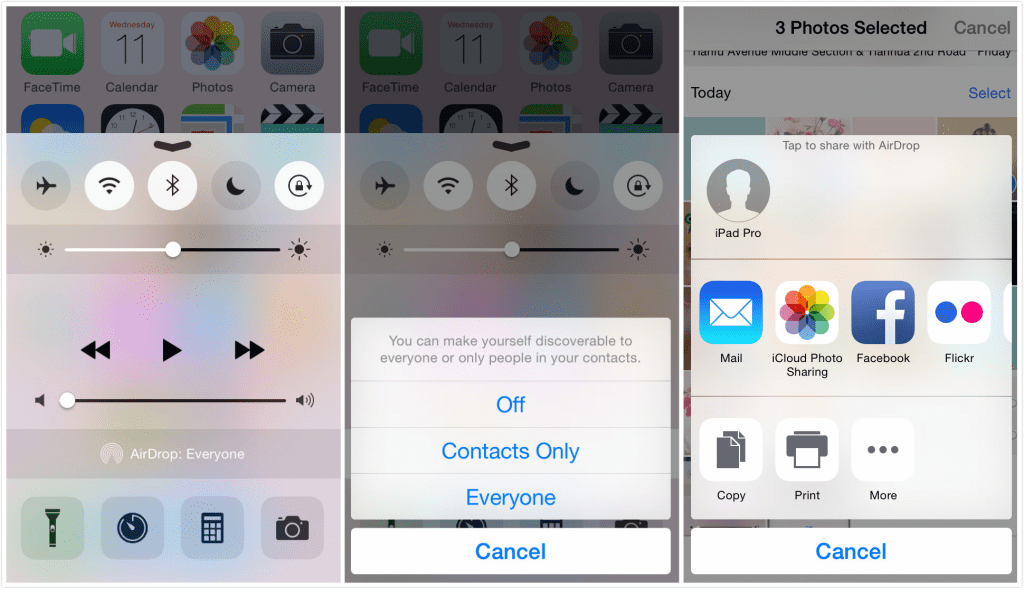
- Tap the Control Center on your iPhone or iPad
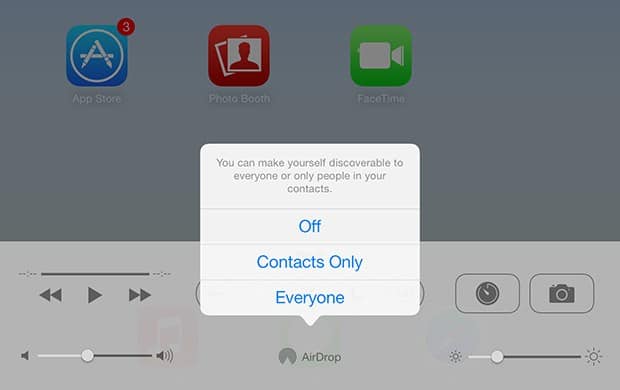
- Now tap the AirDrop icon.

- Choose Contacts Only or everyone depending upon the device which sends the data.
- Now the Airdrop icon turns blue indicating that it is enabled.

Step 2: Send Files from Mac Using AirDrop
- Open Finder on Mac and click on the AirDrop from the list of options in the sidebar.
- You can find the list of devices that are visible within the range.
- Open another Finder window and locate the files that are to be sent.
- Now drag and drop the files on the device to which the files have to be sent.
Step 3: Access The Data on iPhone or iPad
If the files sent are images or videos then they will be stored in Camera Roll in the gallery. If the files are any documents then a popup window appears asking to choose the app to open the files with. You can even save those files to iCloud Drive.
Step 4: Turn Off AirDrop
After sending and receiving of data is done, turn off the AirDrop because there might be a chance that you can receive data from other devices which are within the range of proximity without your permission if you choose everyone while enabling the AirDrop feature.
As AirDrop uses wi-fi for making a connection, fast transfer of data between the devices occurs. Use this feature for fast and secure transfer of data.

