Last Updated on January 26, 2025 by Larious
Even if we leave behind the AI features, Windows 11 is more advanced than you think. It includes several grammar features to help you write easily.
One of the most interesting free features of Windows 11’s Notepad is the Spell Check and Autocorrect. Both of this feature can highlight misspelled words and autocorrect typos.
So, if you write and use Notepad on Windows 11, here’s how to turn on the Spell Check and autocorrect feature.
Table of Contents
Spell Check & Autocorrect in Notepad
The Spell Check & Autocorrect feature is available on the latest version of the Notepad app for Windows 11.
Microsoft rolled out these features in March 2024, but everyone started to receive them later in the previous year.
If you cannot use the Spell Check and Autocorrect feature, you either need to update the Notepad app or install the latest version of Windows.
How to Turn On Spell Check & Autocorrect in Notepad
Make sure you’re using the latest version of Windows 11. Then, follow these simple steps.
1. Open Windows Search (Windows + S) and type Notepad.
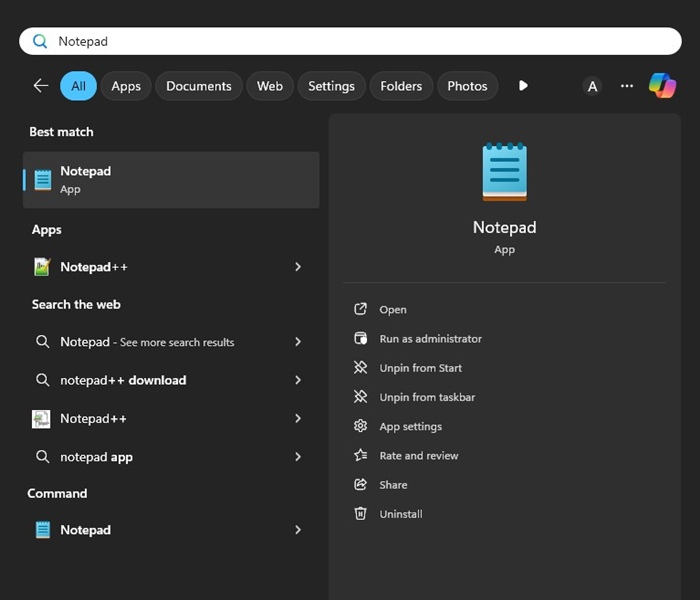

2. Next, open the Notepad app from the Best Match results.
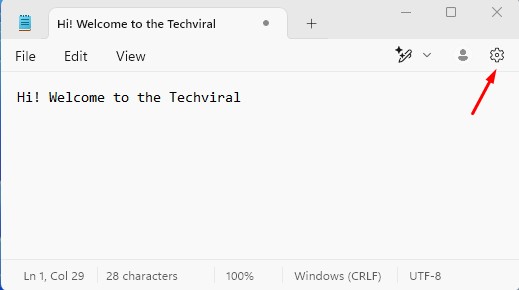
3. When the Notepad app opens, tap the Settings gear icon at the top right corner.

4. On the next screen, scroll down to the Spelling section.
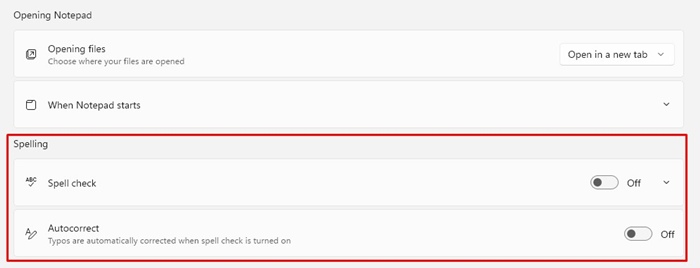

5. Turn on the toggle next to Spell Check and Autocorrect.
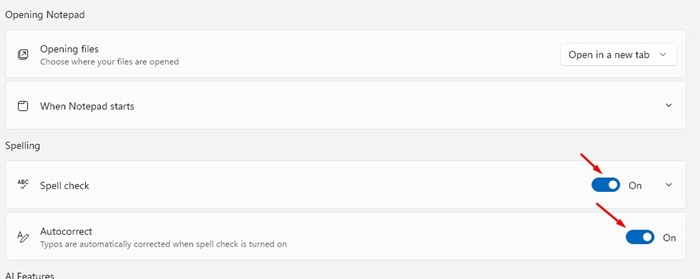

Enable the Spell Checker and Autocorrect (System Level)
Windows 11 also hides a spell checker and Autocorrect feature on the Settings. If you enable the feature, the system will highlight misspelled words and autocorrect typos on any application. Here’s how to enable it.
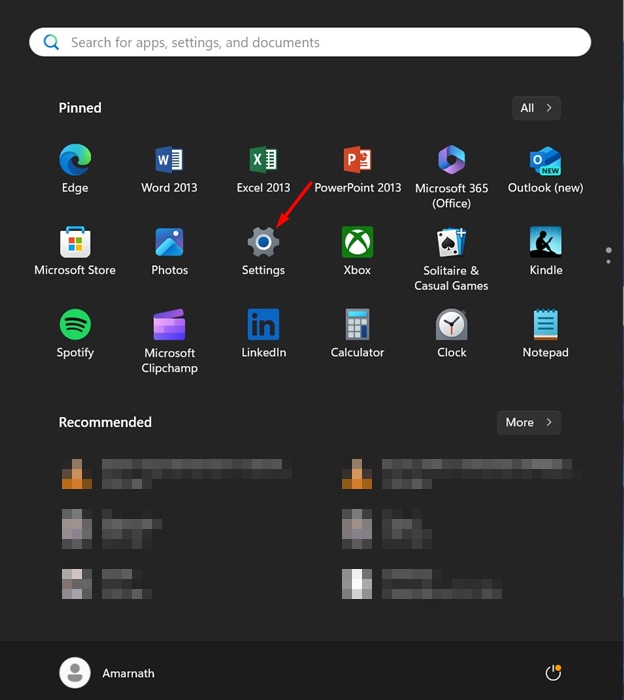
1. Launch the Settings app on your Windows 11.

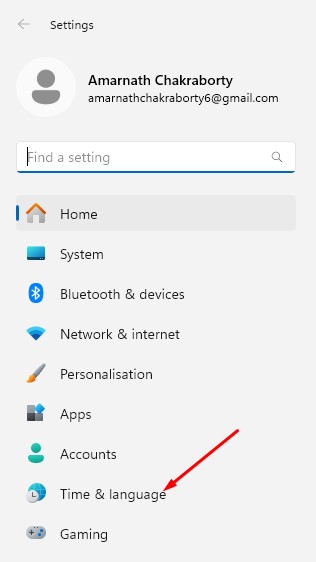
2. On the Settings, switch to the Time & Language.

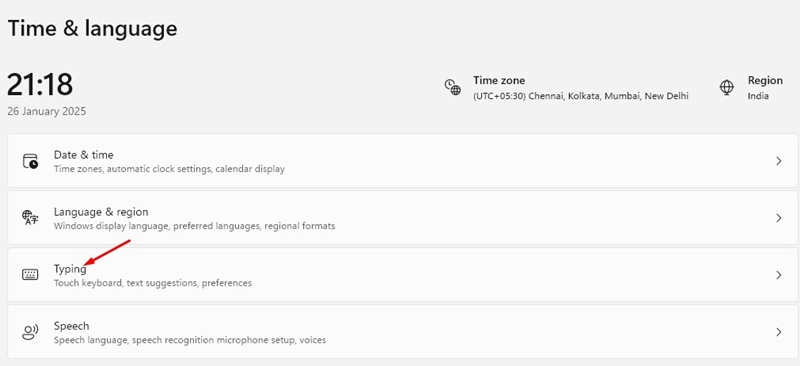
3. On the right side, click Typing.

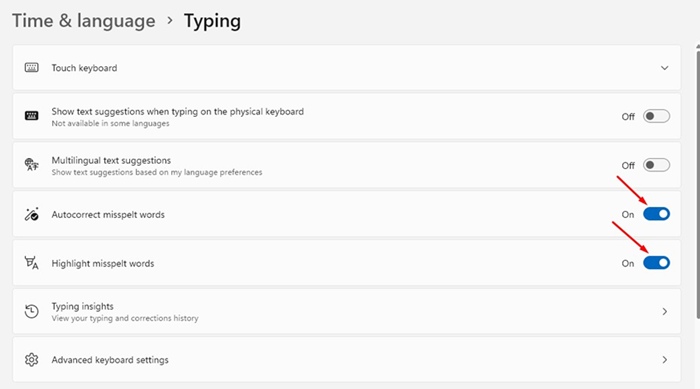
4. On the right side, turn on the toggle next to Autocorrect misspelled words and Highlight misspelled words.

This article explains how to turn on Spell Check & Autocorrect in Notepad and Windows 11. Let us know if you need more help on this topic in the comments. Also, if you find this guide helpful, don’t forget to share it with your friends.

