Last Updated on October 27, 2024 by Larious
We all hate ads, and they are difficult to get rid of. Yes, you can use Adblocker browsers on your Android to browse the web without ads. But what about the ads that you see as you use different apps?
To get rid of system level ads on an Android phone, you will have to setup AdGuard DNS on your Android phone. So, how do you set up AdGuard SNS on Android? Let’s know about it in detail.
Table of Contents
What is AdGuard DNS?
AdGuard DNS is a public DNS server that offers ad-blocking and privacy protection features.
The DNS server works by filtering out requests for known advertising, tracking, and malware domains at the DNS Level.
This simply means that if you set up AdGuard DNS on your phone, you will see fewer ads as you use different apps.
How to use AdGuard DNS on Android?
If your phone runs Android 9 or above, you can use the Private DNS feature to set up AdGuard DNS on your Android phone. Here’s what you need to do.
1. To get started, launch the Settings app on your Android phone.
2. When the Settings app opens, tap on the Connection & sharing.
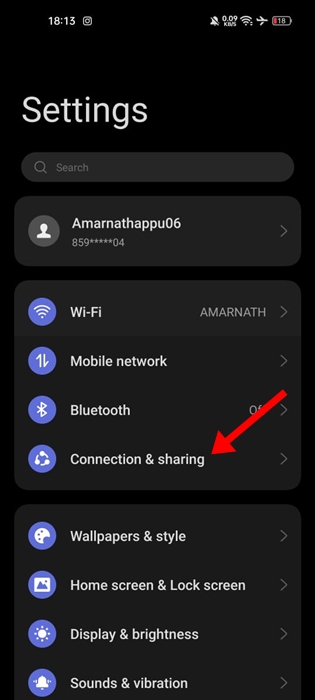

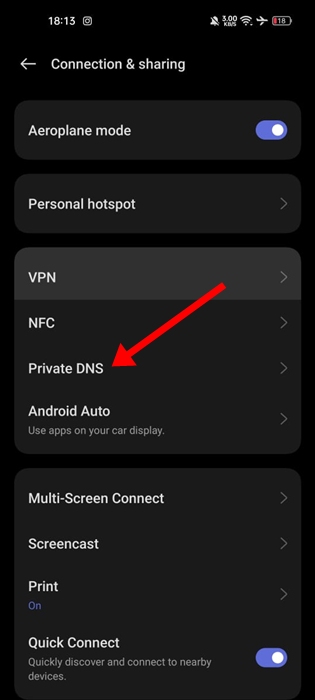
3. On the Connection & Sharing, tap Private DNS.

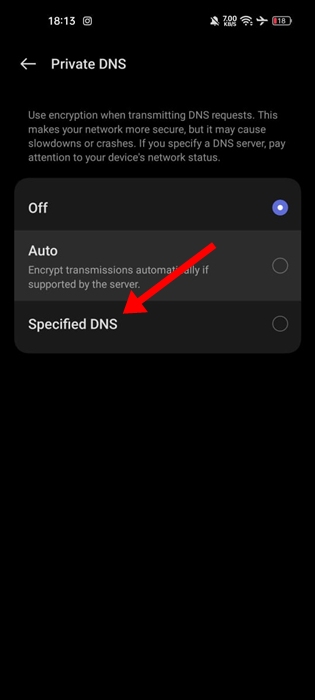
4. On the Private DNS, select Specified DNS.

5. Next, tap the DNS Address.
6. Enter dns.adguard-dns.com and tap Save.
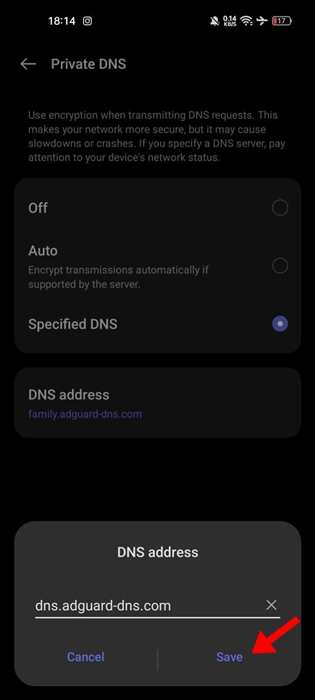

Once done, your phone will disconnect from the WiFi network to switch the DNS. This will set Adguard DNS on your Android phone; now, you will see fewer ads.
How to Use AdGuard DNS on Older Android Smartphone
If you have an older Android phone, you need to use third-party apps to switch to AdGuard DNS. Here’s what you need to do.
1. Download & install the DNS Switch app on your Android phone from the Google Play Store.
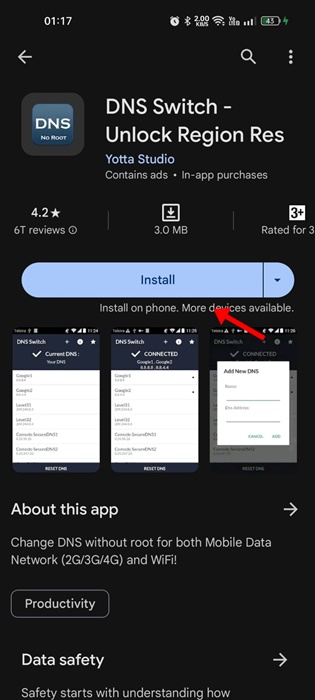

2. Once installed, open the app on your phone.
3. Now, you will be able to see all DNS presets. Find the AdGuard1 and AdGuard2.
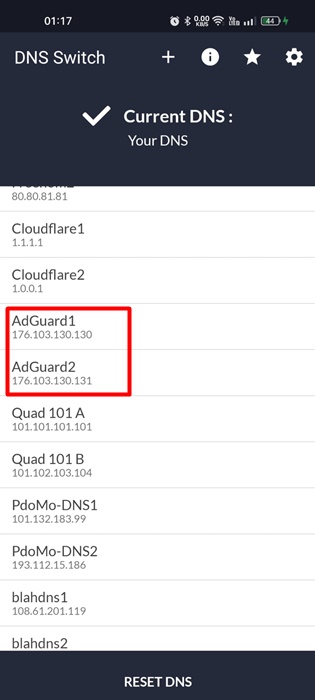

4. Select AdGuard1. You will be asked to grant permission to create a VPN connection; tap Allow.
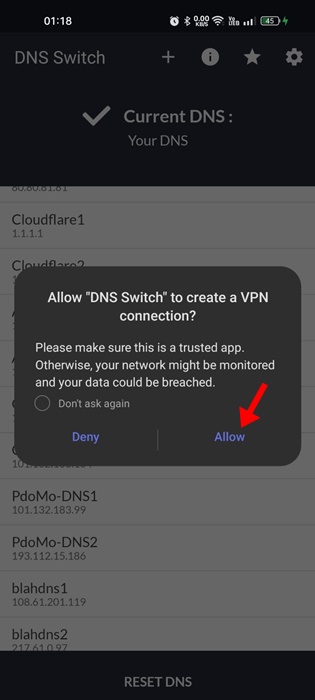

5. The app will create a VPN connection to activate the AdGuard DNS.
Apart from blocking ads and trackers, the AdGuard DNS can even block the adult contents, enable safe search and safe mode on your phone.
To do this, you will need to set up AdGuard’s Family Protection server (family.adguard-dns.com) on your phone.
This article explains how to use AdGuard DNS on an Android phone. You can set up this public DNS server to reduce the number of ads that appear on your phone. If you need more help on this topic, let us know in the comments.

