Last Updated on January 29, 2025 by Larious
Nearby Sharing is already part of Windows 11, but many users are unaware of it. Recently, many users have also messaged us asking how to use it.
So, if you are a Windows 11 user looking for ways to share files faster, continue reading the article. You must enable the Nearby Sharing feature before using it.
1. Make sure to connect your primary device to a WiFi network.
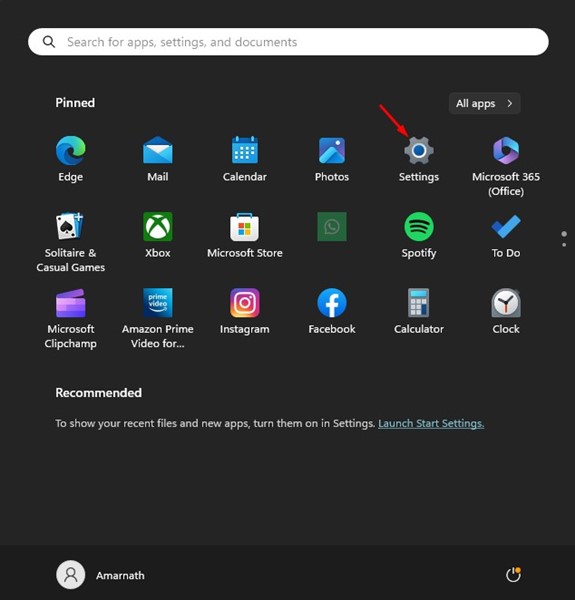
2. Now, on your Primary PC, open the Settings app.

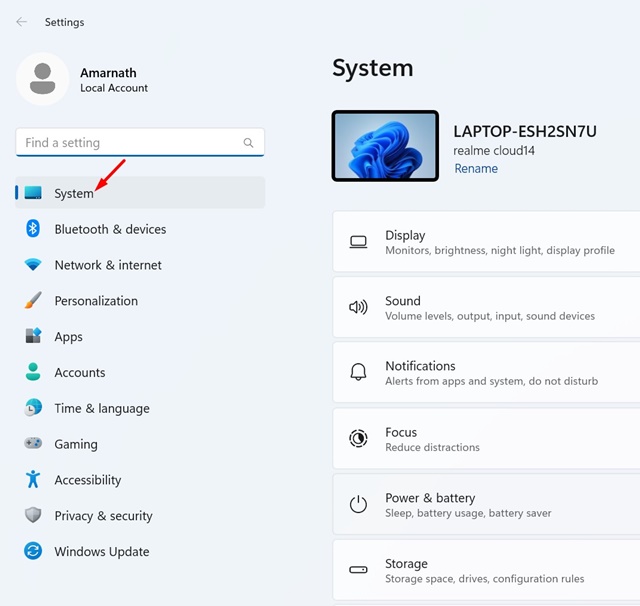
3. On the Settings, switch to the System tab.

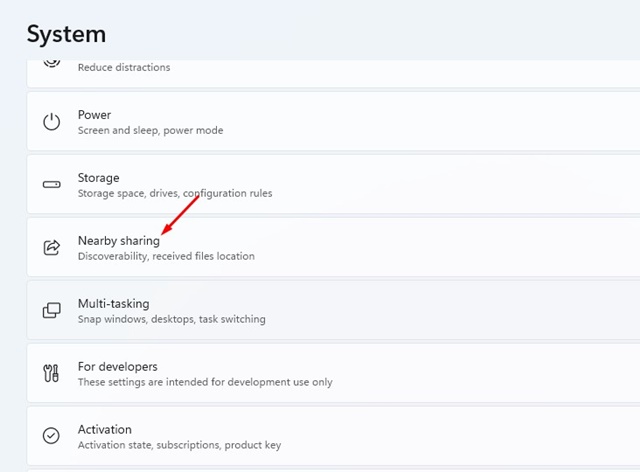
4. On the right side, click on the Nearby Sharing.

5. You will find three options: Off, My Devices Only, and Everyone Nearby.
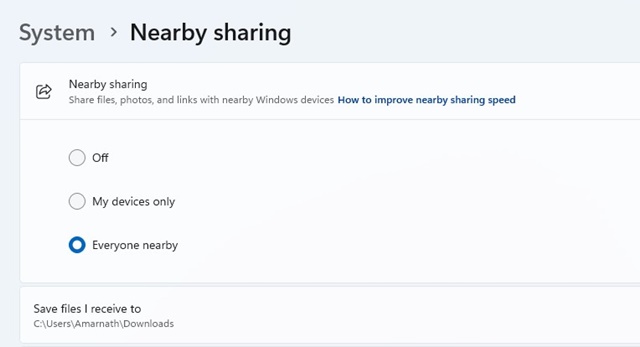

My Devices Only: Select this option to share files with devices linked to your Microsoft Account.
Everyone Nearby: Select this if you want to share files with devices regardless of the account used.
Once selected, you can share files with the Nearby Sharing feature on Windows 11. Depending on the option you choose, you can also share files over Wi-Fi or Bluetooth.
Important: On your secondary PC (the one that will receive the files), enable the Nearby Sharing feature by following the same steps.
Table of Contents
Now that you have enabled the feature, the Nearby Sharing feature on Windows 11 is ready to use. You can go ahead and share a file or webpage directly. Here’s how to share a file or a webpage with Nearby Sharing on a Windows 11 computer.
The steps to share a file via Nearby Sharing on Windows 11 slightly differ from those to share a webpage. Here’s how to use this feature.
1. Open your file explorer on Windows 11. Now, navigate to the file that you want to share.
2. Select the file, right-click on it, and click the Share icon.


3. If you have followed all steps carefully, you will see your secondary PC on Nearby Sharing option in the Windows 11 Share menu.
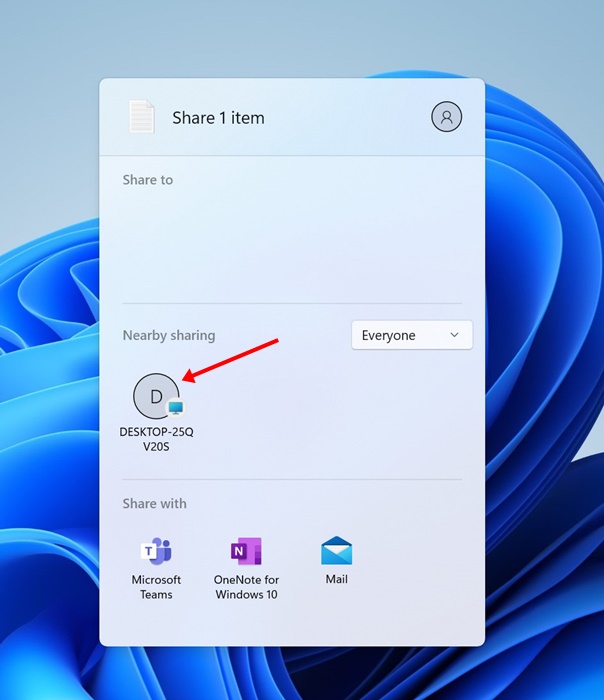

4. Click on your computer name to share the file. On the computer that’s receiving the file, select the Save option.
Sharing a webpage is also possible with the help of Nearby Sharing on Windows 11. To do so, you need to use the Microsoft Edge browser. Here’s what you need to do.
1. Open the Microsoft Edge browser. Now, visit the page that you want to share.
2. Right-click anywhere on a space on the page and choose Share.
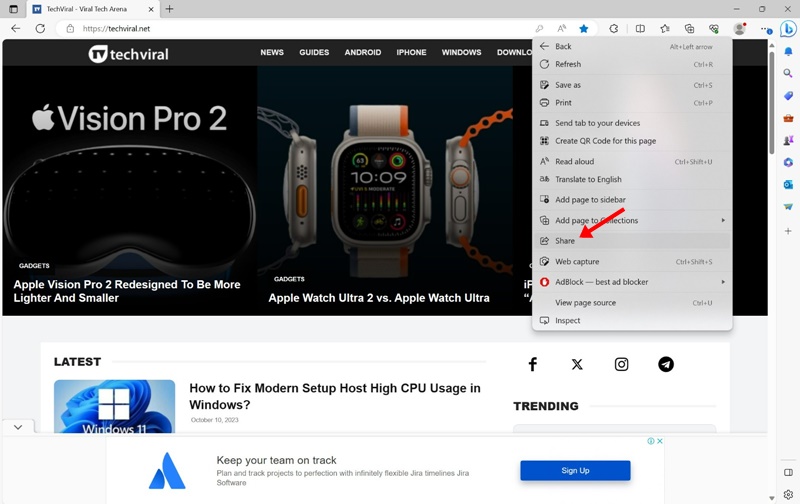

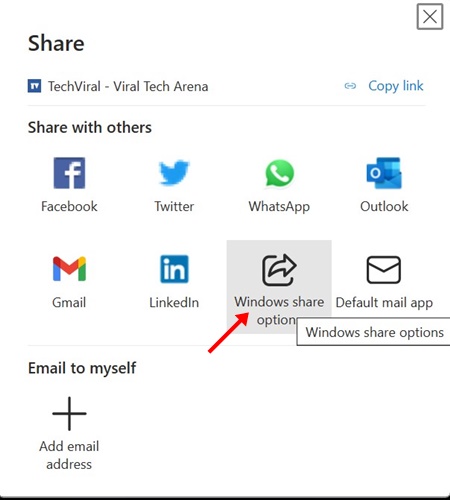
3. On the Microsoft Edge’s Share menu, select Windows Share options.

4. This will open Windows 11’s Share Menu. In the Nearby Share menu, select your device.
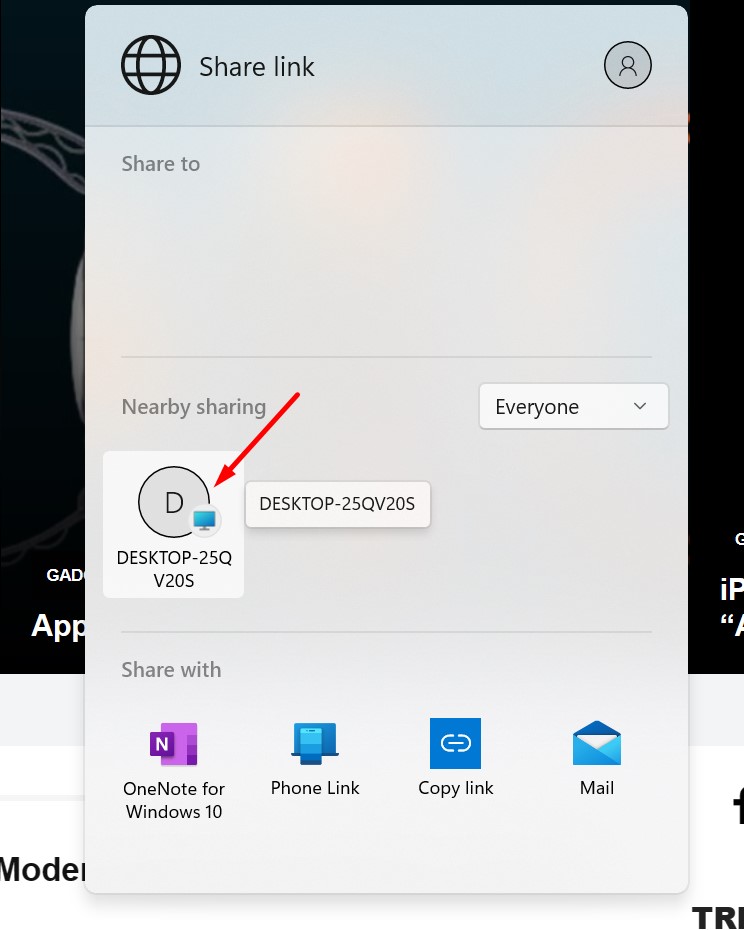

5. On the PC receiving the link, click the Open button.
The webpage sharing will be successful. You can follow the same steps to share as many web pages as you want between Windows PCs.
This guide explains how to use the Nearby Sharing feature on Windows 11 computers. This is a great feature, and you should fully use it. Let us know if you need more help enabling or using it.

