Last Updated on December 9, 2020 by Larious
TrueCaller is indeed a great Android app that helps you with all your communication needs. The app is top-rated amongst Android users, and it’s the only app that you need to make all your communications safe and efficient.
If you are using an Android smartphone, then the chances are that you might be well aware of the TrueCaller. It’s a caller identification app that tells you who is calling you before picking up the call. The app is mostly used to detect spam or telemarketing calls.
Apart from the Caller ID, TrueCaller has lots of other features. For instance, you can use it to block calls, record calls, etc. Recently, TrueCaller introduced another best feature known as ‘Call Reason.’
Call Reason feature of TrueCaller allows you to let the recipient know why you are calling them. The company has added the ‘Call Reason’ feature in its app to add why you are calling a particular person. If the recipient is using the latest version of TrueCaller, they will know why you are calling.
Also Read: Best Truecaller Alternatives For Android
Steps to Enable & Use the Call Reason Feature On TrueCaller
So, in this article, we are going to share a detailed guide on how to enable and use the Call reason feature of TrueCaller. Let’s check out.
Step 1. First of all, head to the Play Store and update the TrueCaller app.
Step 2. Now open the app and tap on the hamburger menu. Next, tap on the ‘Settings.’
Step 3. On the Settings page, tap on the ‘General’ option.
Step 4. Under the General, you will find a new option, ‘Call Reason.’ You need to enable the toggle for the ‘Choose a reason before calls’ option.
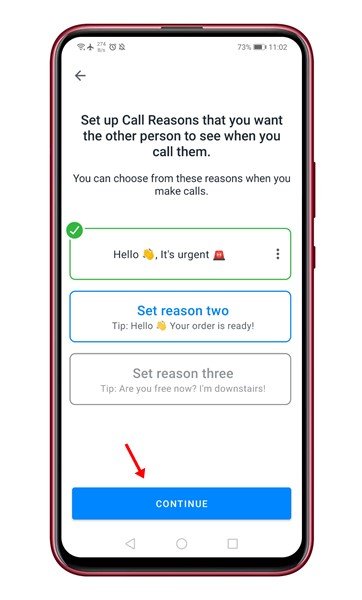
Step 5. On the next page, set up the call reasons that you want the other person to see. Once done, tap on the ‘Continue’ button.
Step 6. You can even edit the pre-defined reasons and add your own reasons. For that, tap on the three-dot menu and select the ‘Edit’ option. Next, type in the call reason and save it.
Step 7. Once done with all the modifications, tap on the ‘Got it’ button to enable the new feature.
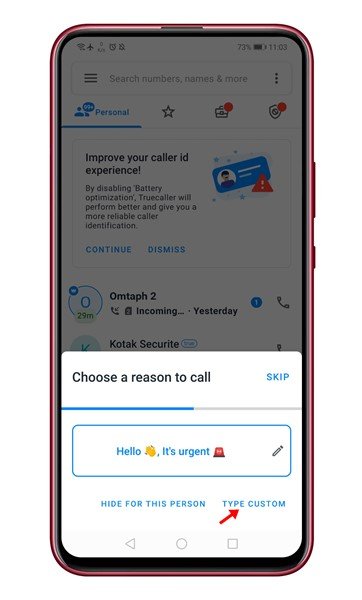
Step 8. Now move the main screen of TrueCaller and place a call. A call reason pop-up will appear. Pick the reason, and the recipient will see the call dialog with the call reason.
That’s it! You are done. This is how you can use the Call Reason feature of TrueCaller.
So, this article is all about how to enable and use the new call reason feature of TrueCaller. I hope this article helped you! Please share it with your friends also. If you have any doubts related to this, let us know in the comment box below.


