Last Updated on May 12, 2022 by Larious
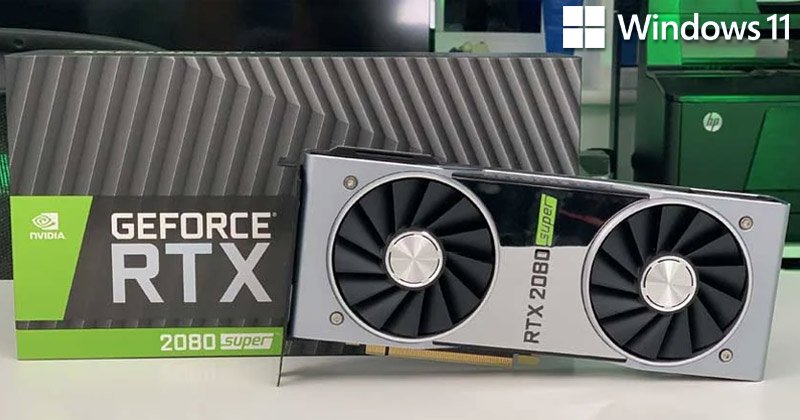
If you are a PC gamer or a video editor, you might already know the importance of a graphics card. A graphic card, often known as a video card or display card, is a hardware component that handles everything from drawing your desktop to rendering demanding graphics and video games.
Graphic Card or GPU (Graphical Processing Unit) is an equally important hardware component as RAM and Processor, and knowing the graphic card details of your PC can be very useful.
For example, knowing the graphics card (GPU) used in your Windows 11 PC can help you decide whether you can run certain games or if your device can handle premium video editing software.
Table of Contents
5 Best Ways to Check the Graphics Card (GPU) in Windows 11
On Windows 11, it’s relatively easy to check the Graphic Card details. So, if you don’t know what graphics card (GPU) is installed on your Windows 11 PC, you can follow these methods to identify your graphics card. Let’s get started.
1) Check Your Graphics Card via Settings
We will use the Windows 11 Settings app to check the graphic card installed on the device. Here’s what you need to do.
1. First of all, click on the Windows 11 Start menu and select Settings.


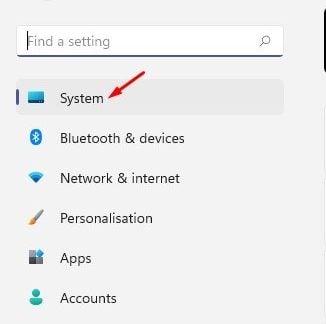
2. On the Settings app, click on the System tab on the left pane.

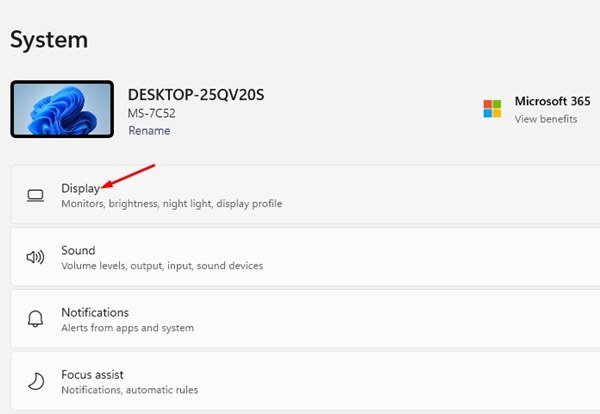
3. On the right, click on the Display.

4. Next, scroll down and click on the Advanced Display option.


5. Under the Display information, you will see your graphic card.


That’s it! You are done. This is how you can check your graphics card in Windows 11 via Settings.
2) Check Graphics Card Details using the System Information Tool
We will use the System Information tool to identify the Graphics card used in Windows 11 device. Here are some of the simple steps you need to follow.
1. First of all, press the Windows Key + R button on your keyboard. This will open the RUN dialog box, type in msinfo32, and hit the Enter button.


2. On the System information Window, expand the Components section.


3. Next, select Display. You need to check the Name section to know your graphics card on the right.
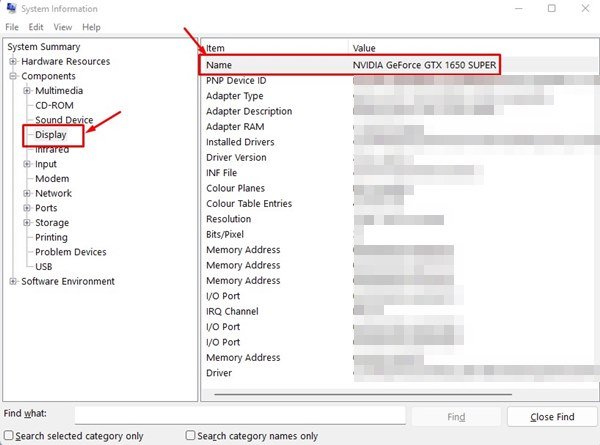

That’s it! You are done. This is how you can use the System Information tool to check your graphics card in Windows 11.
3) Check Your Graphics Card via Task Manager
You can even use the Task Manager to check the graphics card on Windows 11. You need to implement some of the simple steps we have shared.
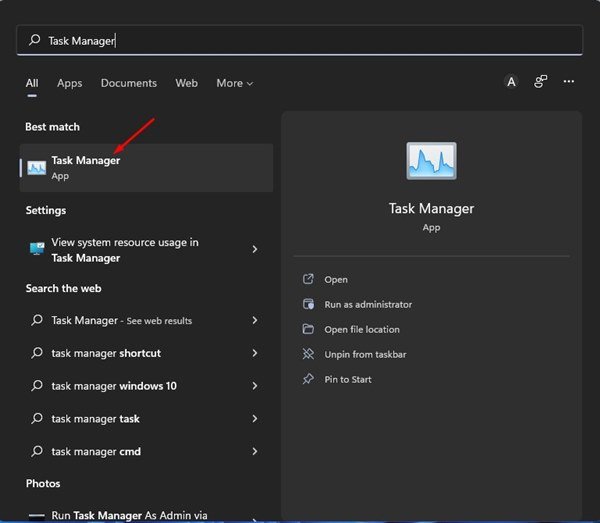
1. First, click on the Windows 11 search and type in Task Manager. Next, open the Task Manager app from the list.

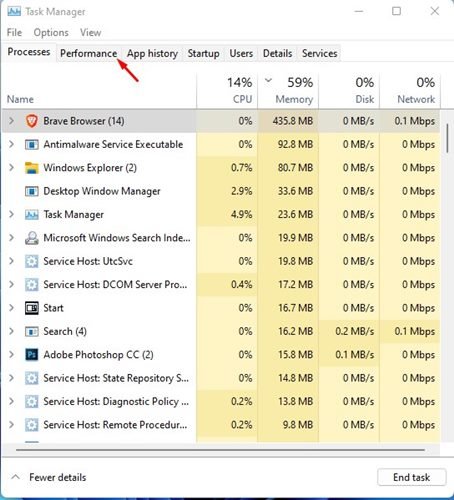
2. On the Task Manager, switch to the Performance tab.

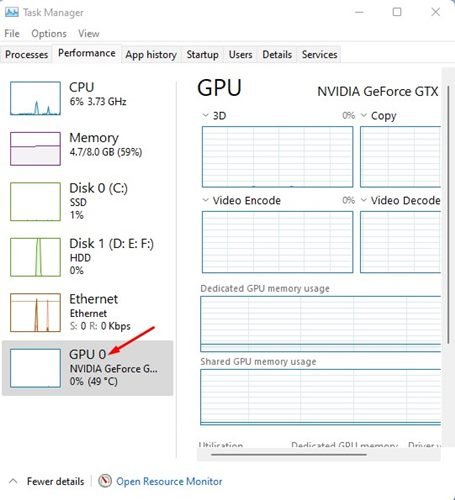
3. Select the GPU unit on the right of the Performance tab.

4. On the right, you will find your Graphics card name.
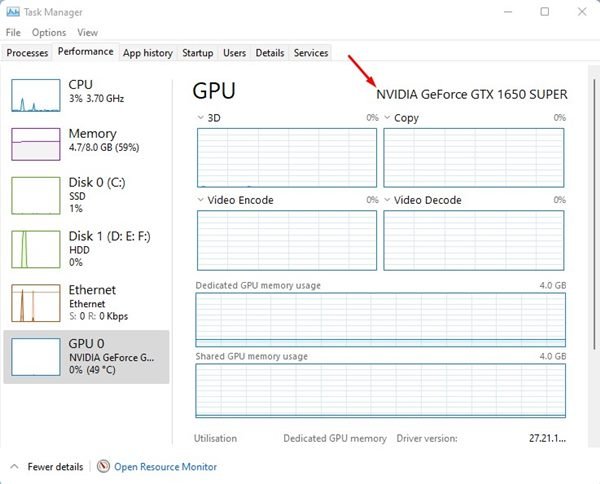

That’s it! You are done. This is how you can check your graphics card in Windows 11 via Task Manager.
4) Check Your Graphics Card via Device Manager
We will use Windows 11’s Device Manager to find the graphics card (GPU) unit installed. Here’s how you can find your graphics card mode via Device Manager.
1. First, click on the Windows 11 search and type in Device Manager. Next, open the Device Manager app from the list.


2. On the Device Manager, expand the Display adapters option as shown below.


3. This will expand the Display Adapters menu and reveal the graphic card used in your device.


4. If you want to find more details about the Display adapter, just double click on the Graphics card name.
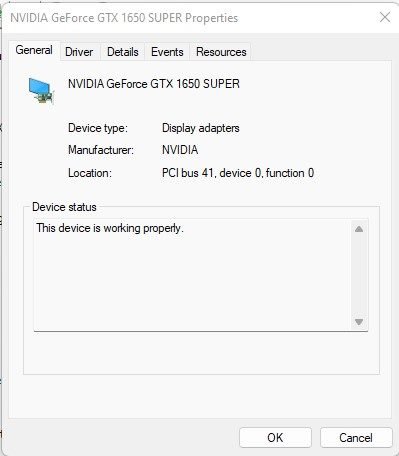

That’s it! This is how you can find the Graphics card name installed on your Windows 11 device via Device Manager.
5) Check Graphics Card details via DirectX Diagnostic Tool
DirectX Diagnostic Tool is a utility that reports detailed information about the DirectX components and drives installed on your Windows 11 device. You can use it to check your graphics card as well. Here’s how to use the tool.
1. First, press the Windows Key + R button to open the RUN dialog box. On the RUN Dialog box, type in dxdiag and hit the Enter button.
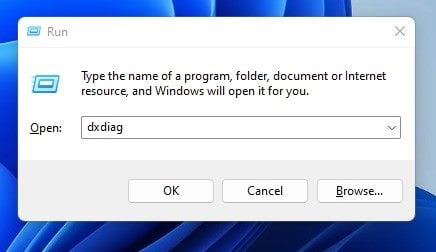

2. Now, give the tool a few seconds to fetch the driver information. Once fetched, switch to the Display tab as shown below.


3. The display section will list all details of the GPU you will probably need. This includes the GPU name, Manufacturer, Total Memory, Display Mode, Driver version, and more.
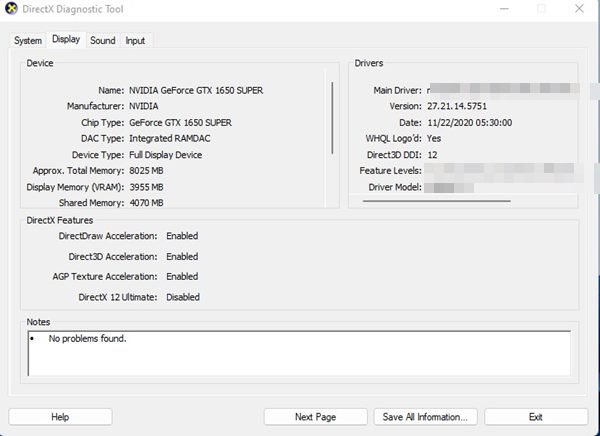

That’s it! This is how you can use the DirectX Diagnostic tool in Windows 11 to fetch the Graphics Card (GPU) details. Direct X Diagnostic tool in Windows can tell you other information, such as the total RAM, Operating system used, Build number, Processor details, and more.
Also Read: How to Check RAM Information on Windows 11
So, that’s all about checking your Graphics Card in Windows 11. Not only the Graphics card name, but these methods would also help you fetch all GPU-related information that you will ever need. If you know any other ways to find the GPU details, let us know.

