Last Updated on October 21, 2020 by Larious
Well, Facebook is right now the most used social networking platform. The platform offers messaging, voice/video calls, photos/video sharing features. The great thing about Facebook is that it also has apps for Android and iOS. Also, Facebook has a standalone mobile app for messaging known as ‘Messenger’
With Facebook Messenger, you can exchange text messages, send and receive videos, etc. Not many would know, but Facebook Messenger also lets you change your friend’s name that you see on the platform. Facebook Messenger enables you to set a nickname for your close friends and family members.
The feature has been around for a long time now, but many users still don’t know about this. Therefore, we have decided to share a working method to set a nickname on Facebook Messenger in 2020.
Steps to Assign Nicknames to Friends in Facebook Messenger
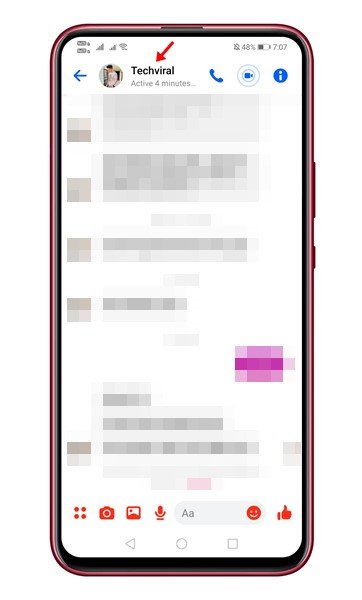
With this method, you can easily set a nickname for your close friends. The Nicknames will appear at the top of the thread in one-on-one chat. So, let’s check out the step-by-step guide.
Step 1. First of all, head to the Google Play Store and update the Facebook Messenger app.
Step 2. Once done, open Facebook Messenger and select the contact you want to set a nickname.
Step 3. Tap on the Profile icon.
Step 4. On the next screen, tap on the ‘Nicknames’ option.
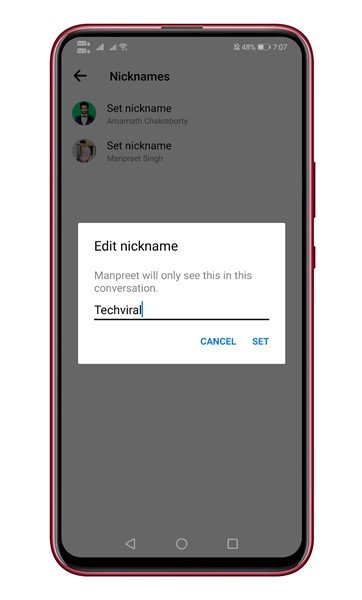
Step 6. Now you will see a screen like below. Simply tap on the ‘Set Nickname’ button.
Step 7. Now type in the nickname and tap on ‘Set’
That’s it! You are done. Now instead of the full name, you will see the nickname of your friend in one-on-one chat. However, please note that the contact will be able to see the name change in the chat history.
So, this article is all about how to set a nickname on Facebook Messenger. If you have any doubts related to this, let us know in the comment box below. I hope this article helped you! Please share it with your friends also.


