Last Updated on November 13, 2020 by Larious
Well, Windows 10 is definitely the best operating system available for desktop computers & laptops. Compared to all other desktop operating systems, Windows 10 offers more features and options. Users can unlock even more features by editing the registry.
There’s a lot that can be achieved by editing the registry file. Over the years, the registry editor has served as a common way to change the inaccessible settings on Windows 10. However, registry editing is not everyone’s cup of tea. A single mistake while editing the registry file can invite lots of troubles.
We recently found an exciting free tool that helps you modify the registry settings in just a few clicks. The free tool is great for power users who want to access and enable the hidden feature of Windows 10.
Also Read: How to Hide & Lock Photos in Windows 10
Steps to Enable the Hidden Features of Windows 10
So, in this article, we are going to share a detailed guide on how to enable the hidden features of Windows 10 in 2020. Let’s check out.
To unlock the hidden features, we will use a free tool named ‘Hidden Windows 10 features’. The tool is free for personal use, and it offers lots of options to enable the hidden features of Windows 10. Here’s how to use the tool.
Step 1. First of all, visit this link and download the Hidden Windows 10 Features software.
Step 2. Once downloaded, install the tool on your computer.
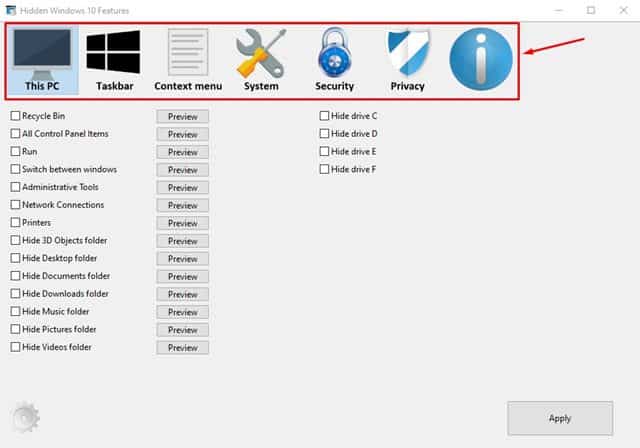
Step 3. Once installed, open Hidden Windows 10 Features, and you will see an interface like below.
Step 4. You will find six options at the top – This PC, TaskBar, Context Menu, System, Security, and Privacy. You need to select the one that you want to customize.
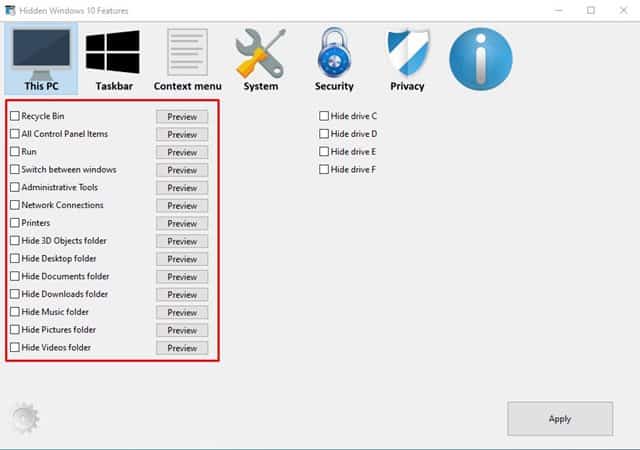
Step 5. For instance, if you want to customize the ‘This PC’, then you will get options to hide drives, show recycle bin in the file explorer, etc.
Step 6. On the Taskbar, you will find options to disable thumbnail live preview, disable the system tray, etc.
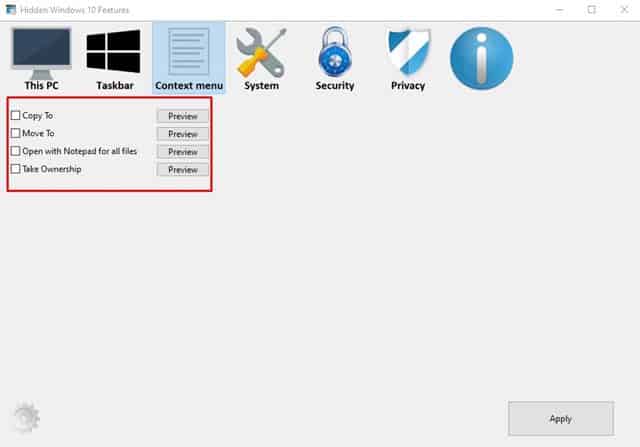
Step 7. The Context menu option enables you to add new items to the right-click menu. For instance, you can add the ‘Copy To’ folder, ‘Move To’ folder, take ownership menu in the context menu.
Step 8. The system panel enables lots of advanced features. With the system settings, you can add the GodMode folder to the desktop, hide the action center, remove OneDrive from file explorer, Disable Cortana, etc.
You just need to go through all of the available settings to explore the capabilities of the tool. It’s a free tool made for power users. However, before making any changes, make sure to use the ‘Preview’ option.
So, this article is all about how to enable the hidden features of Windows 10 computers. I hope this article helped you! Please share it with your friends also.


