Last Updated on June 15, 2024 by Larious
Usually, Windows 11 picks the right color profile for you from a series of defaults. But in rare cases, you may want to install device-specific ICC profiles to get more accurate color management options.
Table of Contents
What is ICC Color Profile?
Generally, we modify the display settings to achieve the image they’re looking for. Minor changes, such as adjusting the brightness a bit, playing with the RGB settings, adjusting the contrast, etc., work well.
However, in rare situations, adjusting the on-screen display doesn’t produce the pleasing image we seek due to some limitations.
This is where the ICC Color Profile comes into play. The International Color Consortium (ICC) profile is one great way to achieve color consistency across different devices.
Since ICC Profiles are the standard benchmark for color management, using these profiles, your softwares can translate colors to make sure what you see on screen is as close as possible to the intended color.
How do you download the ICC Color Profile for your device?
There are various ways to download the ICC Color Profiles for your device, but the most trustworthy source is your display manufacturer’s website.
It’s possible that the brand of monitor you’re using may have its own ICC Profile; hence, it’s always recommended to check your display manufacturer’s website first before diving into third-party sources.
If you can’t find the ICC Profile for your brand of monitor, you can download one from the Internal Color Consortium’s official website.
How do you install an ICC Profile on Windows 11?
If you already have the ICC Profile, it’s time to know how to install it on your PC. Follow the steps we have outlined to install and use ICC Profile on Windows 11.
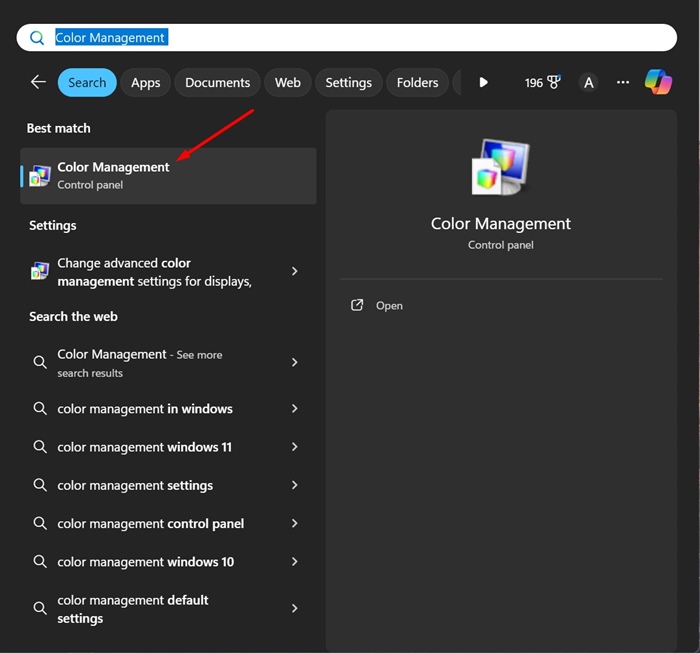
1. Type in Color Management on the Windows 11 Search. Next, open the Color Management app from the list of best match results.
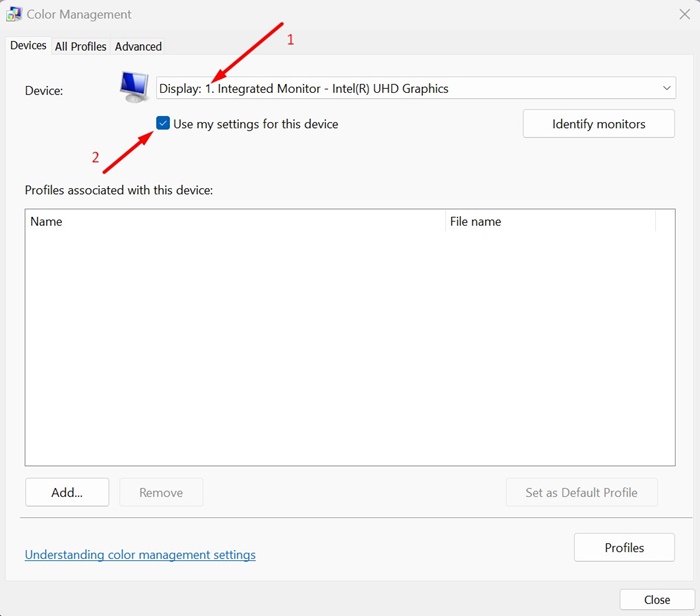
2. On the Color Management window, select your device on the Device dropdown and check the ‘Use my settings for this device’ option.
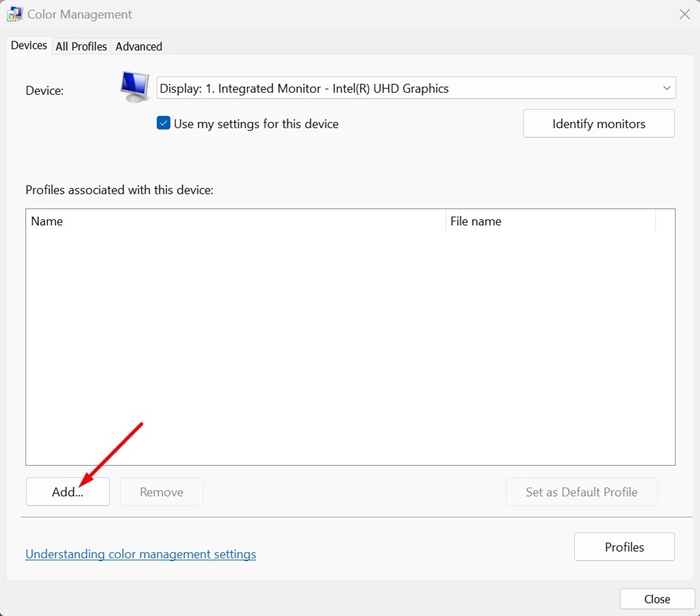
3. At the bottom left corner, click on the Add button.
4. Select a profile from the ICC Profiles section and click OK.

5. If you want to add your own color profile, click on Browse and select your profile.
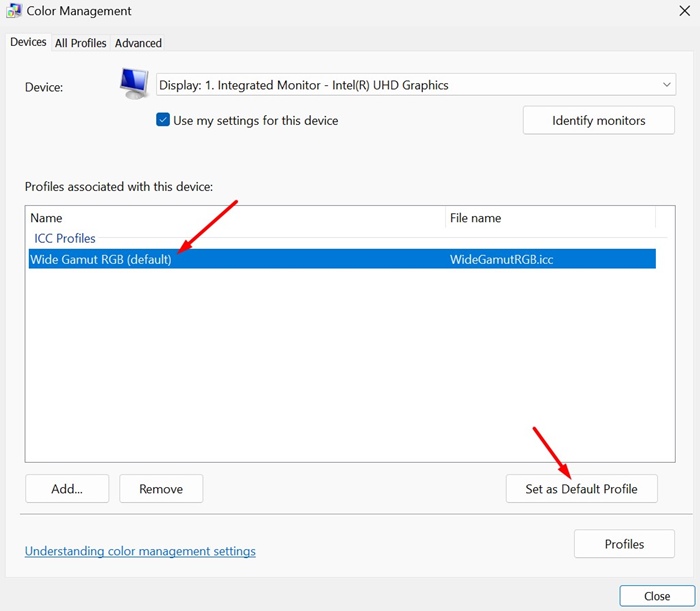
6. Once done, select the ICC Profile you’ve added and click Set as default profile.
How to Reset Color Profiles on Windows 11?
If you encounter problems after switching to the ICC Profile, you can always return to your PC’s default color profile. Here’s how to reset color profiles on Windows 11.
1. Launch the Color Management tool on your Windows 11 PC.
2. Select your display on the Device dropdown.

3. Uncheck the ‘Use my settings for this device’ option.
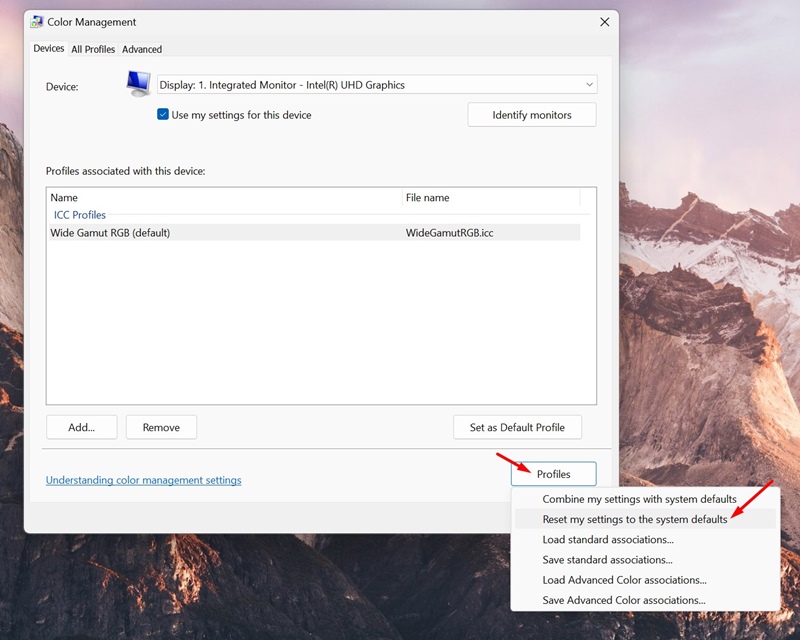
4. Next, click on the Profiles and select Reset my settings to the system defaults.
This guide explains how to install the ICC Profile on a Windows 11 device. If you need more help with this topic, let us know in the comments. Also, if you find this guide helpful, don’t forget to share it with your friends.
