

Last Updated on October 11, 2026 by Larious
While BitLocker is a great security feature, once you unlock a locked drive, you can’t lock it again without a restart. Restarting Windows to lock a protected drive isn’t the best option, especially if you often leave your PC unattended.
BitLocker Manager also doesn’t offer you an option to lock an unlocked drive. Hence, you need to rely on Command Prompt or PowerShell to instantly lock a BitLocker-encrypted drive without restarting your PC.
Table of Contents
1. Lock a BitLocker-Encrypted Drive Using a Bat File
You can create a .bat file for locking a specific Bitlocker encrypted drive on your Windows 11 computer. Here’s what you need to do
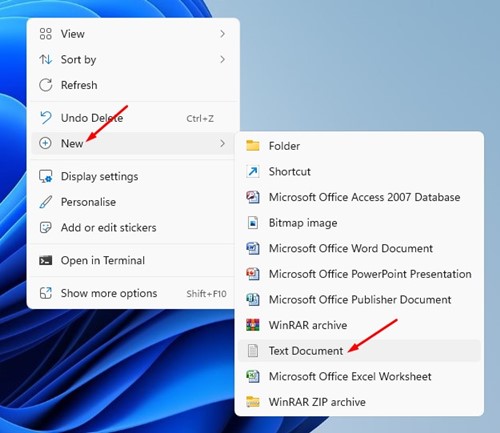
1. Right-click anywhere on your desktop and select New > Text Document.
2. In the Text document, enter manage-bde -lock G:
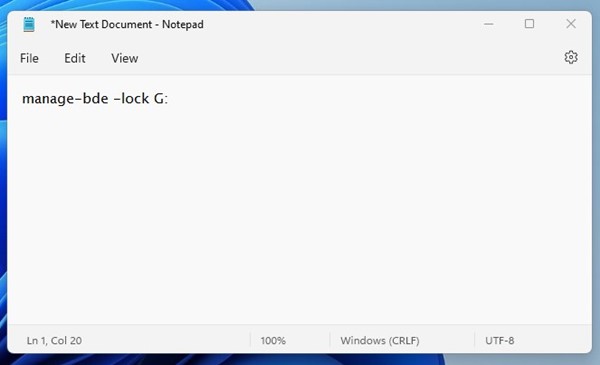
Important: Replace G with the actual drive letter you want to lock.
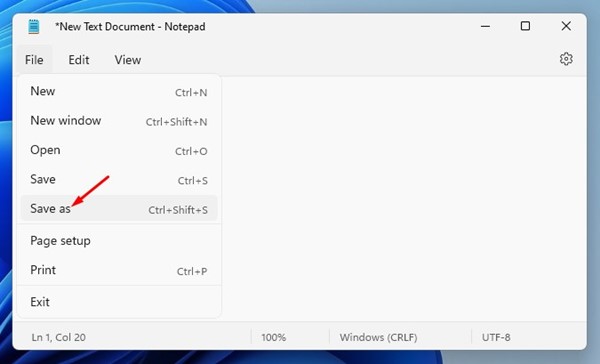
3. Once done, click the File button and select Save As.
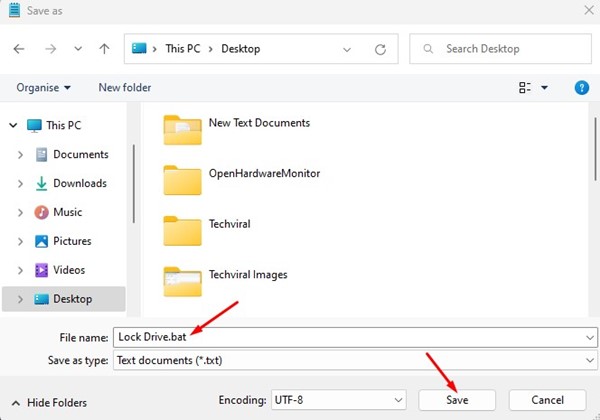
4. Name it Lock Drive.bat and click the Save button next to the file name.
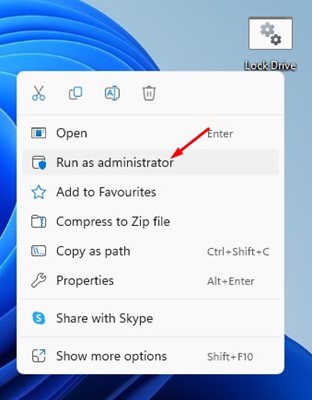
5. Now, if you want to lock an unlocked BitLocker encrypted drive, right-click on the BAT file you’ve created and select Run as administrator.
2. Lock a BitLocker Drive using Command Prompt
You can also use the Command Prompt utility to lock a BitLocker-encrypted drive.
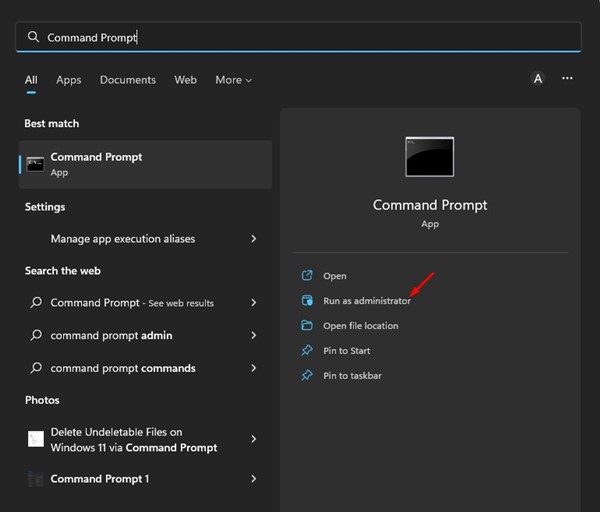
1. Click on the Windows Search and type in Command Prompt. Right-click on Command Prompt and select Run as administrator.
2. In Command Prompt, execute the command:
manage-bde -lock <drive letter>: -ForceDismount
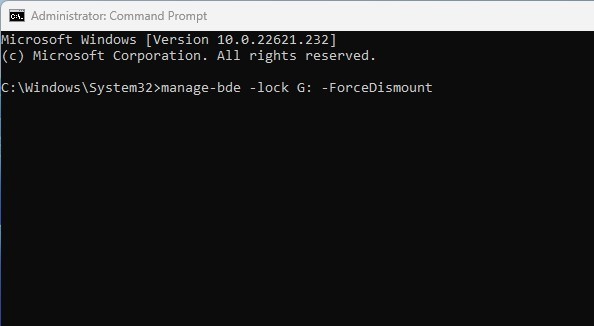
Note: Replace <drive letter> with the drive you want to lock.
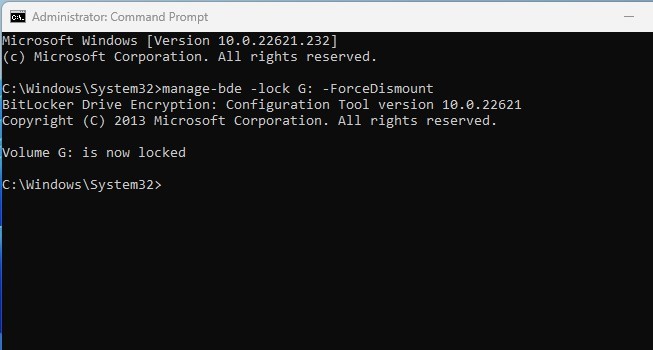
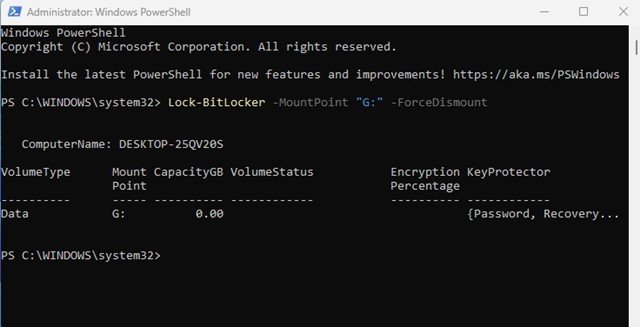
3. Press the Enter button on your keyboard to lock the protected drive without restarting.
3. Lock BitLocker Encrypted Drive using PowerShell
Like the Command Prompt, you can even utilize the PowerShell utility to lock an unlocked BitLocker drive.
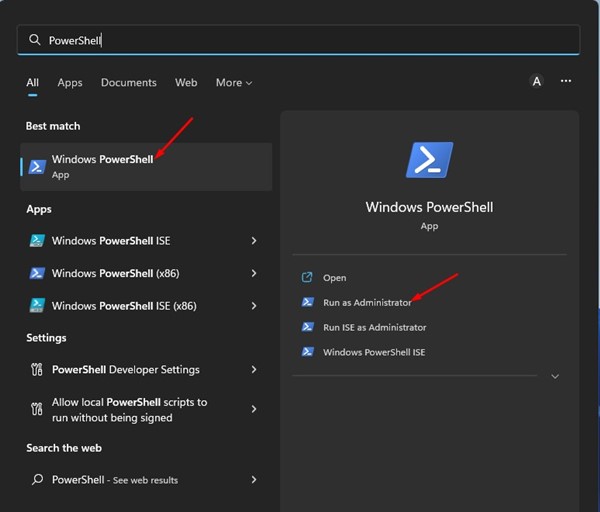
1. Click on the Windows search and type in PowerShell. Next, right-click on the PowerShell app and select Run as administrator.
2. In PowerShell, type Lock-BitLocker -MountPoint "<drive letter>:" -ForceDismount and hit the Enter button.
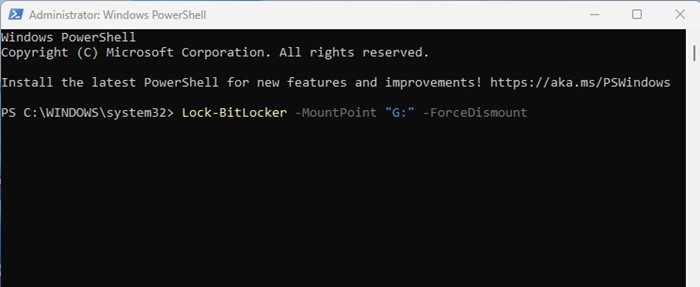
Note: Replace <drive letter> with the actual drive letter you want to lock.
Also read: How to Force Delete Undeletable Files in Windows 11
These are a few of the best methods to lock the BitLocker drive in Windows 10/11 without restarting. If you know any other ways to lock a BitLocker drive, let us know in the comments below.

