Last Updated on January 23, 2020 by Larious
Let’s admit, USBs serves as a great portable device to transfer data between computers. USB storage devices could be anything ranging from PenDrives, External HDD, SSDs, etc. USB devices usually have a single partition by default. That means, there’s no division between the storage capacity of the device.
In this article, we are going to share some of the best methods to partition USB drives on Windows 10 computers. By partitioning your USB device, you can store different types of files on different partitions. This will help you in managing files in a more efficient way.
Table of Contents
How To Partition USB Drives On Windows 10
To partition a USB drive on Windows, we will be using a few third-party software. So, let’s check out how to set up multiple partitions on a USB flash drive 2020.
1. Using AOMEI Partition Assistant Standard Edition
AOMEI Partition Assistant Standard Edition is one of the best software available on the web that can help you to partition the USB Drive. Just follow some of the simple steps given below to partition USB Drive with AOMEI Partition Assistant Standard Edition.
Step 1. First of all, download & install AOMEI Partition Assistant Standard Edition on your Windows computer.
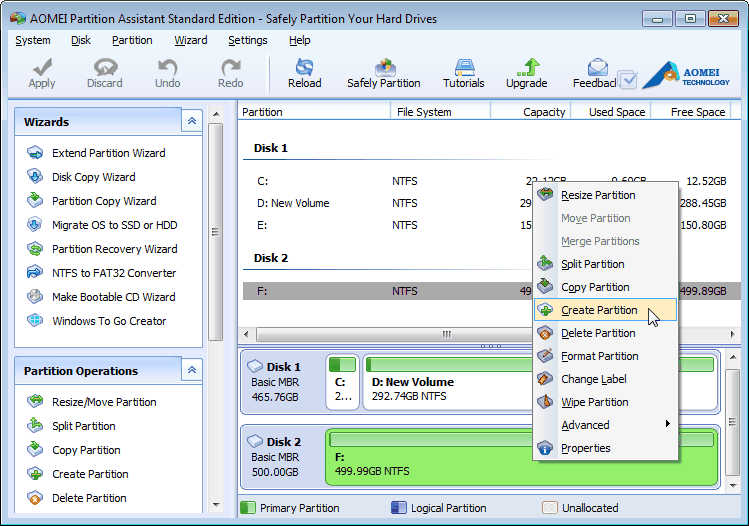
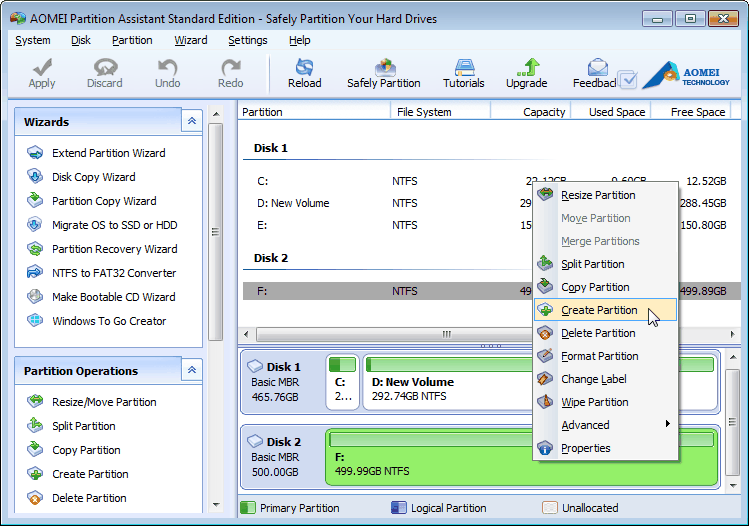
Step 2. Once done, launch the app and right-click on the USB Drive and select ‘Create Partition’.
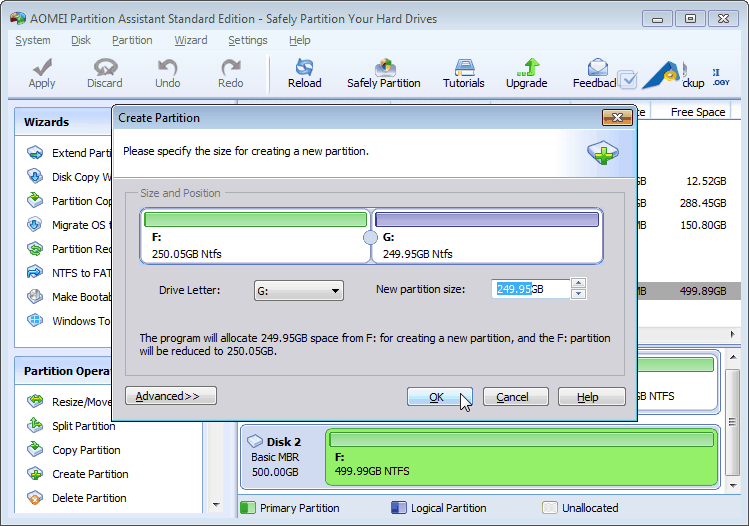
Step 3. In the next step, you need to drag the slider bar to commit the size of the new partition. Once done, click on ‘OK’
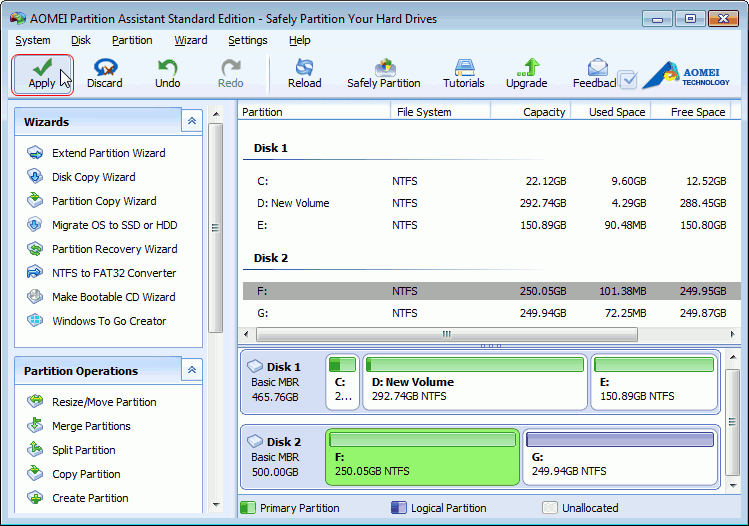
Step 4. Now you will see that the USB Drive is showing two partitions. Click on ‘Apply’ to make the changes.
Step 5. Now if you want to resize the partition, simply right click on the Partition which you have just created and then select ‘Resize a partition’. From there, you can either resize or split the partition.
2. Using Disk Management
If you don’t want to rely upon any third-party tool, then you can use the Disk Management tool of Windows to partition the USB Drive. Simply, follow some of the simple steps given below to Partition USB Drive with Disk Management.
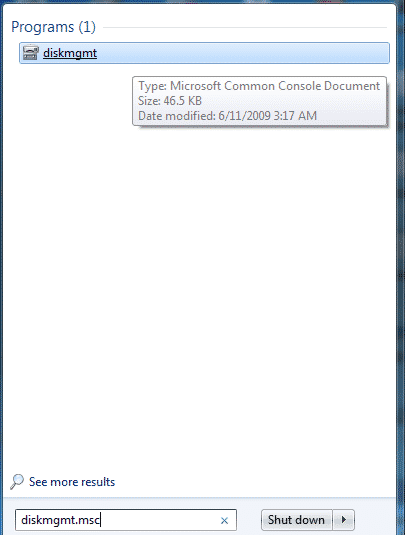
Step 1. First of all, open the Windows search menu and type in ‘diskmgmnt.msc’. Open the Disk Management from the list.
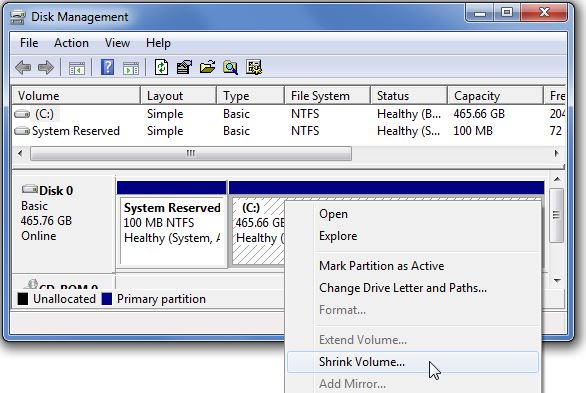
Step 2. Now right click on the USB Drive and then select ‘Shrink Volume’
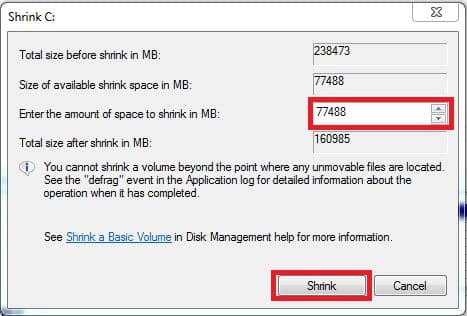
Step 3. Now you will see the current size and the free space. Enter the amount (in MB) that you want to shrink and click on ‘Shrink’ button.
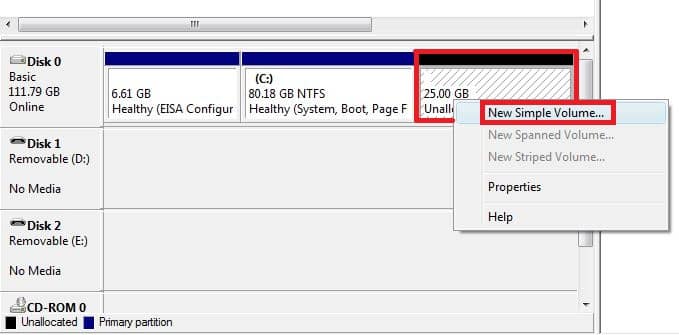
Step 4. Once done, you will see an ‘Unallocated Space’. Right-click on it and select ‘New Simple Volume’
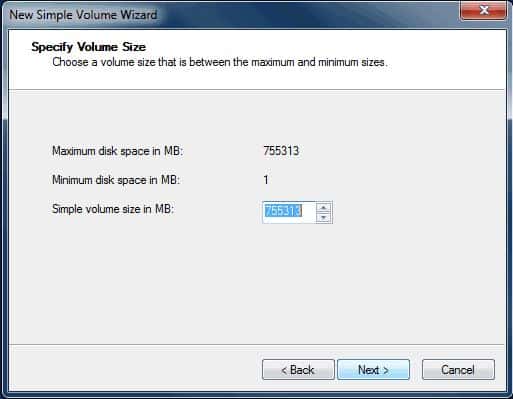
Step 5. Now on the Simple Volume Wizard, specify the volume size.
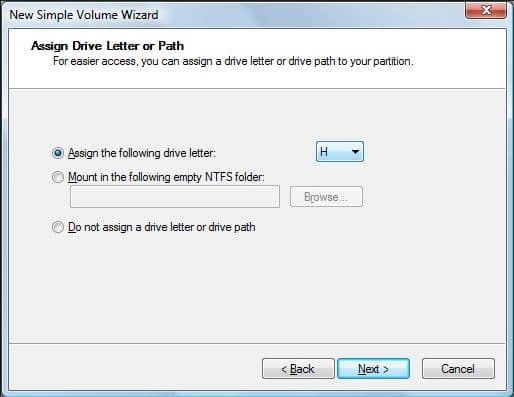
Step 6. In the next step, assign a drive letter or path.
Step 7. In the next window, select ‘NTFS’ under the ‘Format Partition’ option and click on ‘Next’
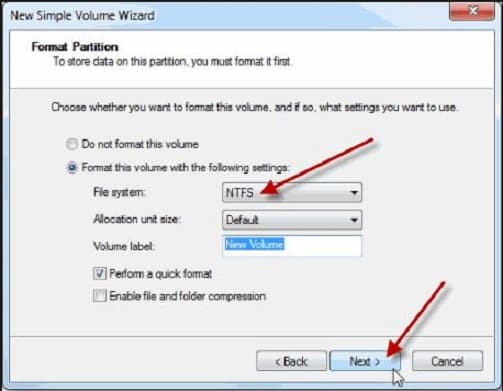
Step 8. Now, wait for a few seconds until you see a similar window. Once done, click on ‘Finish’

That’s it, you are done! This is how you can use Disk Management utility to partition a USB Drive.
So, these are the two best methods to partition USB Drives. Not just USB Drives, but these two methods will also help you to partition HDD and SSD drives as well. If you have any other doubts, discuss it with us in the comment box below. I hope this article helped you! Share it with your friends also.

