

Last Updated on October 11, 2026 by Larious
If your Windows 11 PC/laptop is often left unattended, it’s best to disable access to removable storage devices. Below, we have shared a step-by-step guide on blocking access to USB drives in Windows 11.
Also read: How to Clear the Thumbnail Cache in Windows 11
Table of Contents
Steps to Block Access to Removable Storage Devices in Windows 11
To deny access to removable storage devices in Windows 11, we need to make a few changes to the Local Group Policy.
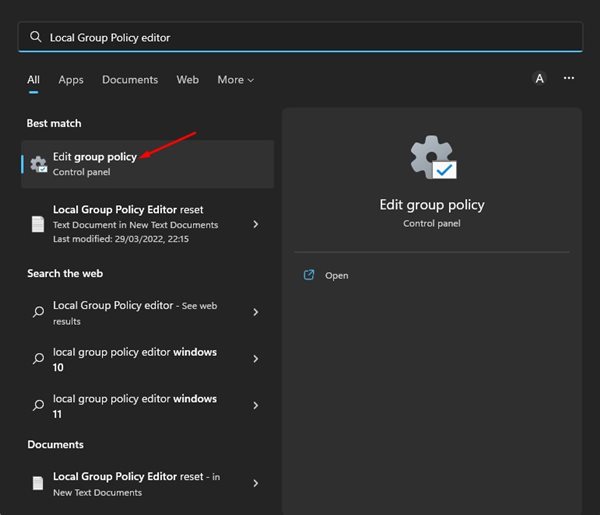
1. Click on the Windows 11 search and type in Local Group Policy Editor. Next, open the Local Group Policy Editor app from the list.
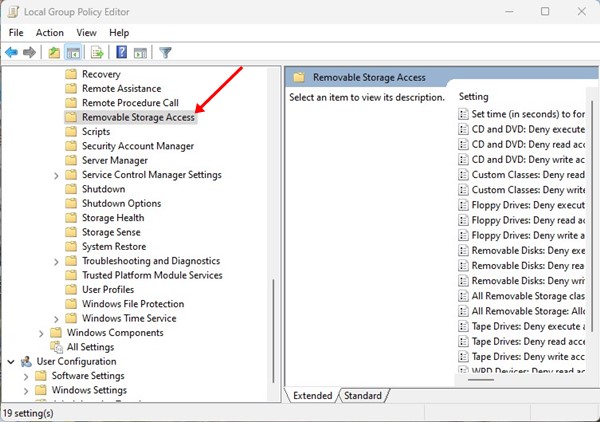
2. In the Local Group Policy Editor, navigate to the following path:
Computer Configuration > Administrative Templates > System > Removable Storage Access
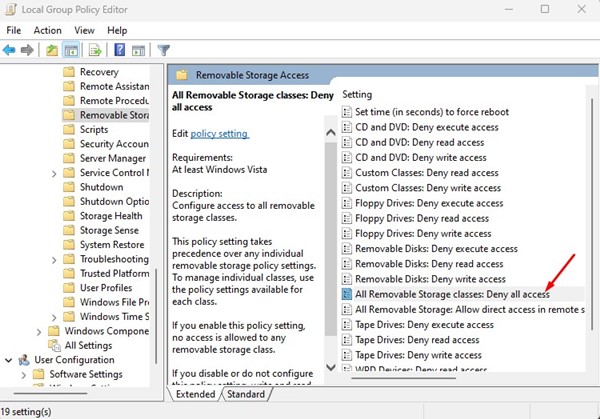
3. In the right pane, scroll down and find the ‘All Removable Storage classes: Deny all access’ policy.
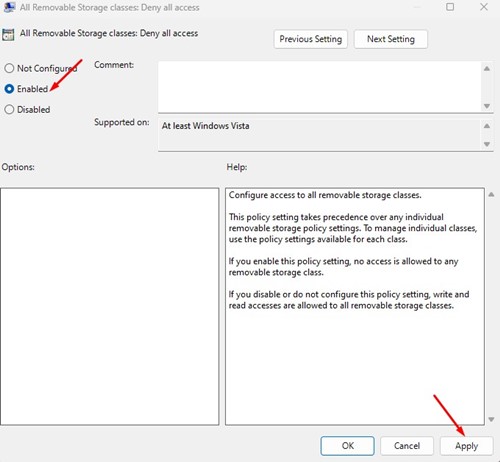
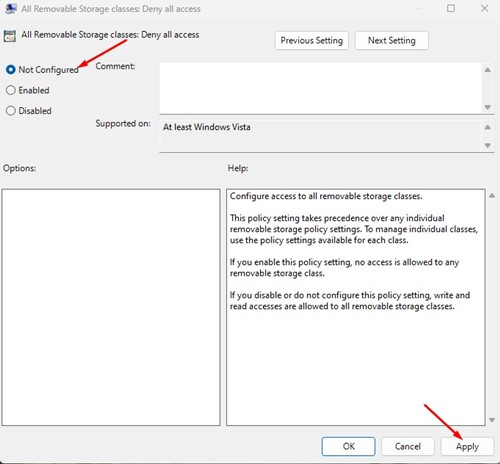
4. Once found, double-click on the policy. In the All Removable Storage Classes: Deny all access policy window, select ‘Enabled‘, and click Apply.
How to Enable Access to Removable Storage Drives?
To enable access to removable storage drives, you need to revert the changes you have made in the Local Group Policy Editor.
1. Open the Local Group Policy Editor on your Windows 11 computer.
2. In the Local Group Policy Editor, navigate to the Computer Configuration > Administrative Templates > System > Removable Storage Access.
3. On the right, double-click on the All Removable Storage classes: Deny all access policy.
4. In the next window, select Not configured and click Apply.
Also Read: How to Make and Receive Android Phone Calls from Windows 11
These are the easy steps to deny or allow access to removable storage devices on your Windows 11 computer. The method will block access to all removable storage devices, including external HDD/SSD. If you need more help denying access to removable devices in Windows 11, let us know in the comments.

