

Last Updated on October 10, 2026 by Larious
The Windows Security app allows you to add or remove items to the exclusion list so they won’t be scanned. If Windows Security often blocks important programs, folders, or files from running on your Windows 11, you need to set exclusions. Here’s how to fix Windows Security exclusions in Windows 11.
Table of Contents
Add Windows Security Exclusions in Windows 11
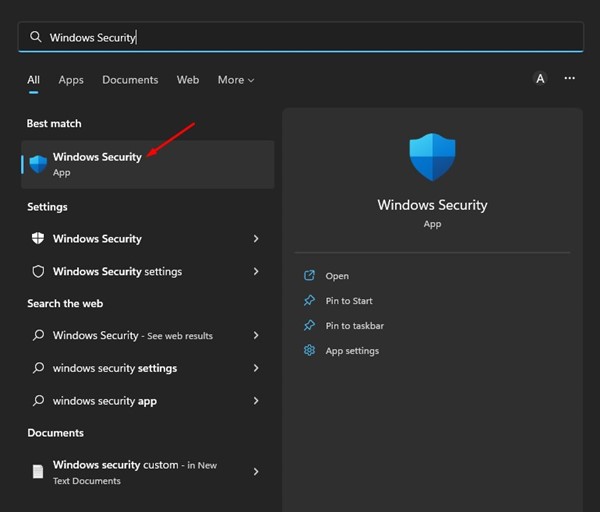
1. Open the Windows Security app from the Windows Search.
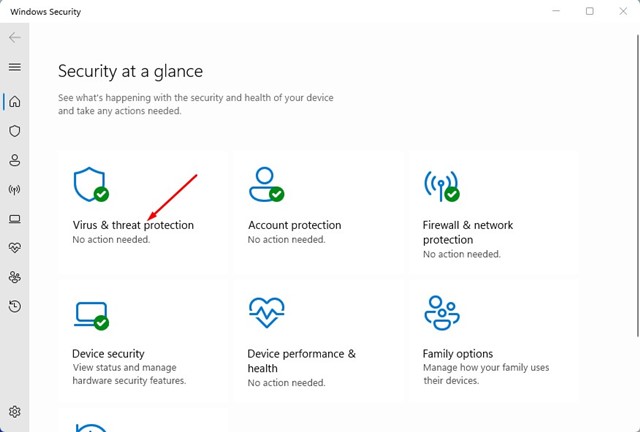
2. Click on the Virus & threat protection option.
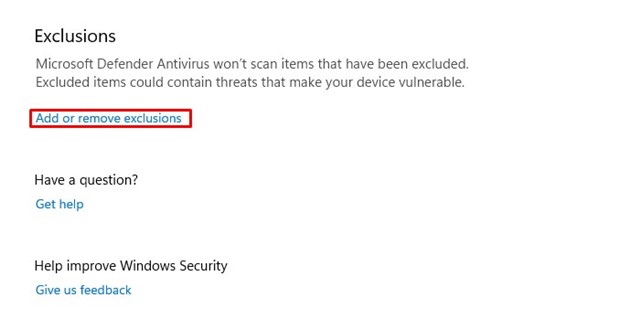
3. Scroll down and click on Add or remove exclusions under the Exclusions section.
4. Click on the + Add an exclusion button.
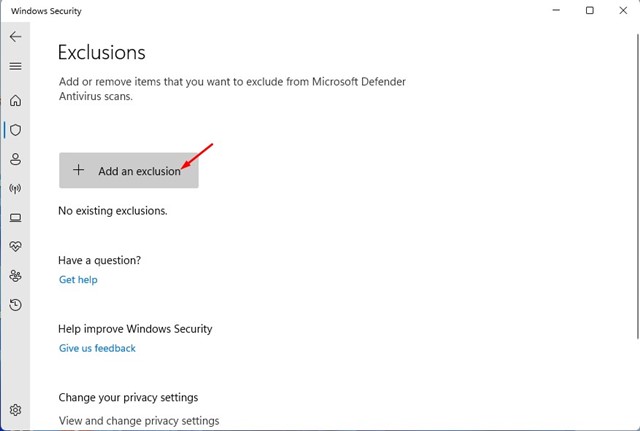
5. You must choose whether you want to exclude a File, Folder, File type, or Process.
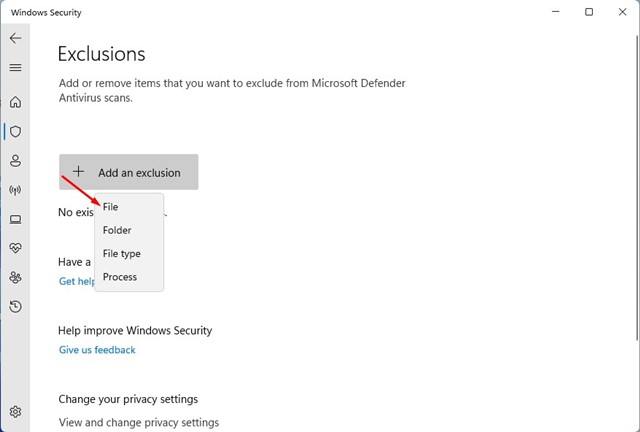
6. Select the type of exclusion and pick the file you want to add to the Exclusion list.
Allow an App Through Controlled Folder
Controlled folder access, or the Ransomware protection feature of Windows Security, can also protect files, folders, and memory areas on your device from unauthorized changes by unfriendly applications. Hence, sometimes it might block app installation. So, you need to set exclusions in Controlled folder access as well.
1. Open the Windows Security app and click on Virus & threat protection.
2. On the Virus & threat protection screen, scroll down and click on the Manage ransomware protection link.
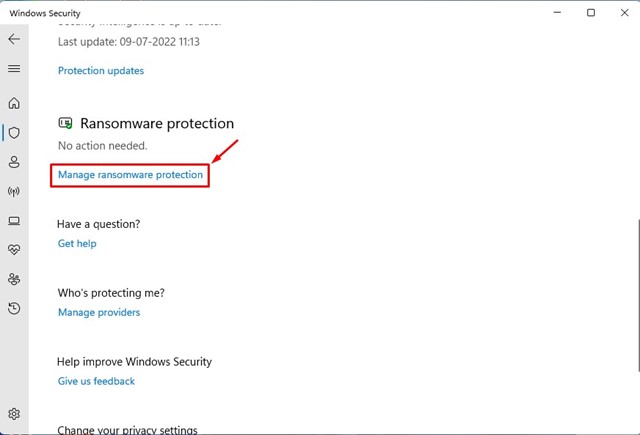
3. Next, click on the Allow an app through the Controlled folder access link.
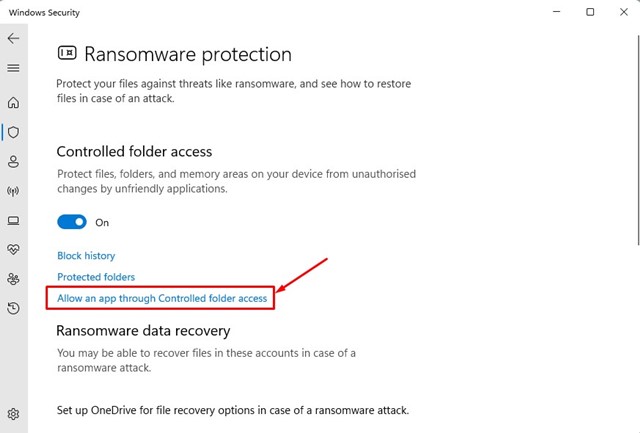
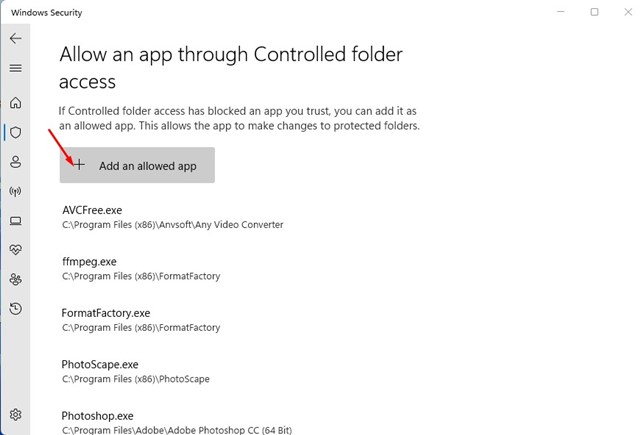
4. Click the + Add an allowed app and select the app you want to add to the exclusion list.
Also Read: How to Backup Windows 11 to an External Drive
These are the two best ways to set Windows Security exclusions on Windows 11. For better security, you need to start using premium antivirus software for PC. If you need more help setting antivirus exclusions, let us know in the comments.

