Last Updated on June 19, 2024 by Larious
Even though the use of file converters is declining, they are still helpful and are being used today. Windows 11 handles all common file formats, but sometimes, you have to convert specific files for definite reasons.
In this article, we will discuss converting PNG files. Compared to JPG or JPEG, the PNG file format is larger in size, and you may want to convert it before uploading it to the cloud storage. Converting PNG files to JPG is easy and here’s how you can do it.
Table of Contents
1. Convert PNG to JPG via Paint
On Windows 11, you can use the Paint or Paint 3D application to convert PNG images to JPG. Here are some of the simple steps you need to follow.
1. Right-click on the PNG file you want to convert and select Open With > Paint. You can also use the Paint 3D application.
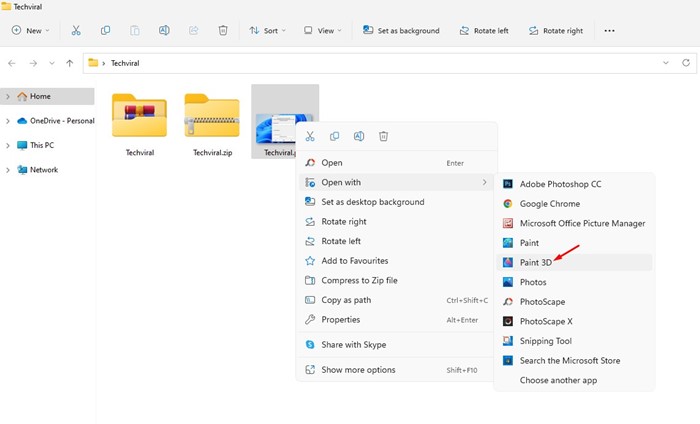

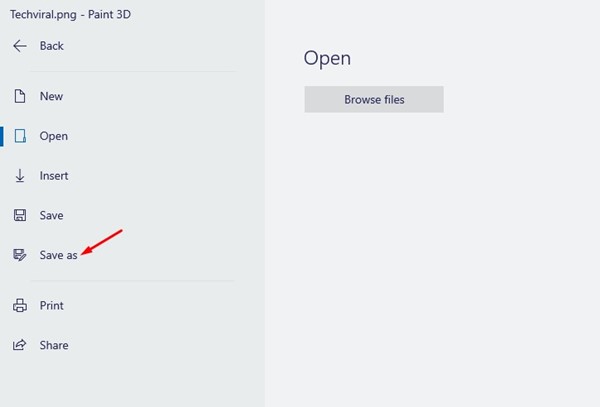
2. When the app opens in the Paint or Paint 3D application, click the File button in the top-left corner.
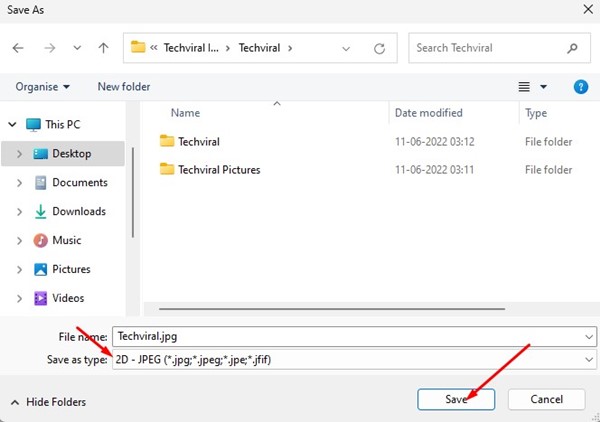
3. On the list of options, select Save as > JPEG picture.

4. Now select the save location.

2. Convert PNG files to JPG via Photoscape
Well, Photoscape is a full-fledged photo editing tool for the Windows operating system. It’s less complicated than Photoshop and pretty lightweight. Here’s how to convert PNG files to JPG via Photoscape.
1. First of all, download & install Photoscape on your Windows 11 PC.
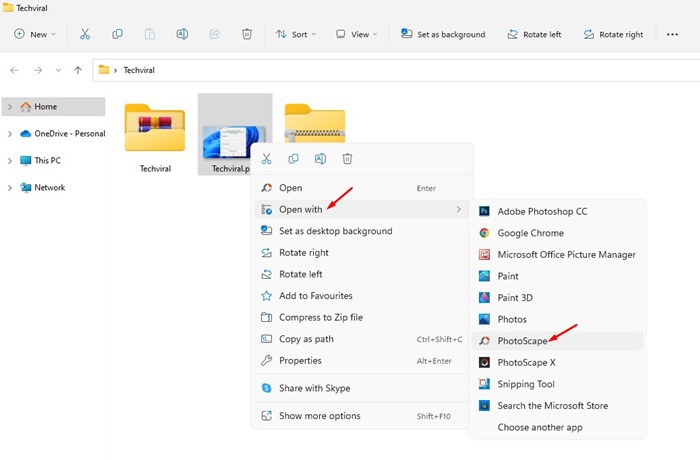
2. Once installed, right-click on the PNG file you want to convert and select Open With > Photoscape.

3. The PNG file will open in Photoscape. Click on the Save button in the bottom right corner.
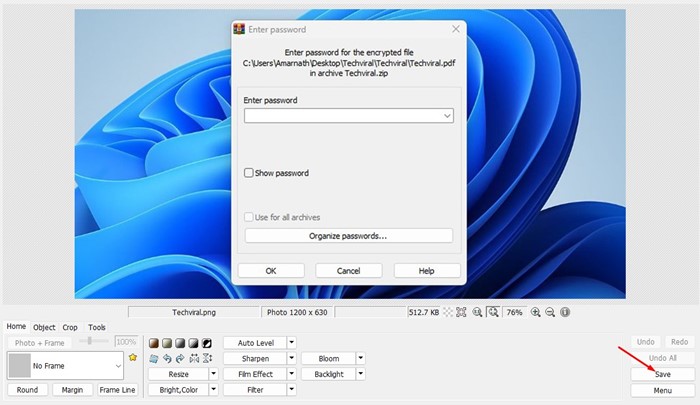

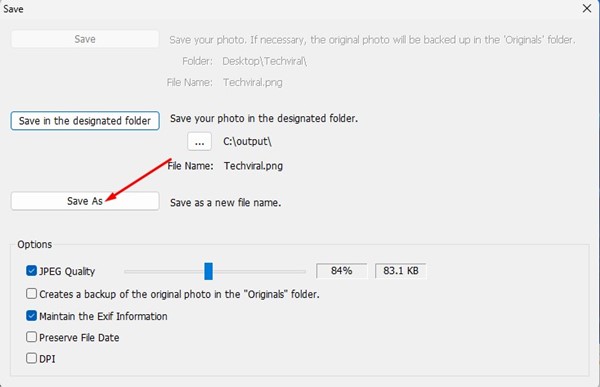
4. On the Save prompt, click on the Save As button.

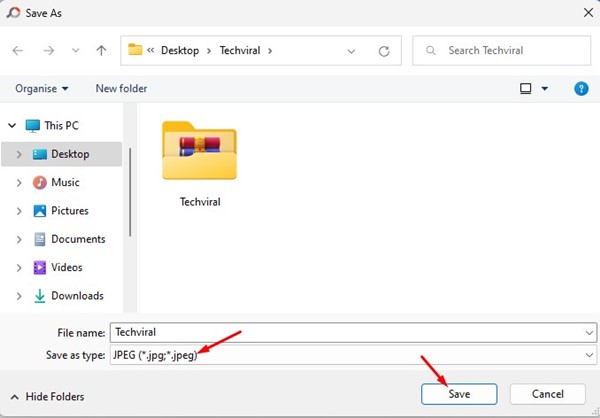
4. Select JPEG and click on the Save button on the Save as type.

3. Convert PNG files to JPG using Photoshop
Converting PNG files to JPG using Photoshop is pretty easy. So, if your PC has a Photoshop app installed, you can also use it to convert your PNG files to JPG. Here’s what you need to do.
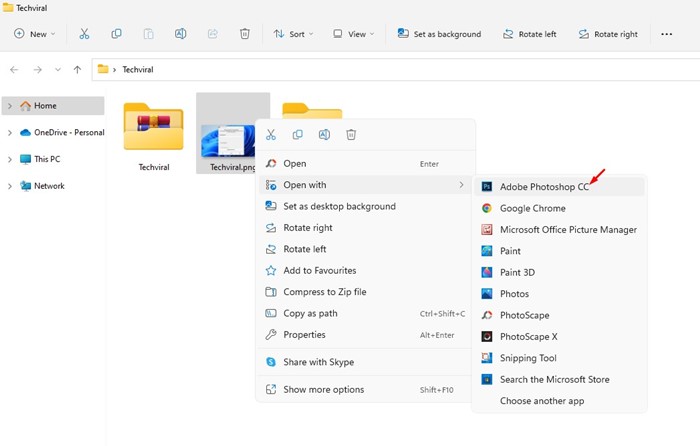
1. Right-click on the PNG file you want to convert and select Open With > Photoshop.

2. The image will open in Photoshop. You need to click on the File menu at the top.
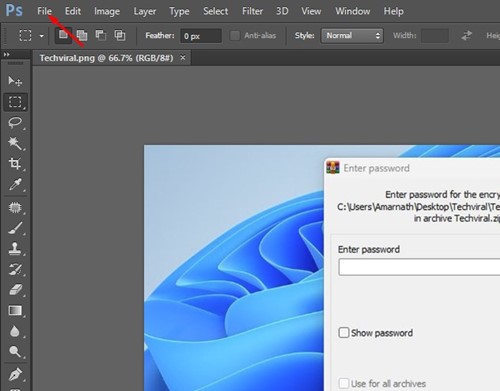

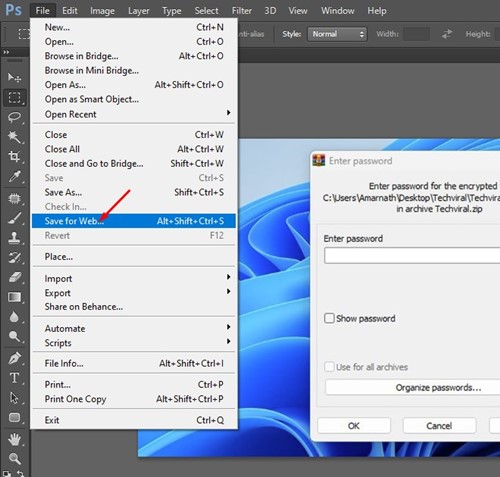
3. Select the Save for Web option from the list of options.

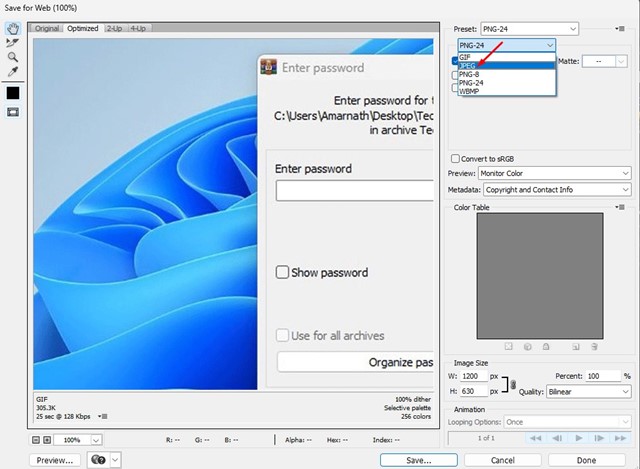
4. On the right, select ‘JPEG’, set the image quality, and click the Save button.

4. Convert PNG to JPG using Pixroll Image Converter
Pixroll Image Converter is a great way to convert images to other formats. It’s free from the Microsoft Store, and here’s how to use it.
1. Launch the Microsoft Store on your PC. Next, search for Pixroll Image Converter Lite.
2. Open the relevant app and click Get.
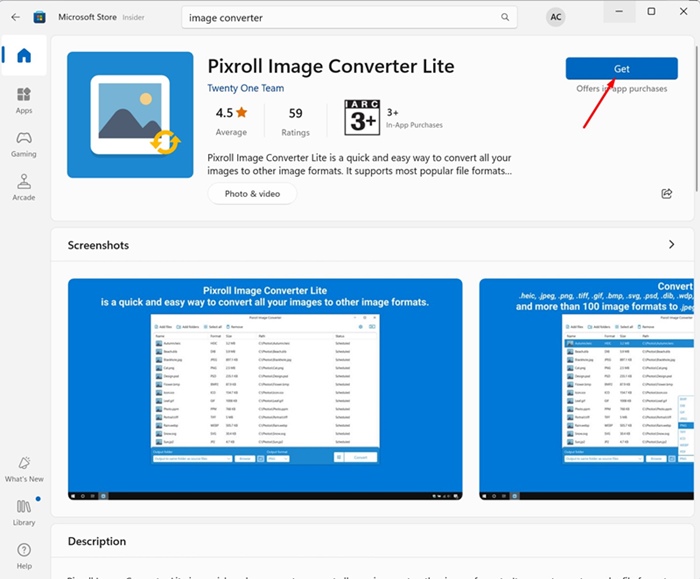

3. Wait until the Pixroll Image Converter installs on your device. Once installed, open it.
4. Click the Add Files button at the top left corner and select the PNG images you want to convert.
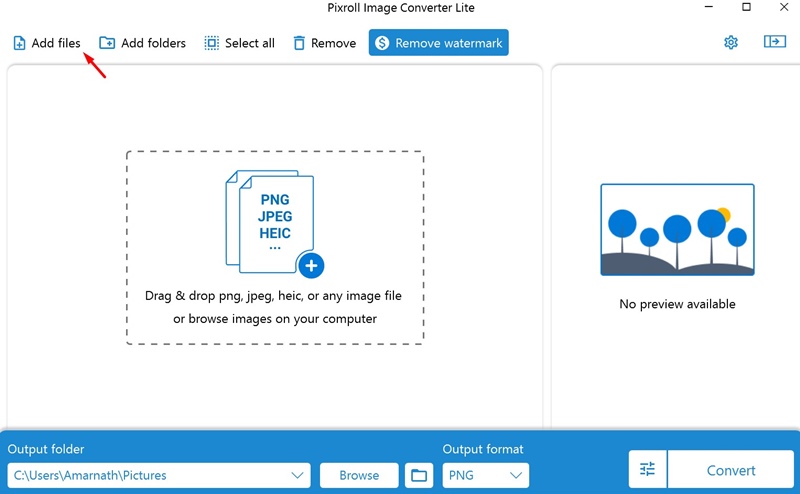

5. Once added, select JGP as the output format and click Convert.
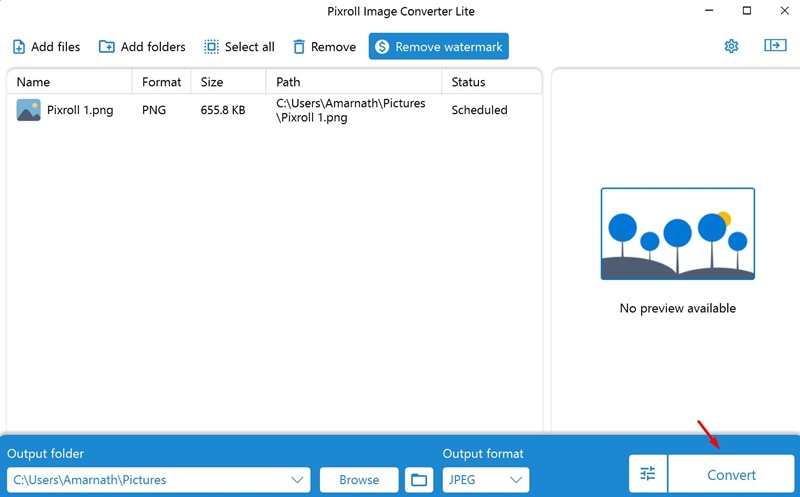

The converted pictures will be saved in the Pictures folder on C: drive. The only problem with this tool is that it adds a watermark to the converter images.
5. Convert PNG files to JPG using PNG2JPG
PNG to JPG is an online image converter that can convert your PNG images to JPEG format. The good thing about the online converter is that it can convert your images without compromising their quality. Here’s how to use PNG2JPG online converter
1. First, open your favorite web browser and head to png2jpg.com.
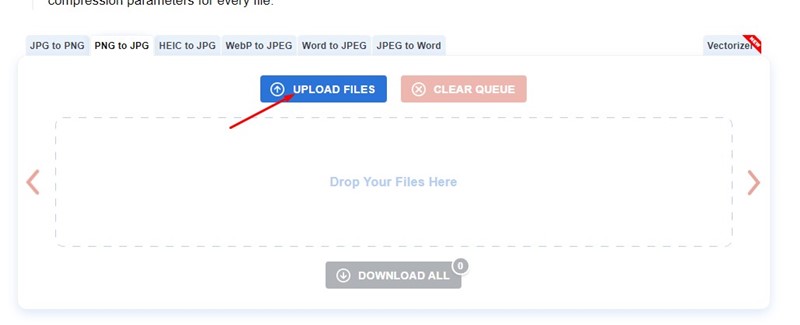
2. On the main screen, click on the Upload files and select the PNG file you want to convert.

3. Once uploaded, wait until the tool converts your PNG file.
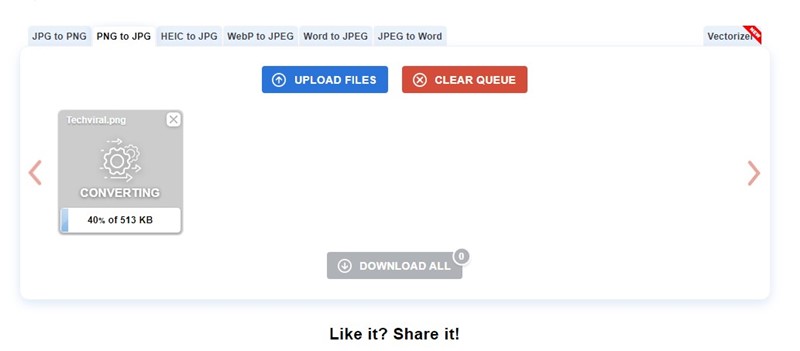

4. Once converted, click the Download button underneath your PNG image to download the converted file.
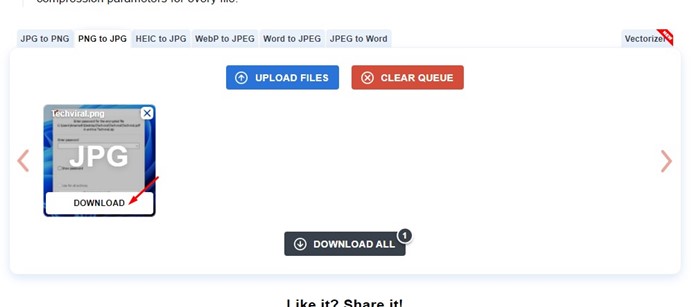

You can use png2jpg to convert your PNG files for free. You can also use other online image converters to convert your PNG files to JPG.
Web-based image converters can convert PNG to JPG, WebP to JPG, JPG to PNG, and more.
So, these are the four best ways to convert PNG files to JPG in Windows 11. You can follow these methods to convert PNG files to JPG for free on your Windows 11 computer. If you know of any other ways to convert PNG image files, let us know in the comments below.
