Last Updated on June 30, 2021 by Larious
As of now, there are hundreds of gaming-centric voice and text chat services available on the web. However, out of all those, Discord seems to be the best one.
Discord is right now the most popular cross-platform voice and text change service available for gamers. It’s very popular amongst gamers due to its simplicity.
If you have ever used Discord, you might know about its servers. Discord servers were basically communities that users can join. After creating a server, you can add different channels, some for text and some for voice chats.
Also Read: 10 Best Voice Changer Apps For Discord
Steps to Create your own Discord Server On Android
So, if you are interested in creating your own Discord server, you are reading the right article. In this article, we will share a step-by-step guide on how to create your Discord Server on Android. Let’s check out.
Step 1. First of all, launch the Discord app on your Android smartphone.
Step 2. Next, tap on the (+) button, as shown in the screenshot below.
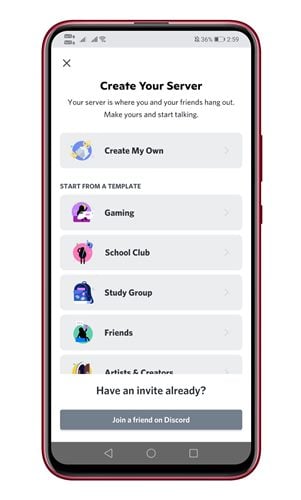
Step 3. On the Create your server page, select a Discord Server template based on your purpose.
Step 4. On the next page, you will be asked to select who will use this server. Select between “For me and my friends” or “For a club or community”.
Step 5. On the next page, set the profile picture for the server, and assign a name. Once done, tap on the ‘Create Server’ button.
Step 6. You will get the invitation link. You can send your friends the invitation link and ask them to join.
Step 7. To add text and voice channels to the server, tap on the three horizontal lines and select the (+) button behind the text/voice channels.
That’s it! You are done. This is how you can create your own Discord Server on Android.
So, this article is all about how to create your own Discord Server on Android. I hope this article helped you! Please share it with your friends also. If you have any doubts related to this, let us know in the comment box below.


