

Last Updated on October 7, 2026 by Larious
Windows 11 Boot Log is a text file automatically generated when your computer boots. The text file contains a list of all drivers that are loaded and failed to load during the boot. On Windows 11, the boot log file is disabled by default, but you can enable it in a few easy steps. Once enabled, Windows 11 will automatically generate a boot log and store it in the system installation drive.
There are multiple ways to enable Boot Log in Windows 11. You can use the System Configuration utility or the Command Prompt to enable the boot log generation. Here’s how to enable Boot Log in Windows 11.
Table of Contents
Enable Boot Log in Windows 11
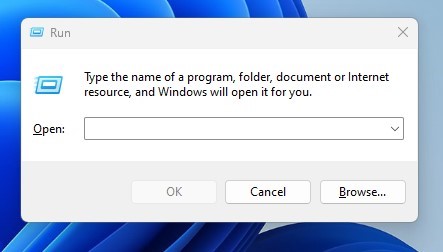
1. Press the Windows Key + R on your keyboard. This will open the RUN dialog box.
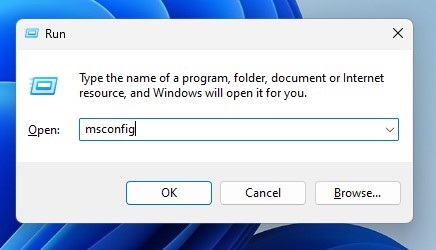
2. On the RUN dialog box, type msconfig and press Enter.
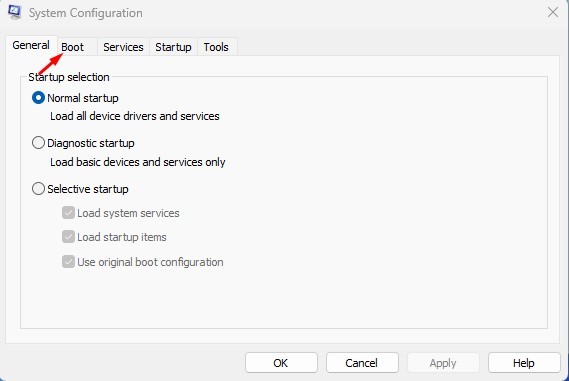
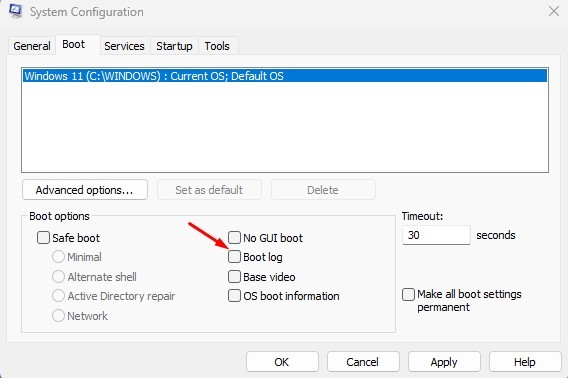
3. On the System Configuration Window, switch to the Boot tab.
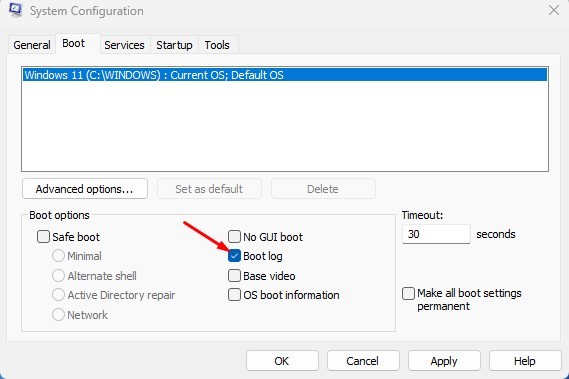
4. Check the Boot Log option under the Boot options and click Apply.
Where to Find the Boot Log file?
The boot log will be created automatically every time you restart your PC. You can find the Boot log file at C:\Windows\ntbtlog.txt.
The boot log file will appear only after you restart your computer. If you haven’t restarted your computer after making changes to the System Configuration, you won’t find any file at the C:\Windows\ntbtlog.txt location,
How to Disable Boot Log
If you don’t want Windows 11 to create a boot log, here’s how you can disable it.
- Press the Windows Key + R on your keyboard. This will open the RUN dialog box; type msconfig and press Enter.
2. Switch to the Boot section and uncheck the Boot Log.
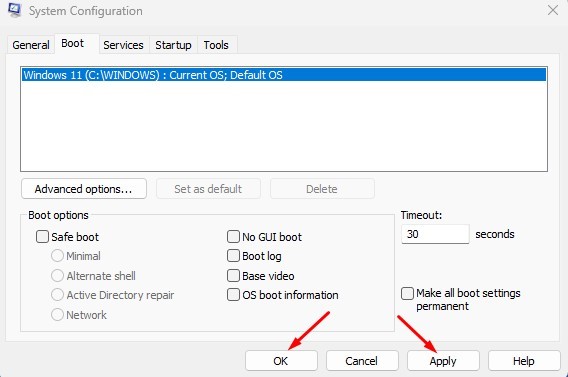
3. Once done, click on the Apply button, then on Ok.
Also read: How to Download Google Maps for Windows 11
That’s all about enabling or disabling Boot Log on a Windows 11 computer. The boot log file can be handy, especially if you are experiencing problems due to hardware drivers. If you need any more help, let us know in the comments.

