

Last Updated on October 7, 2026 by Larious
If you often leave your Windows 11 PC unattended, it’s best to schedule an automatic shutdown. By doing this, you’ll preserve your Windows 11 device’s battery life and give the hardware components much-needed time to cool down. Here’s how you can schedule a shutdown in Windows 11.
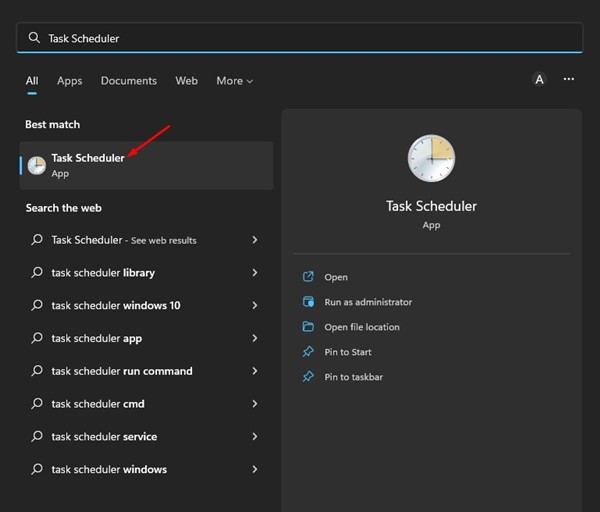
1. Click on the Windows 11 search and type Task Scheduler. Next, open the Task Scheduler app from the list of options.
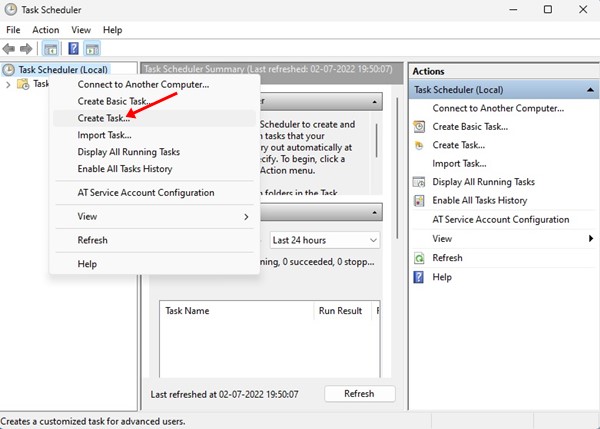
2. In Task Scheduler, select the Task Scheduler Library and select Create Task.
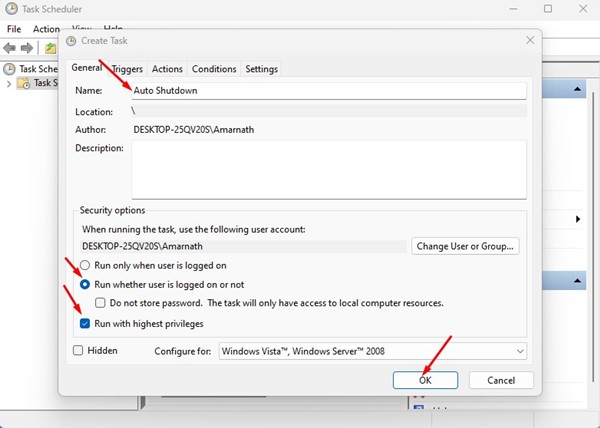
3. Enter the Task name in the ‘Name’ field. Once done, check the options Run whether user is logged on or not and Run with highest privileges. Once done, select ‘Windows 10’ in the Configure for: drop-down. After making the changes, click on the Ok button.
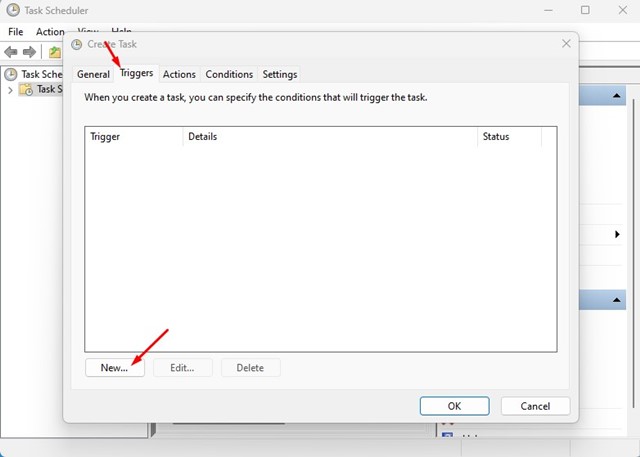
4. Now switch to the Triggers tab and click on the New button.
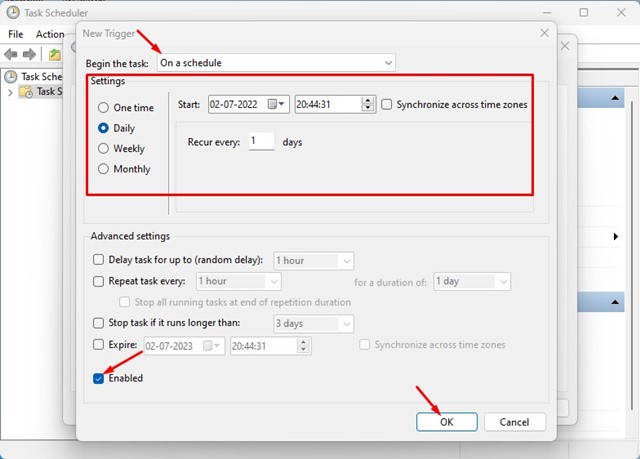
5. On the New Trigger window, select On a schedule in the Begin the task drop-down. Once done, set the schedule options: Time interval, Start time, Recurring date, etc. At the bottom, check Enabled nd click Ok.
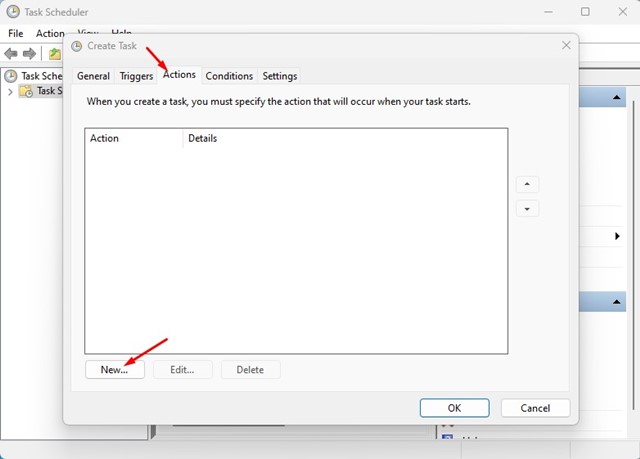
6. Now switch to the Actions tab and click on the New button.
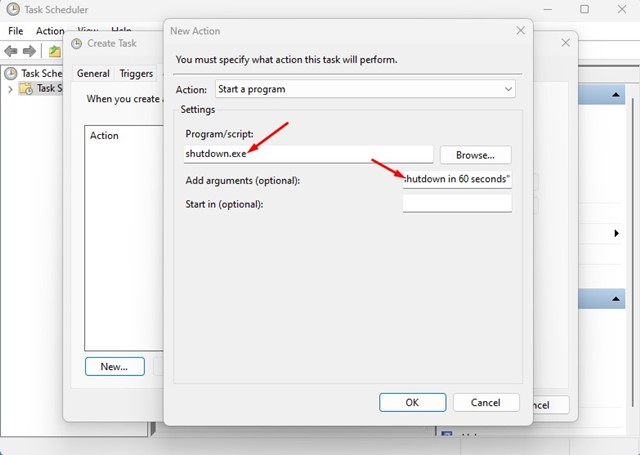
7. Select Start a program on the Action drop-down. In the Program/script: field, enter shutdown.exe. In the Add arguments (optional): field, enter the command: /s /t 60 "PC will shutdown in 60 seconds". After making the changes, click Ok.
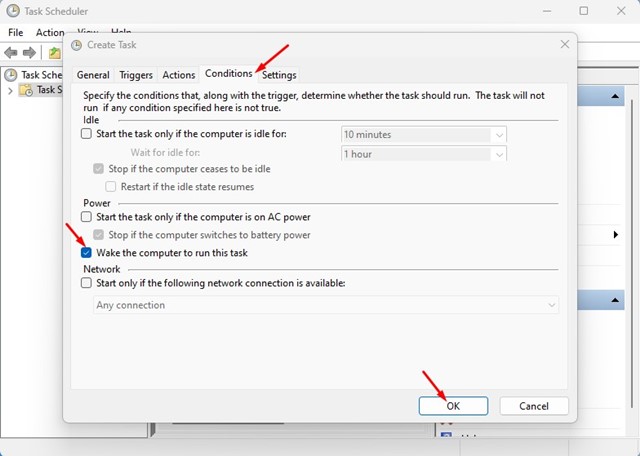
8. Switch to the Conditions tab and check the Wake the computer to run this task. All other options should be disabled in the Conditions tab. After making the changes, click Ok.
How to Delete the Shutdown Schedule?
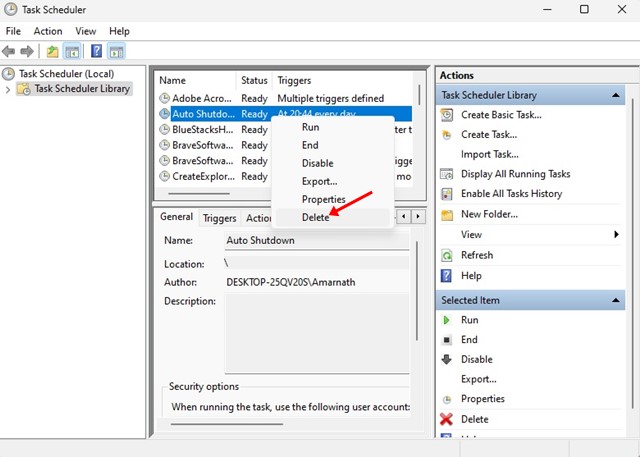
If you don’t want Windows 11 to shut down automatically, you need to delete the task you created. For that, open Task Scheduler > Task Scheduler Library. In the Task Scheduler Library, find the task you have created. Once found, right-click on it and select ‘Delete‘.
Also Read: How to Enable and Find Boot Log in Windows 11
You can also use other third-party apps such as Shutdown Timer Classic to schedule a shutdown in Windows 11. If you need any more help, let us know in the comments.

