Last Updated on May 27, 2021 by Larious
Let’s admit; there are times when we all have wanted to record our Android screen on our computer. There might be various reasons why you would like to record your Android screen from a computer.
Maybe the touchscreen of your Android is not working, and you want to show it to a mechanic. Or want to record your Android gameplay videos from a computer. Whatever might be the reason, you can easily record an Android screen from your PC.
However, to record your Android screen from a computer, you need to use some third-party apps. You would also need to install some software on a PC as well.
Table of Contents
Best Methods to Record Android Screen On Computer
So, if you are interested to know how to record an Android screen on a PC, then continue reading the article. In this article, we have listed some of the best methods to record an Android screen from a PC. Let’s check out.
Using MirrorGo
MirrorGo from Wondershare is a third-party tool that lets you record android screen right from the PC. Here’s how to use it.
Step 1. First of all, on your PC, you need to download and install MirrorGo Android Recorder.
Step 2. Now let the tool download its packages and wait for it to finish. Now, when the tool is ready, you will have two options to connect your Android phone: either through USB or using the same Wi-Fi network.
Step 3. Choose the one you prefer to connect your device to your PC. Now your device will get connected.
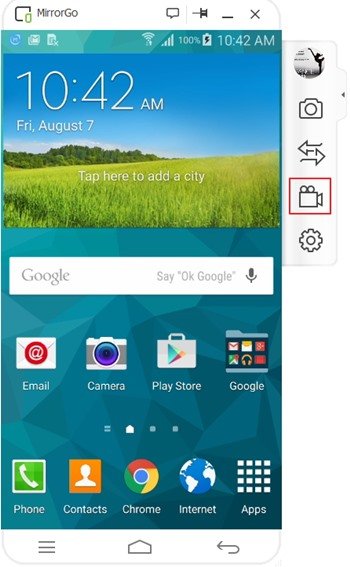
Step 4. Now you will find the Screen Recording option in the tool. You need to click on the recording option to start the screen recording.
That’s it! You are done. When you want to stop the recording just click on the stop button and choose the location to save the video recorded.
Using Vysor and Free Screen Capturer:
Vysor is a chrome app that lets users view and control their Android device from their computer. Well, users need a USB connection to work with Vysor. Things might look complicated, but it’s super easy.
Step 1. First of all, you need to download and install Chrome App Vysor on your Google Chrome browser.


Step 2. Now you need to install the Vysor app from Google Play Store on your Android device.
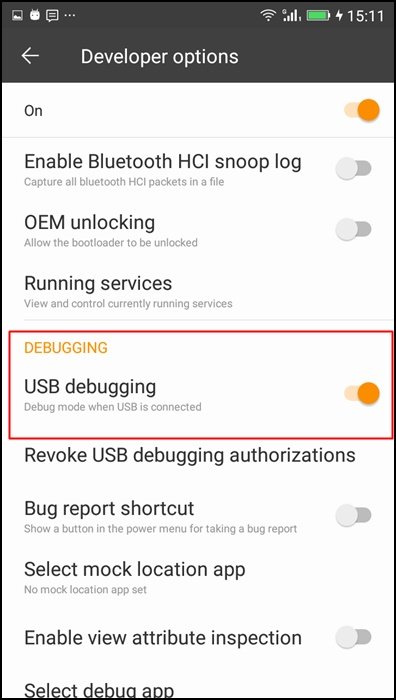
Step 3. Enable USB Debugging mode for that; you need to go to the developer option and tap on “Enable USB Debugging.”
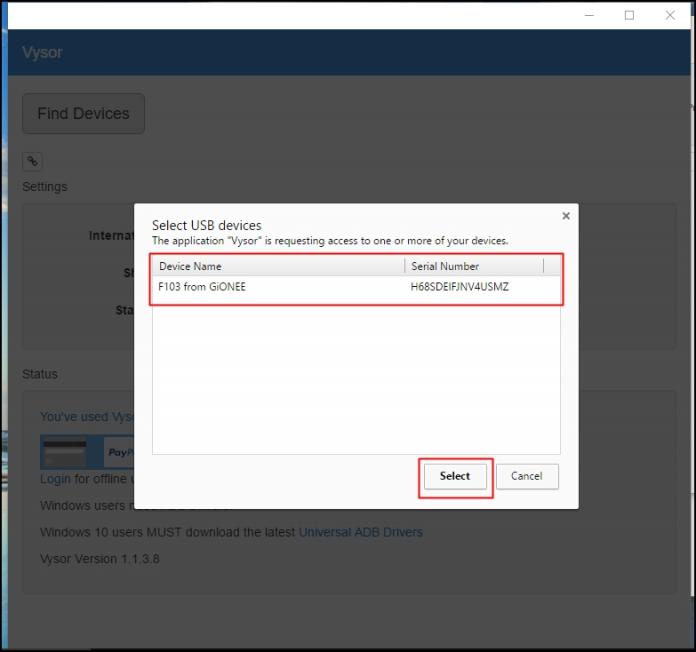
Step 4. Now connect your phone to the computer via USB cable and then click on “Find Devices” and select the device from there.
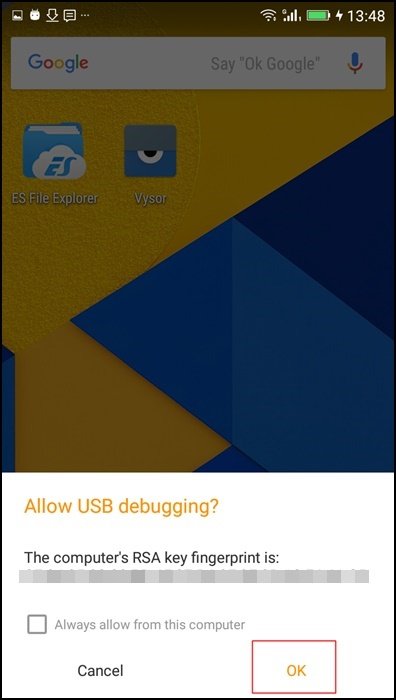
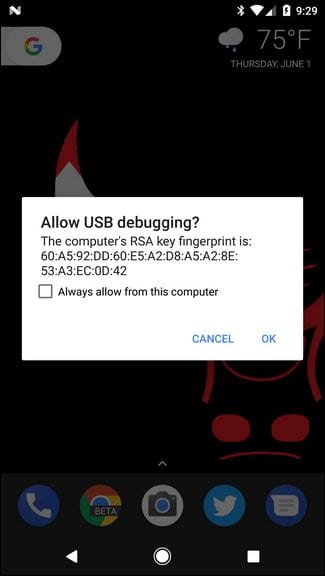
Step 5. Vysor will ask you to grant permission on your Android smartphone. Simply tap on “OK” on the popup that will appear on your Android smartphone.
Step 6. Once connected, you will be notified “Vysor is connected.”
Capture using Free Screen Capturer
After connecting your Android phone to your computer via Vysor, you need to download and install Free Screen Capturer on your Windows computer. Well, this app lets you select the region that you want to capture.
So, you can save the video as an AVI or Windows WMV file. The best part is this software is free for both personal and professional use.
So, this is how you can record your Android screen on your PC Using Vysor and Free Screen Capturer.
Capture your Android’s device screen with ADB
This might be a complicated process, but it still works if you don’t have a working internet connection. However, we need to use Powershell or Command Prompt to record an Android screen with ADB.
Step 1. First of all, head to the Android SDK download page and there find and download the “SDK tools only”
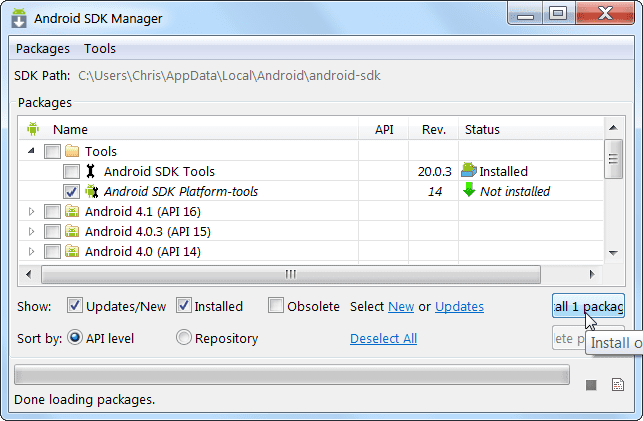
Step 2. Now open the SDK Manager EXE and select only “Android SDK Platform-tools”. Then click on the ‘Install‘ button.
Step 3. Now navigate to the folder where you have just installed the SDK and press Shift+Right Click. There you need to select the option ‘Open PowerShell Window here’
Step 4. Enable the USB Debugging mode on your Android and then connect it with the computer.
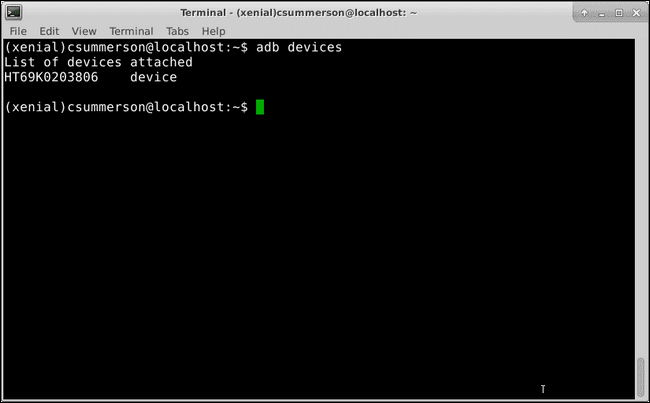
Step 5. Now on the terminal, type “adb devices” (without quotation mark)
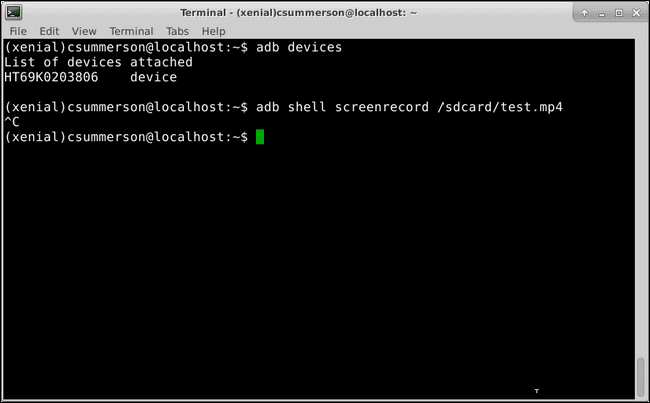
Step 6. Next, you need to enter the command “adb shell screenrecord /sdcard/test.mp4” (without quotation mark)
Note: You can change the location and filename if you wish.
Step 7. If you want to stop the recording, press CTRL+C on your keyboard in the active terminal window.
That’s it; you are done! Now visit the folder, and you will find the recording.
Using ApowerMirror
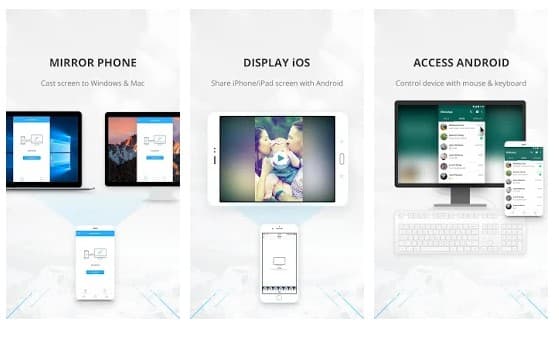
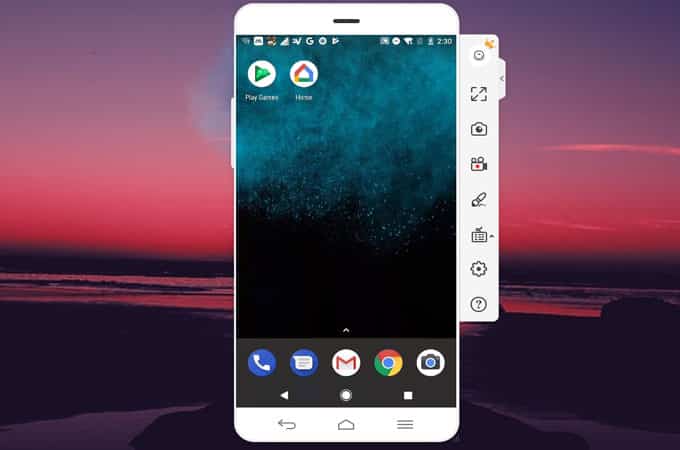
Well, ApowerMirror is one of the best screen mirroring tools available for the Windows operating system. The great thing about the ApowerMirror screen mirroring utility is that it offers users a wide range of tools to control Android devices. For example, after mirroring, users get the option to capture screenshots, record the entire Android screen, etc. ApowerMirror doesn’t need a rooted Android smartphone to record the screen.
Step 1. First of all, head to this link and download ApowerMirror on your Windows 10 computer. Once downloaded, install it on your PC.
Step 2. In the next step, visit this link from your Android device and download the ApowerMirror app on your Android device.
Step 3. Turn on the USB debugging mode and connect your Android to the computer via USB cable. You will get a popup message on your Android where you need to tap on ‘Start Now’
Step 4. Once connected, you will see the entire Android screen on your computer. Now to record the screen, click on the ‘Recording’ icon.
That’s it; you are done! This is how you can use ApowerMirror to record your Android screen from your PC.
So, this article is all about how to record an Android screen on a PC. I hope this guide helped you! Please share it with your friends also. If you have any doubts related to this, let us know in the comment box below.


