

Last Updated on October 14, 2026 by Larious
While we have hundreds of backup & restore utilities for the Windows operating system, nothing seems to beat the classic Restore Points. If you don’t know, a System Restore Point is a feature of the Windows operating system that helps you roll back your computer to a previous date and time.
Windows 11 automatically creates a restore point when it detects special events. However, you can force the operating system to create restore points automatically on a schedule. Here’s how you can do it.
Table of Contents
1. Enable System Restore on Windows 11
Before scheduling automatic restore points in Windows 11, you first need to enable the feature. We have already shared a step-by-step guide on enabling System Restore on Windows 11.
Make sure to go through that guide and set up the system restore point creation on Windows 11. Once enabled, follow the next steps.
2. Schedule Automatic Restore Points in Windows 11
To create periodic restore points on Windows 11, you must create a scheduled task via Task Scheduler.
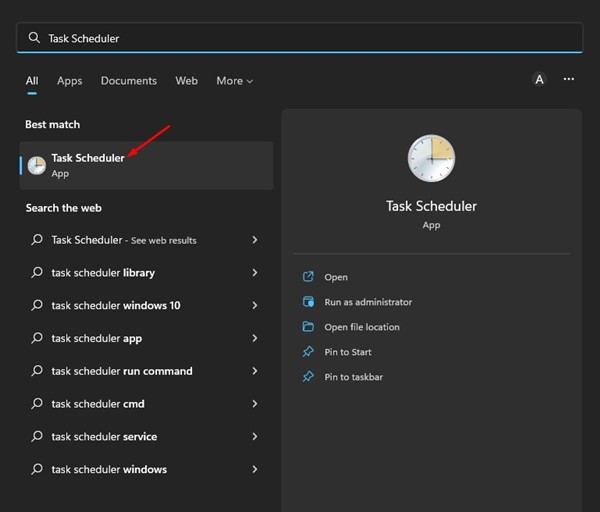
1. Click on the Windows 11 search and type Task Scheduler. Next, open the Task Scheduler app from the list of options.
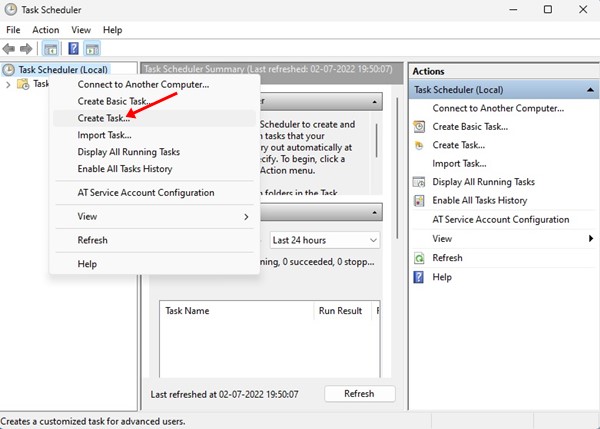
2. Right-click on My Tasks and select the Create Task option.
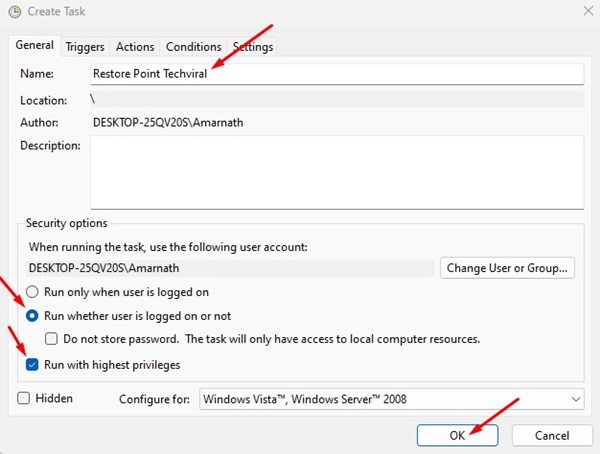
3. On the Create Task window, switch to the General tab. In the name field, type a name for the task, and under the Security options, select Run whether user is logged on or not and check the Run with highest privileges option.
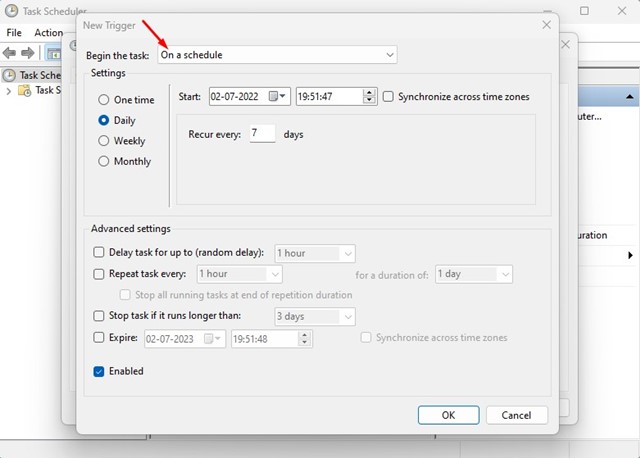
4. Once done, switch to the Trigger tab and select On a schedule in the Begin the task drop-down. In the Settings section on the left, select Daily and configure the scheduling settings (date, time, and frequency) on the right side. After making the changes, click on the Ok button.
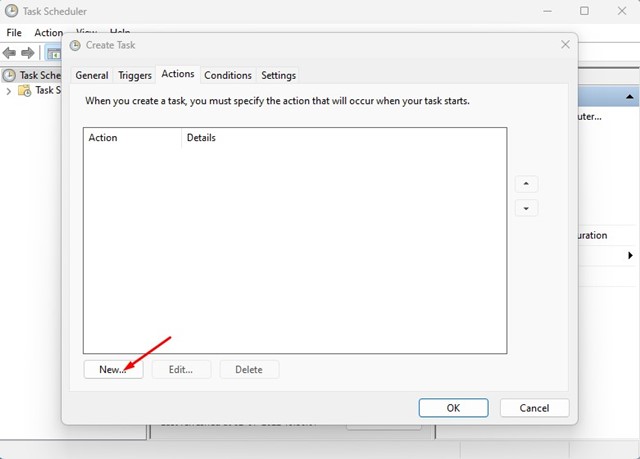
5. Switch to the Actions tab and click on New.
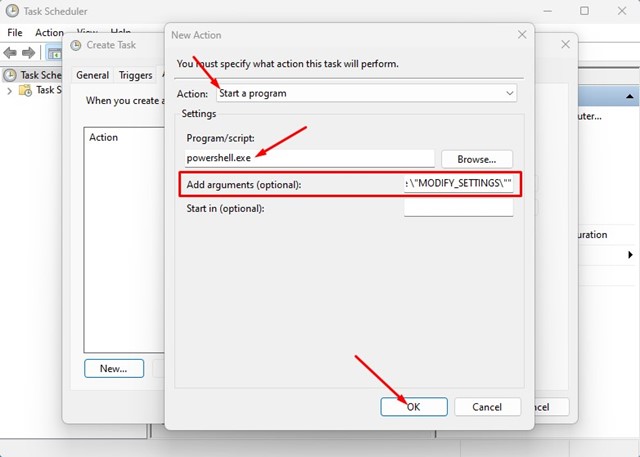
6. On the Actions drop-down, select the Start a program option. In the Program/script: field, type powershell.exe. Once done, type the following command in the ‘Add arguments (optional)’ field and click on the Ok button.
-ExecutionPolicy Bypass -Command "Checkpoint-Computer -Description \"My Daily Periodic Restore Point\" -RestorePointType \"MODIFY_SETTINGS\""
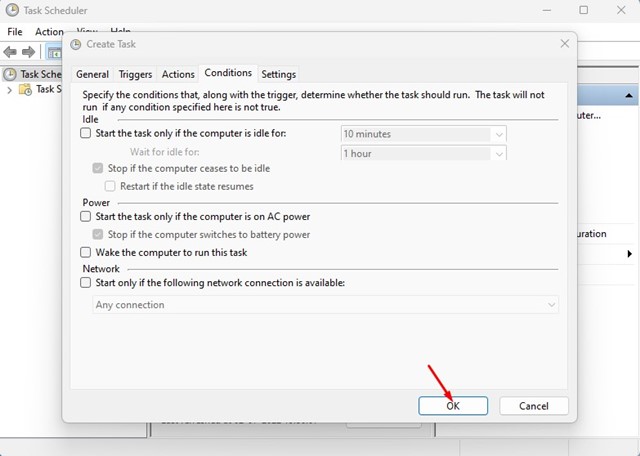
7. Now switch to the Condition tab and uncheck all options. Click Ok.
How to Delete the Task from the Task Scheduler?
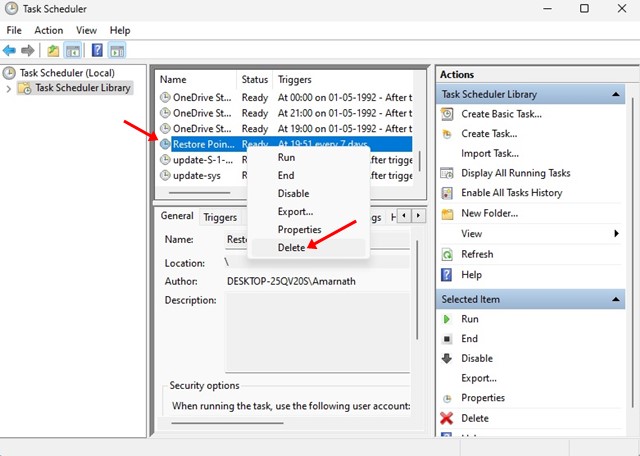
If you don’t want Windows 11 to create restore points on a schedule, you need to delete the task you have created via Task Scheduler. For that, open Task Scheduler and select the ‘Task Scheduler Library’. Next, find the task you have created, right-click on it, and select Delete.
Also Read: How to Check CPU Temperature in Windows 11
That’s all about how to schedule automatic restore points on Windows 11. The method is quite lengthy, so follow each step carefully. If you are stuck anywhere in the steps, let us know in the comments below.

