

Last Updated on October 13, 2026 by Larious
When Account Lockout policies are set on Windows 11, the operating system prevents others from entering the password after several wrong login attempts and blocks the user account for 10 minutes. After 10 minutes of lockout, the counter is automatically reset, giving users another 10 chances to enter the password or PIN. You can modify that 10-minute duration in easy steps.
Below, we have shared a step-by-step guide on changing account lockout duration in Windows 11. Let’s check it out.
Table of Contents
1. Change Account Lockout Duration via Local Group Policy
This method will show you how to change account lockout duration via Local Group Policy Editor.
1. Open the Group Policy Editor from Windows Search.
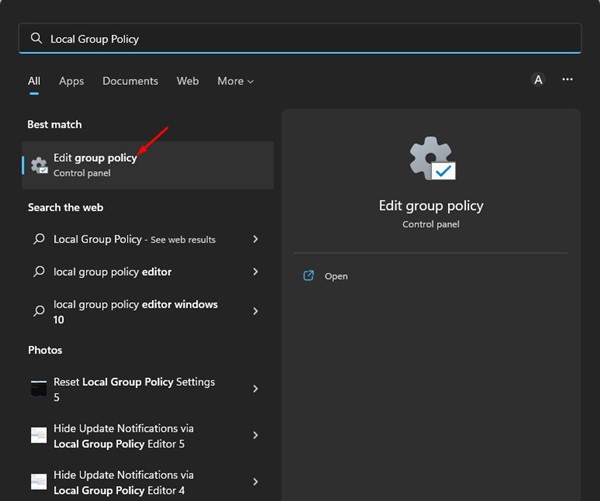
2. In the Local Group Policy Editor, navigate to the following path:
Computer Configuration > Windows Settings > Security Settings > Account Policies > Account Lockout Policy
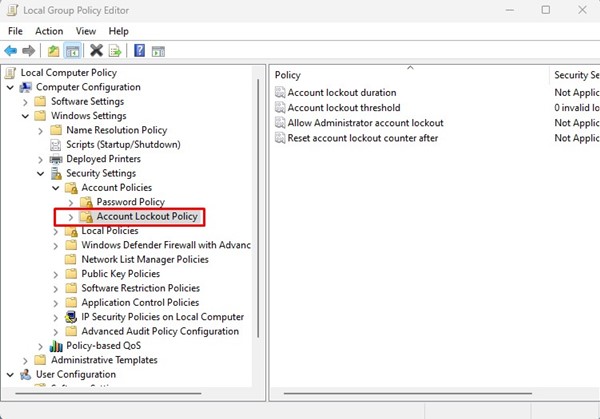
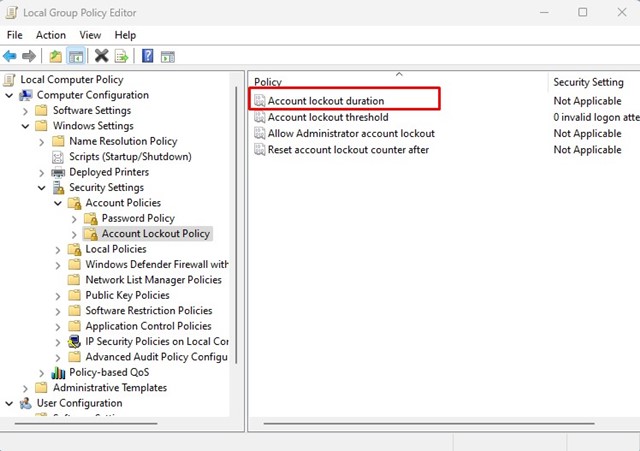
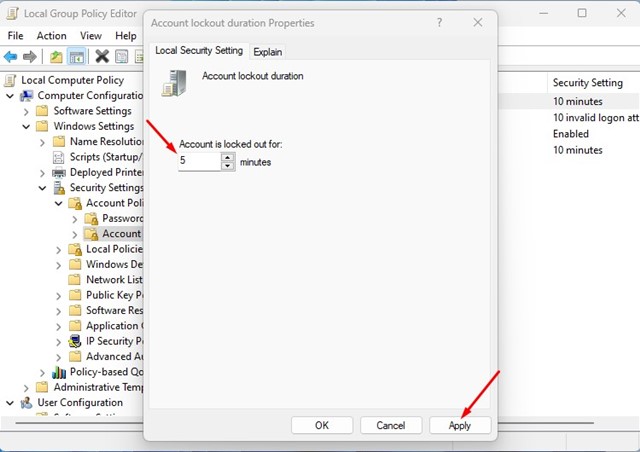
3. You will find a few policies in the Account Lockout Policy folder. You need to double-click the Account lockout duration policy on the right.
4. In the Account lockout duration properties, switch to the Local Security Settings tab.
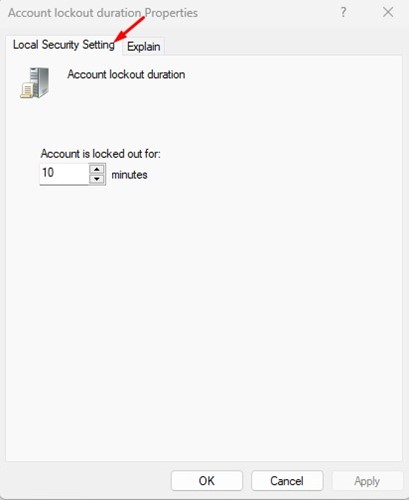
5. Set the time (in minutes) for the account lockout. Once done, click on the Apply button and then Ok.
2. Change the Account Lockout Duration via Command Prompt
You can even use the Command Prompt utility to change the account lockout duration.
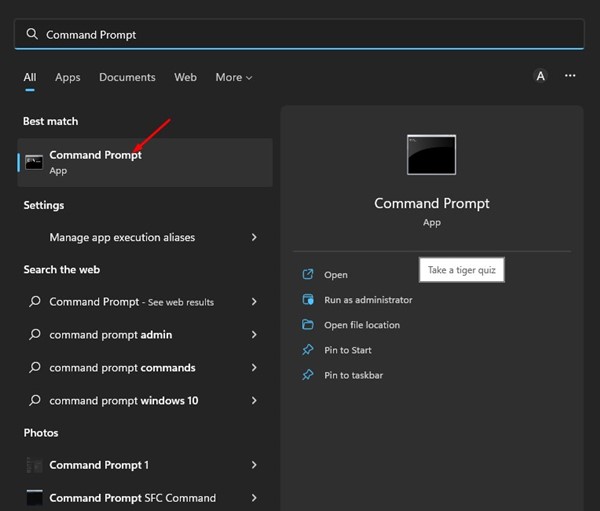
1. Click on the Windows 11 search and type in Command Prompt. Next, open the Command Prompt utility from the list of matching results.
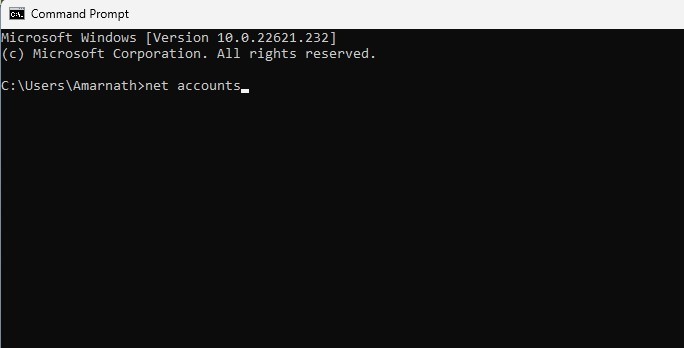
2. In Command Prompt, type in net accounts and press Enter.
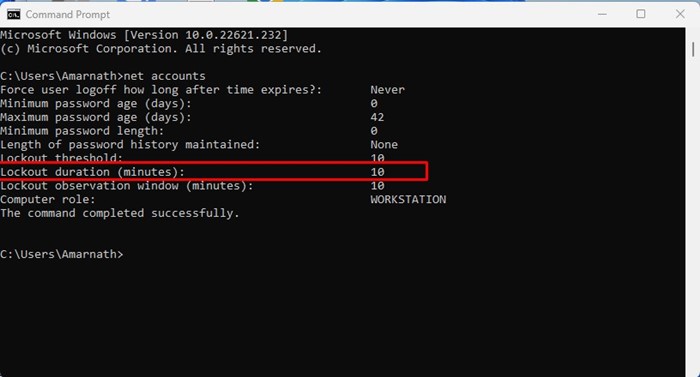
3. This will reveal the Account Lockout policy. You need to check the Lockout duration (minutes): to check the current account lockout time.
4. If you want to increase or decrease the Account Lockout duration, enter the following command:
net accounts /lockoutduration:<number>
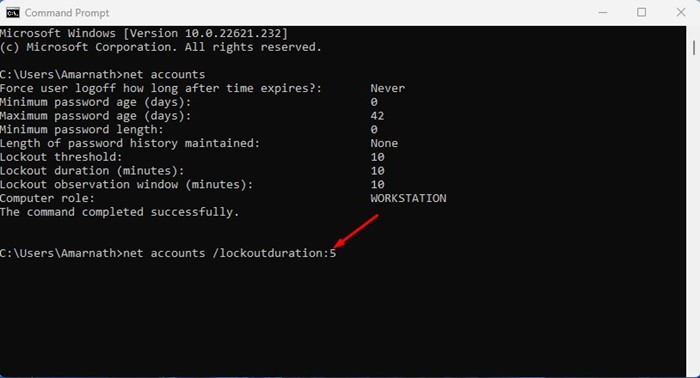
Important: Make sure to replace<number> with the time you want to set. You can set the time between 0 and 99999 minutes. Setting it to 0 will disable the account lockout.
Also Read: How to Format a Hard Drive or SSD in Windows 11
That’s all about changing the account lockout duration in Windows 11. You can follow these two methods to modify the time limit for account lockout. If you need more help with the Account lockout duration policy, let us know in the comments below.

