

Last Updated on October 8, 2026 by Larious
When you enable file name extensions in Windows 11, file types such as .jpg, .mp4, and .zip appear next to the file name. Knowing file extensions makes it easier to open files with the right app. Here are the best ways to show file extensions in Windows 11.
Table of Contents
1. Show File Extensions via File Explorer on Windows 11
You can change Windows 11’s File Explorer to show the file extensions.
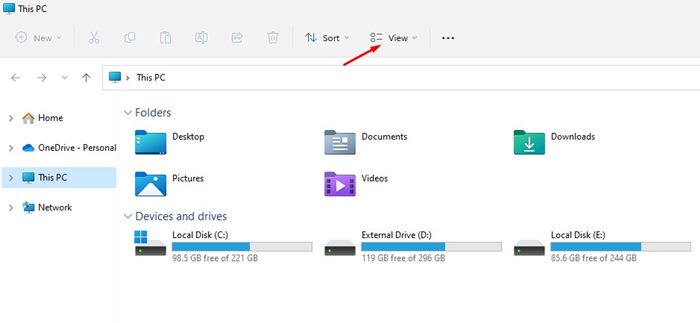
1. Open File Explorer and click on the View button.
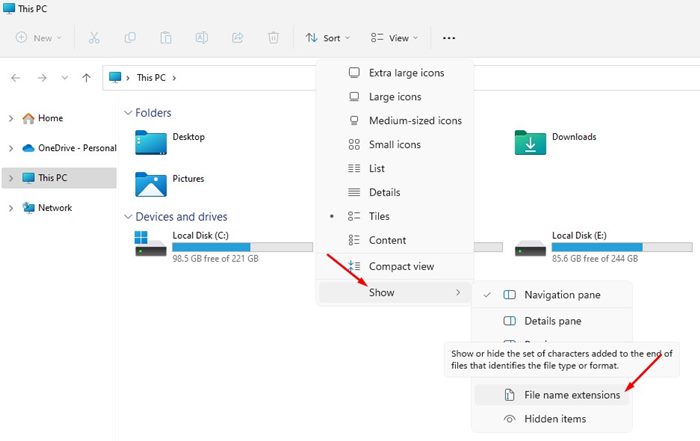
2. Select Show > File name extensions from the list of options.
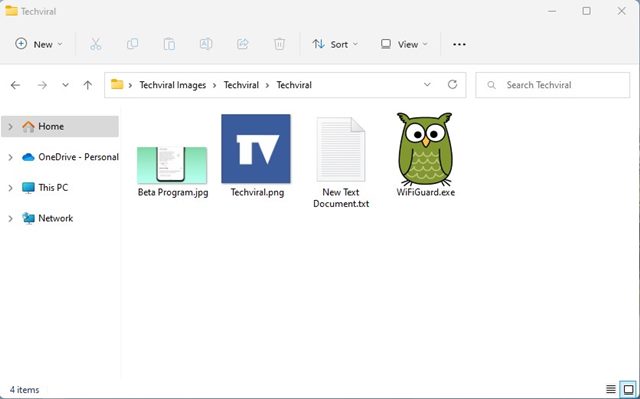
3. Open a folder containing different types of file types. You will see the file format just beside the file name.
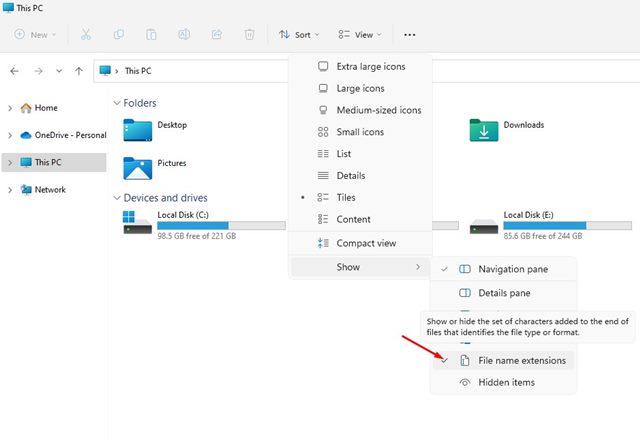
4. If you wish to hide the file name extensions, click on View > Show and uncheck File name extensions.
2. Show or Hide File Extensions via File Explorer Options
You can also make a few changes to the File Explorer options on Windows 11 to show or hide the File name extensions.
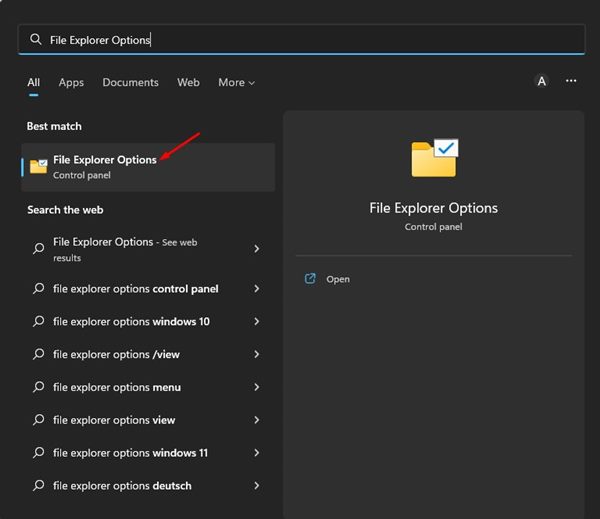
1. Click the Windows 11 search and type in File Explorer options. Next, open File Explorer Options from the list.
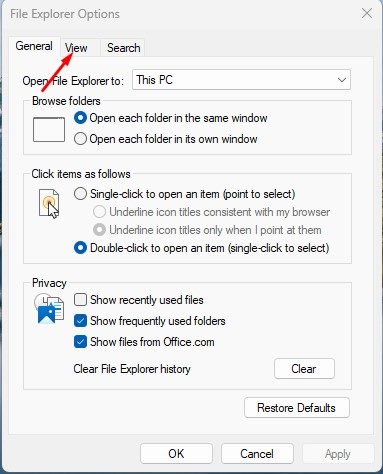
2. In File Explorer Options, switch to the View tab.
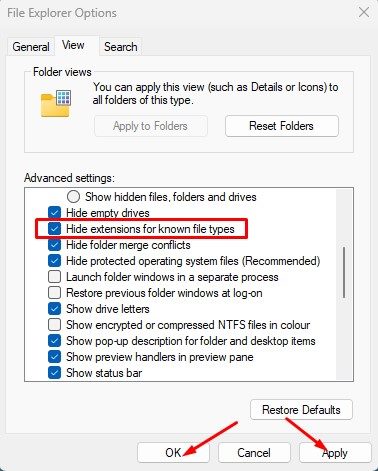
3. In Advanced Settings, scroll down and uncheck the Hide extensions for the known file types.

4. Once done, click on the Apply button, and then Ok.
5. To hide the file extension, open the File Explorer options again, switch to the View tab, and check the Hide extensions for known file types.
3. Show or Hide File Extensions via Windows Settings
This method will use the Settings app to show or hide the File Extensions.
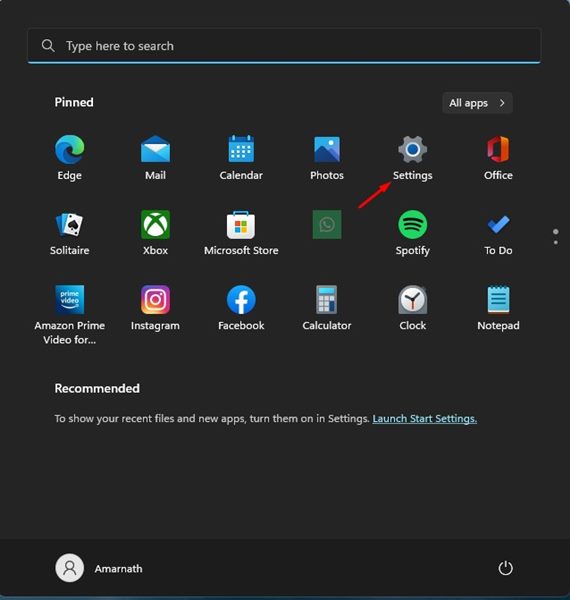
1. Click on the Windows 11 search and select Settings.
2. In the Settings app, switch to Privacy & security.
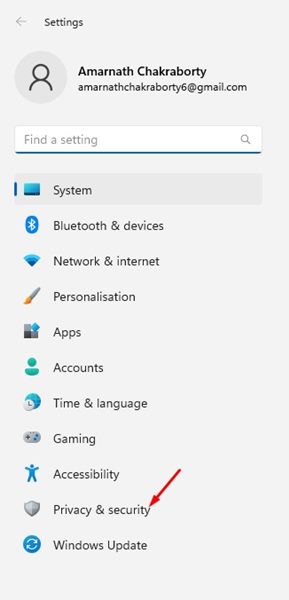
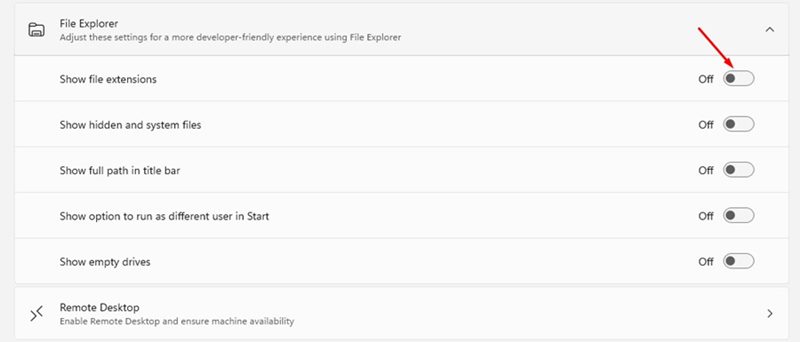
3. Click on For Developers.
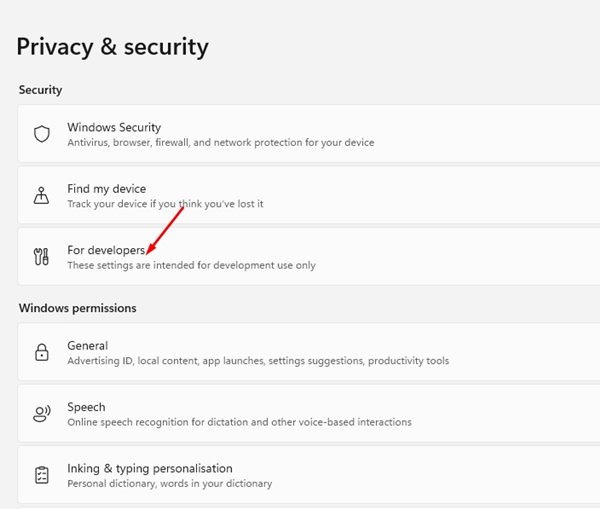
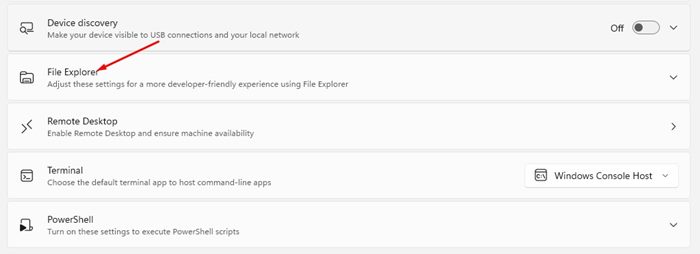
4. On the next page, expand File Explorer.
5. Enable the toggle for Show file extensions. This will show file extensions on your PC.
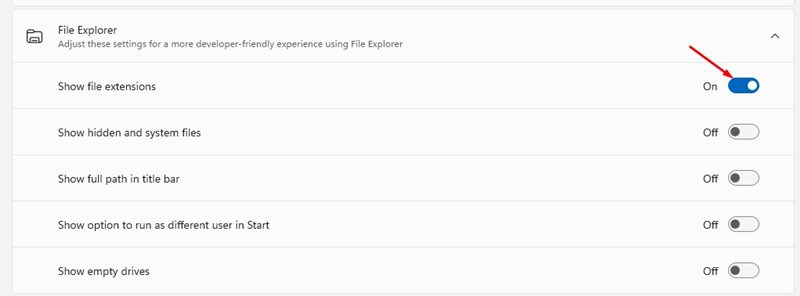
6. If you wish to disable the file name extensions, turn off the toggle for Show file extensions.
4. Show File Name extensions via Command Prompt
You can also use the Command Prompt utility to enable file name extensions.
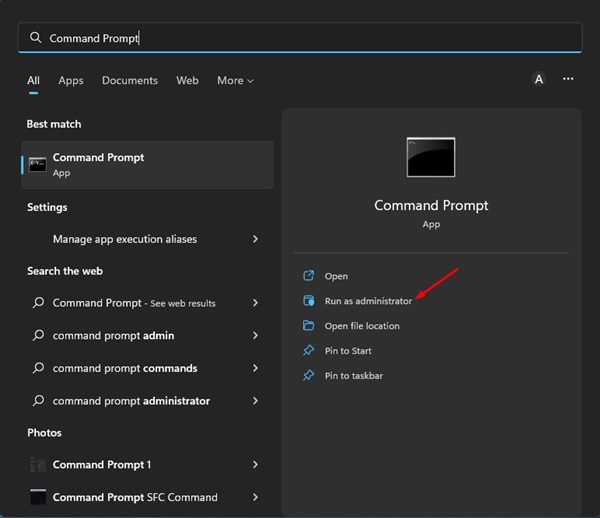
1. Click on the Windows 11 search and type in Command Prompt. Next, right-click on Command Prompt and select Run as administrator.
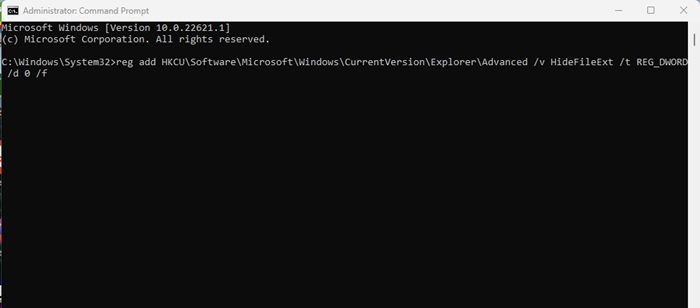
2. In Command Prompt, execute the command shared below:
reg add HKCU\Software\Microsoft\Windows\CurrentVersion\Explorer\Advanced /v HideFileExt /t REG_DWORD /d 0 /f
These are a few of the best ways to show file name extensions on Windows 11. Other than that, you can also show hidden files & folders on your Windows 11 computer. If you need more help showing file extensions in Windows 11, let us know in the comments.

