

Last Updated on November 5, 2026 by Larious
If your PC has less than 4GB of RAM, you might face lots of issues while using Windows 11. This is because the visual elements of Windows 11 take up a lot of RAM resources and slow down the device. So, if you are experiencing performance-related problems after installing Windows 11, you may want to disable the Visual effects.
Table of Contents
1. Disable Visual Effects via Advanced System Settings
In this method, we will use the Advanced System Settings to disable the visual effects on Windows 11.
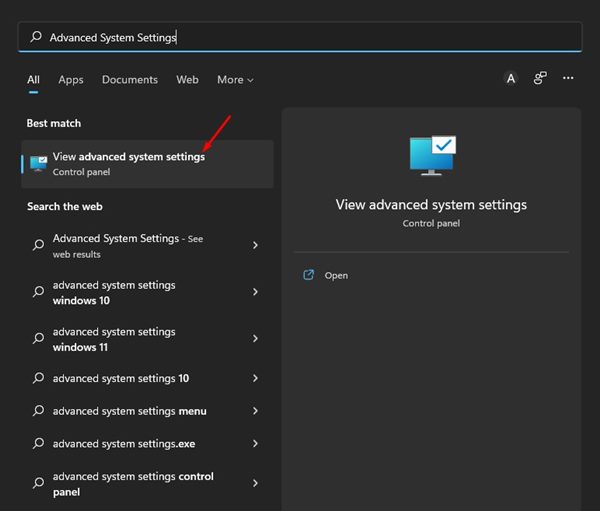
1. Click on the Windows 11 search and type in Advanced System Settings. Open the View Advanced System Settings option from the list.
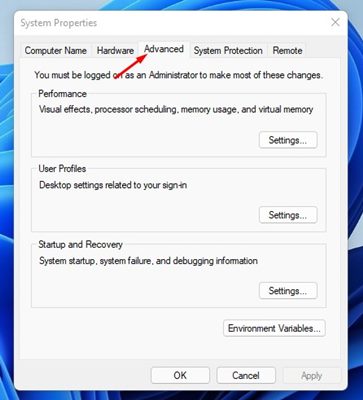
2. Switch to the Advanced tab.
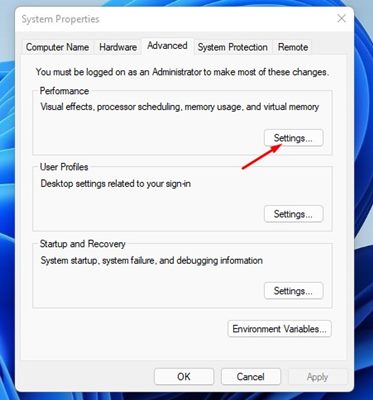
3. Click on the Settings button under Performance.
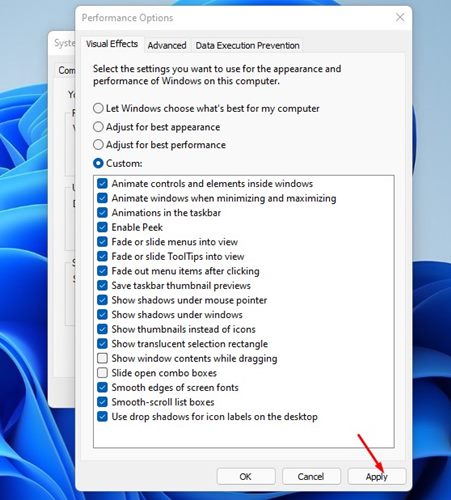
4. In the Performance option, you need to select the ‘Adjust for best performance’ option.
5. You can also manually check or uncheck the visual elements.
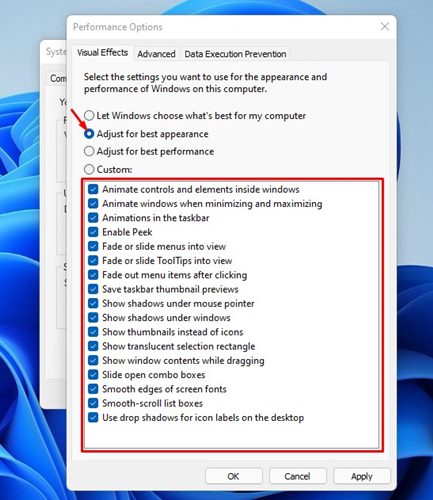
6. After making the changes, click on the Apply button, then click OK.
2. Disable Visual Effects via Windows 11 Settings
In this method, we will use the Windows 11 Settings app to disable the Visual effects.
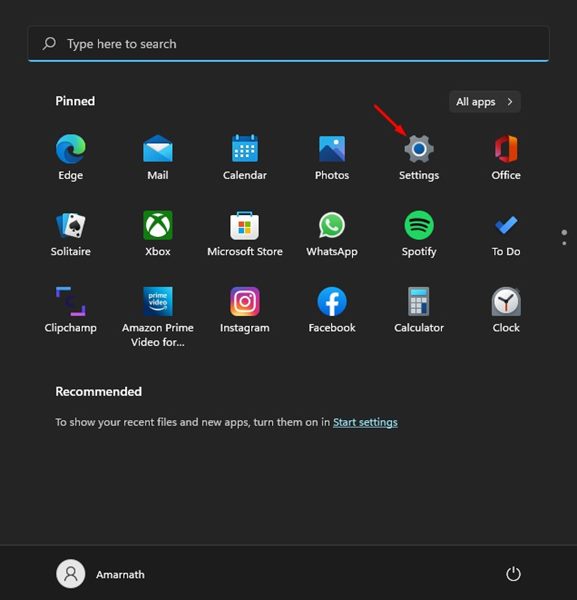
1. Click on the Windows 11 Start button and select Settings.
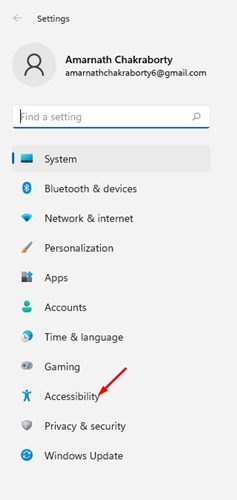
2. Click on the Accessibility option.
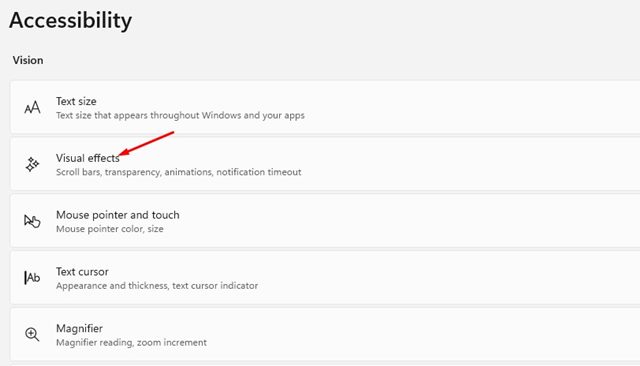
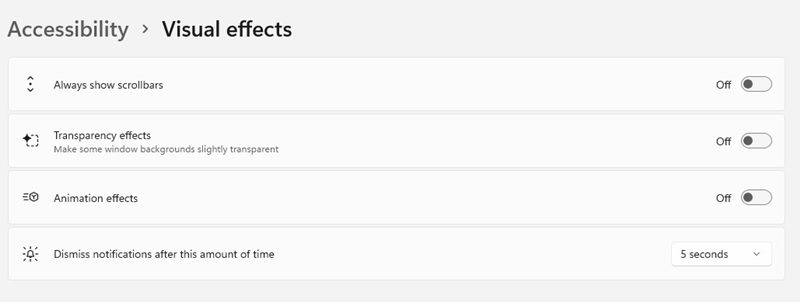
3. Scroll down and click on Visual effects.
4. To disable the visual effects, turn off the first four options: Always show scrollbars, Transparency effects, Animation effects, Dismiss notifications.
These are the best ways to disable the visual effects on Windows 11. If you have any doubts related to this, let us know in the comment box below.

